SIMPLE SUMMER PLUM CAKE

IMG_3213.jpeg

Today's recipe has quite a bit of significance to me. Back in 2011, when I was in college in Chicago and only occasionally baking cupcakes and cakes from a box mix, and absolutely nothing from scratch, I discovered food blogs. I believe this was the time when food blogs, and any type of blog for that matter, were beginning to gain traction and it felt as if there was a new blog popping up on the internet daily. One of those blogs was Smitten Kitchen - a blog that is run by Deb Perelman that I still love and utilize to this day.

IMG_3081.jpeg

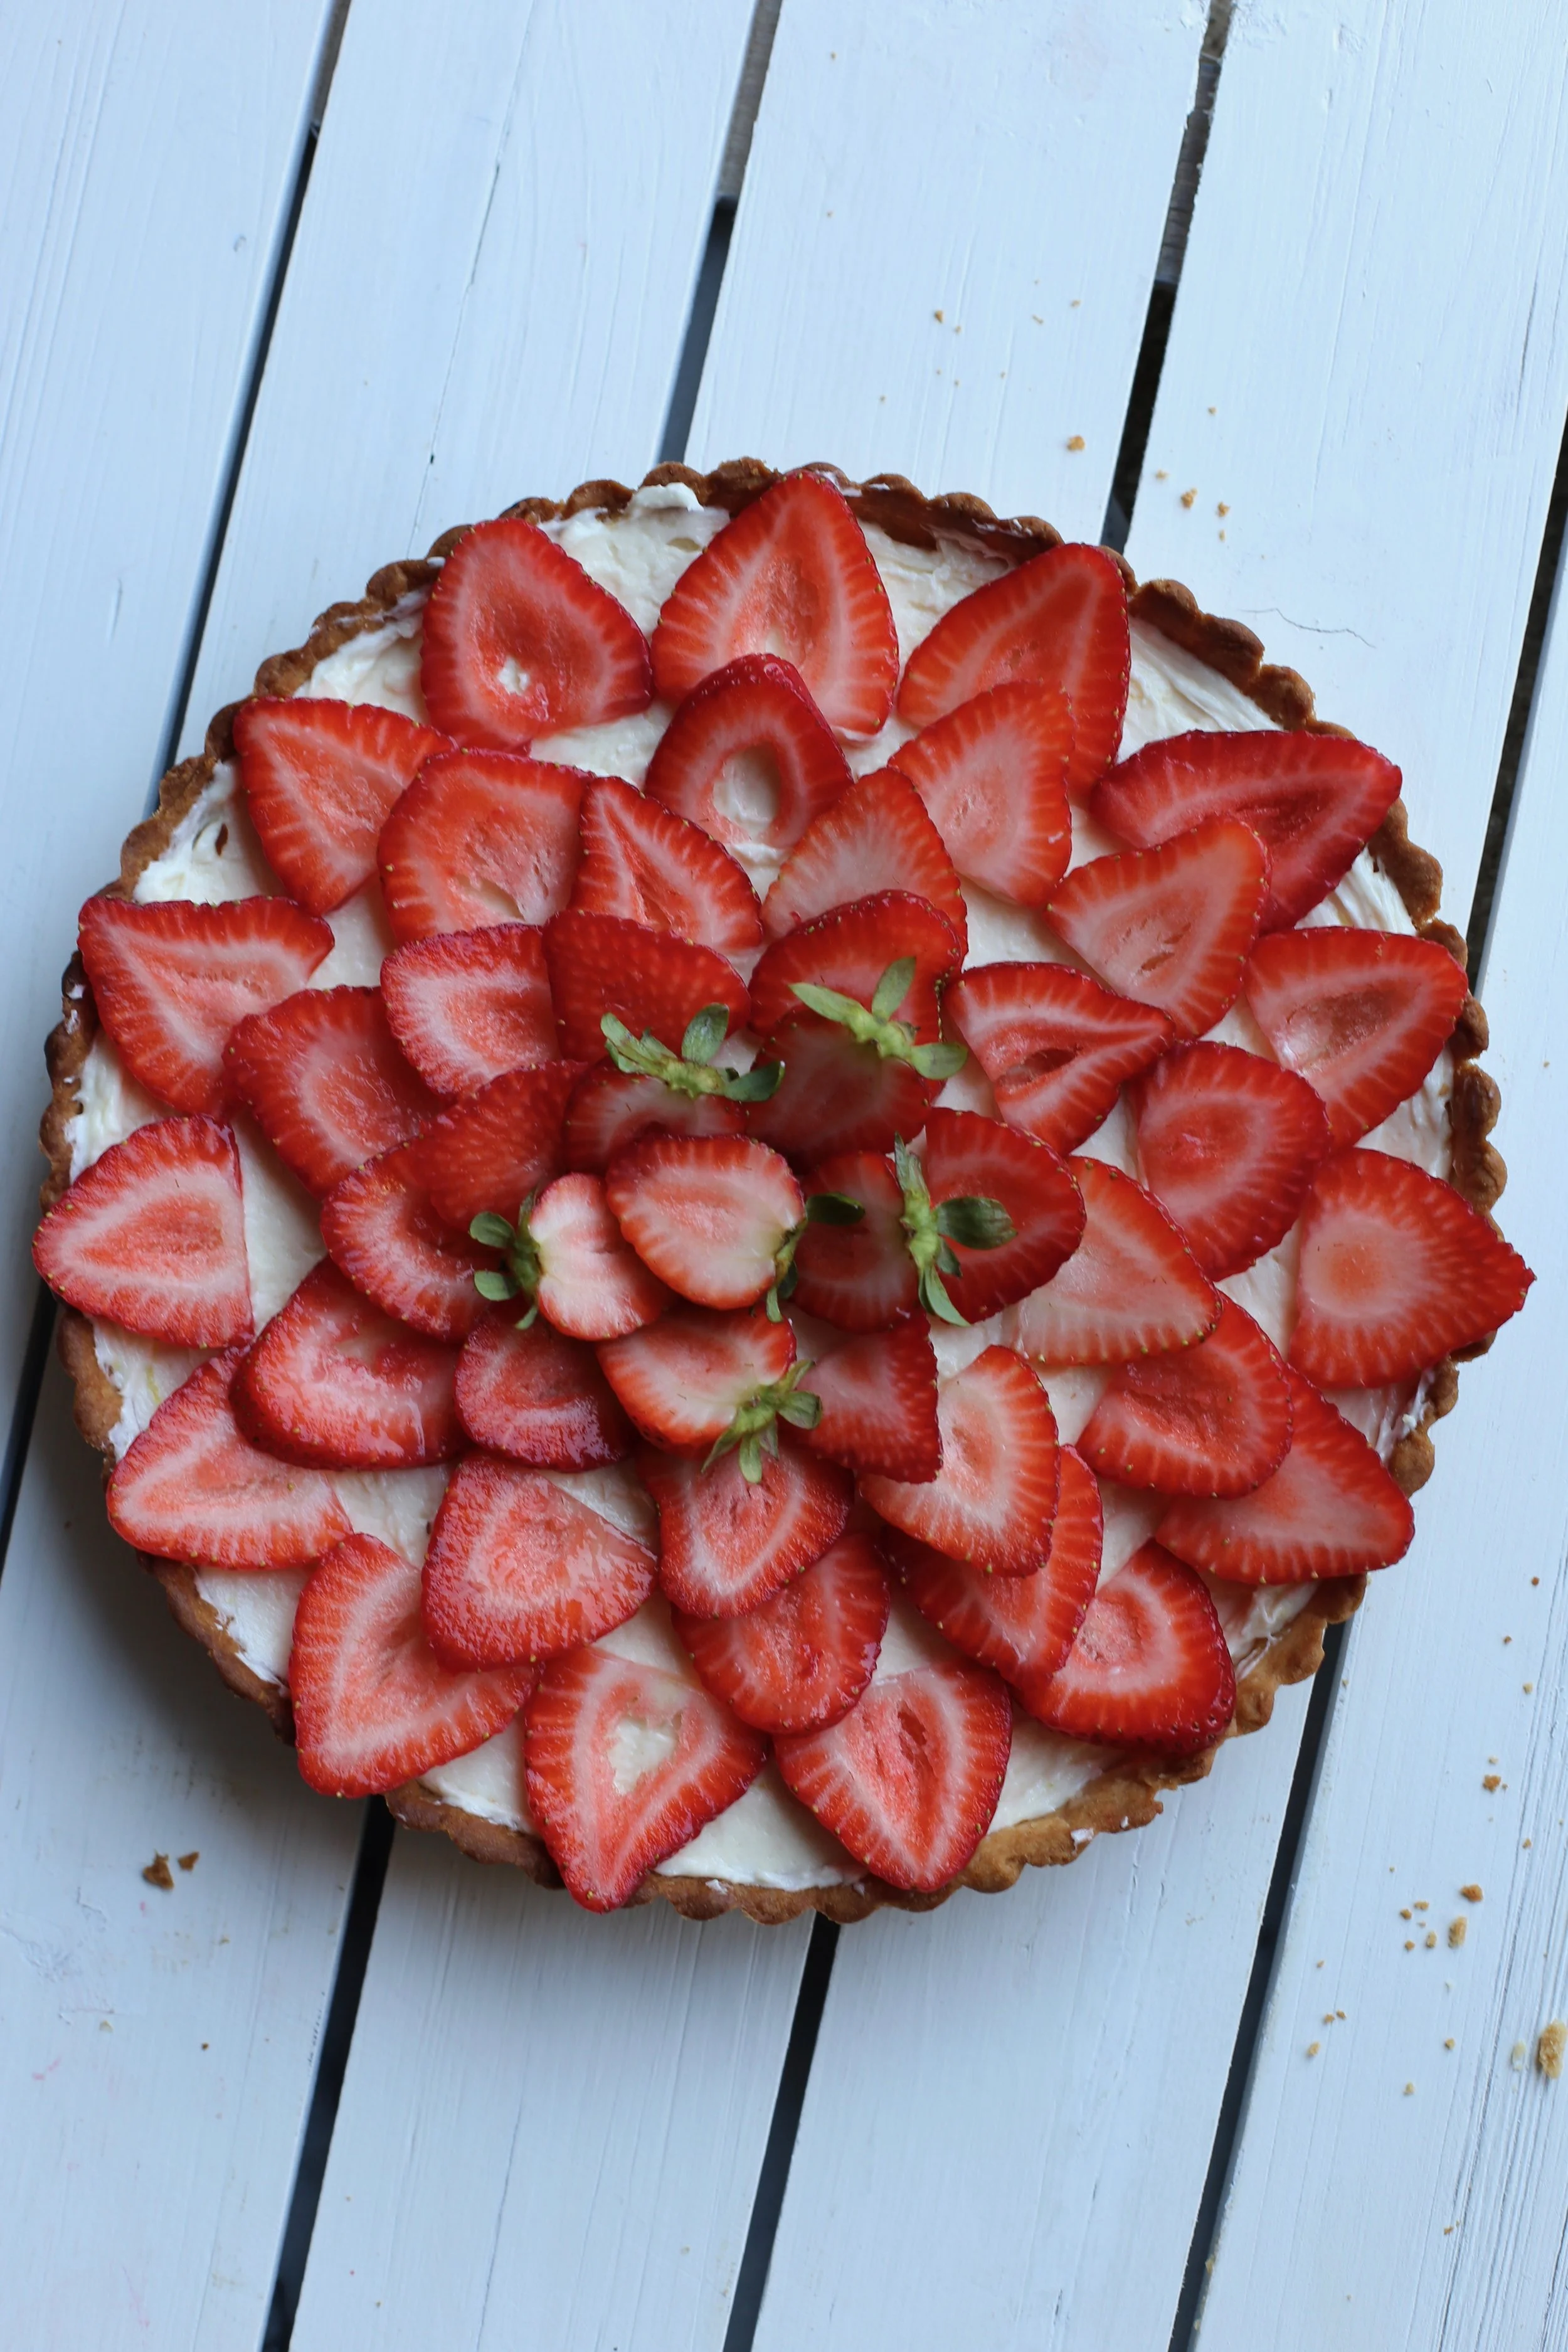
I randomly came across a recipe of Deb's, Strawberry Summer Cake, in the summer of 2011 when I was visiting Cleveland, Ohio and wanted to make something for the Fourth of July. The recipe looked innocent enough and I thought I'd give it a try, this being my first recipe baking from scratch without help from my mom, grandma, etc. Also, the house I was staying at had a beautiful, hunter green Kitchenaid stand mixer, and I was fortunately able to use it (this was also my first time using the machine). Needless to say, I made a bunch of mistakes while making the cake - I'm fairly certain I didn't use room temperature butter and got some eggshell in the batter that I had to fish out - BUT by some miracle, the cake ended up working out and tasted pretty good. 

Even though I didn't really get into baking until I moved back home to California a year later, I'll never forget that day in Cleveland and how it sparked something within me; I will always fondly think of that as my "first" baking experience.

IMG_3103.jpeg

7 years later, I like to think that a lot has changed when it comes to making a simple fruit cake, and more over, my skills in the kitchen. But for whatever reason, I never attempted to remake that strawberry cake until this past weekend when it somehow popped up on my radar again. But even though the cake calls for strawberries, I thought I'd take this recipe and use it as a base for something that I wanted to create. So, I went grocery shopping and looked for a fruit substitute that is in season right now - lo and behold, I landed on plums. 

Honestly, I can't tell you the last time I had eaten a red plum and I'm kind of kicking myself for not doing it sooner. I've always been more inclined to buying nectarines or peaches, but I gotta say that plums might be beating both of those right now. They are that good. And look at how beautiful they are! 

IMG_3119.jpeg

Luckily for me, the plums worked out perfectly with the cake. To put my own spin on it, I added some spices that I knew would work well with the fruit (AKA I googled what pairs well with plums). I added cinnamon, ginger, and a little bit of cardamom because it's what I had in my pantry and it turned out AMAZING. If ginger isn't your thing, you definitely can leave it out and just add more nutmeg or even add another spice in its place, like cardamom. 

I feel like this cake can easily pass as a breakfast dish; I would just maybe stay away from adding confectioners' sugar and whipped cream, and maybe topping it with greek yogurt instead with fresh plums. That sounds perfect to me!

IMG_3175.jpeg


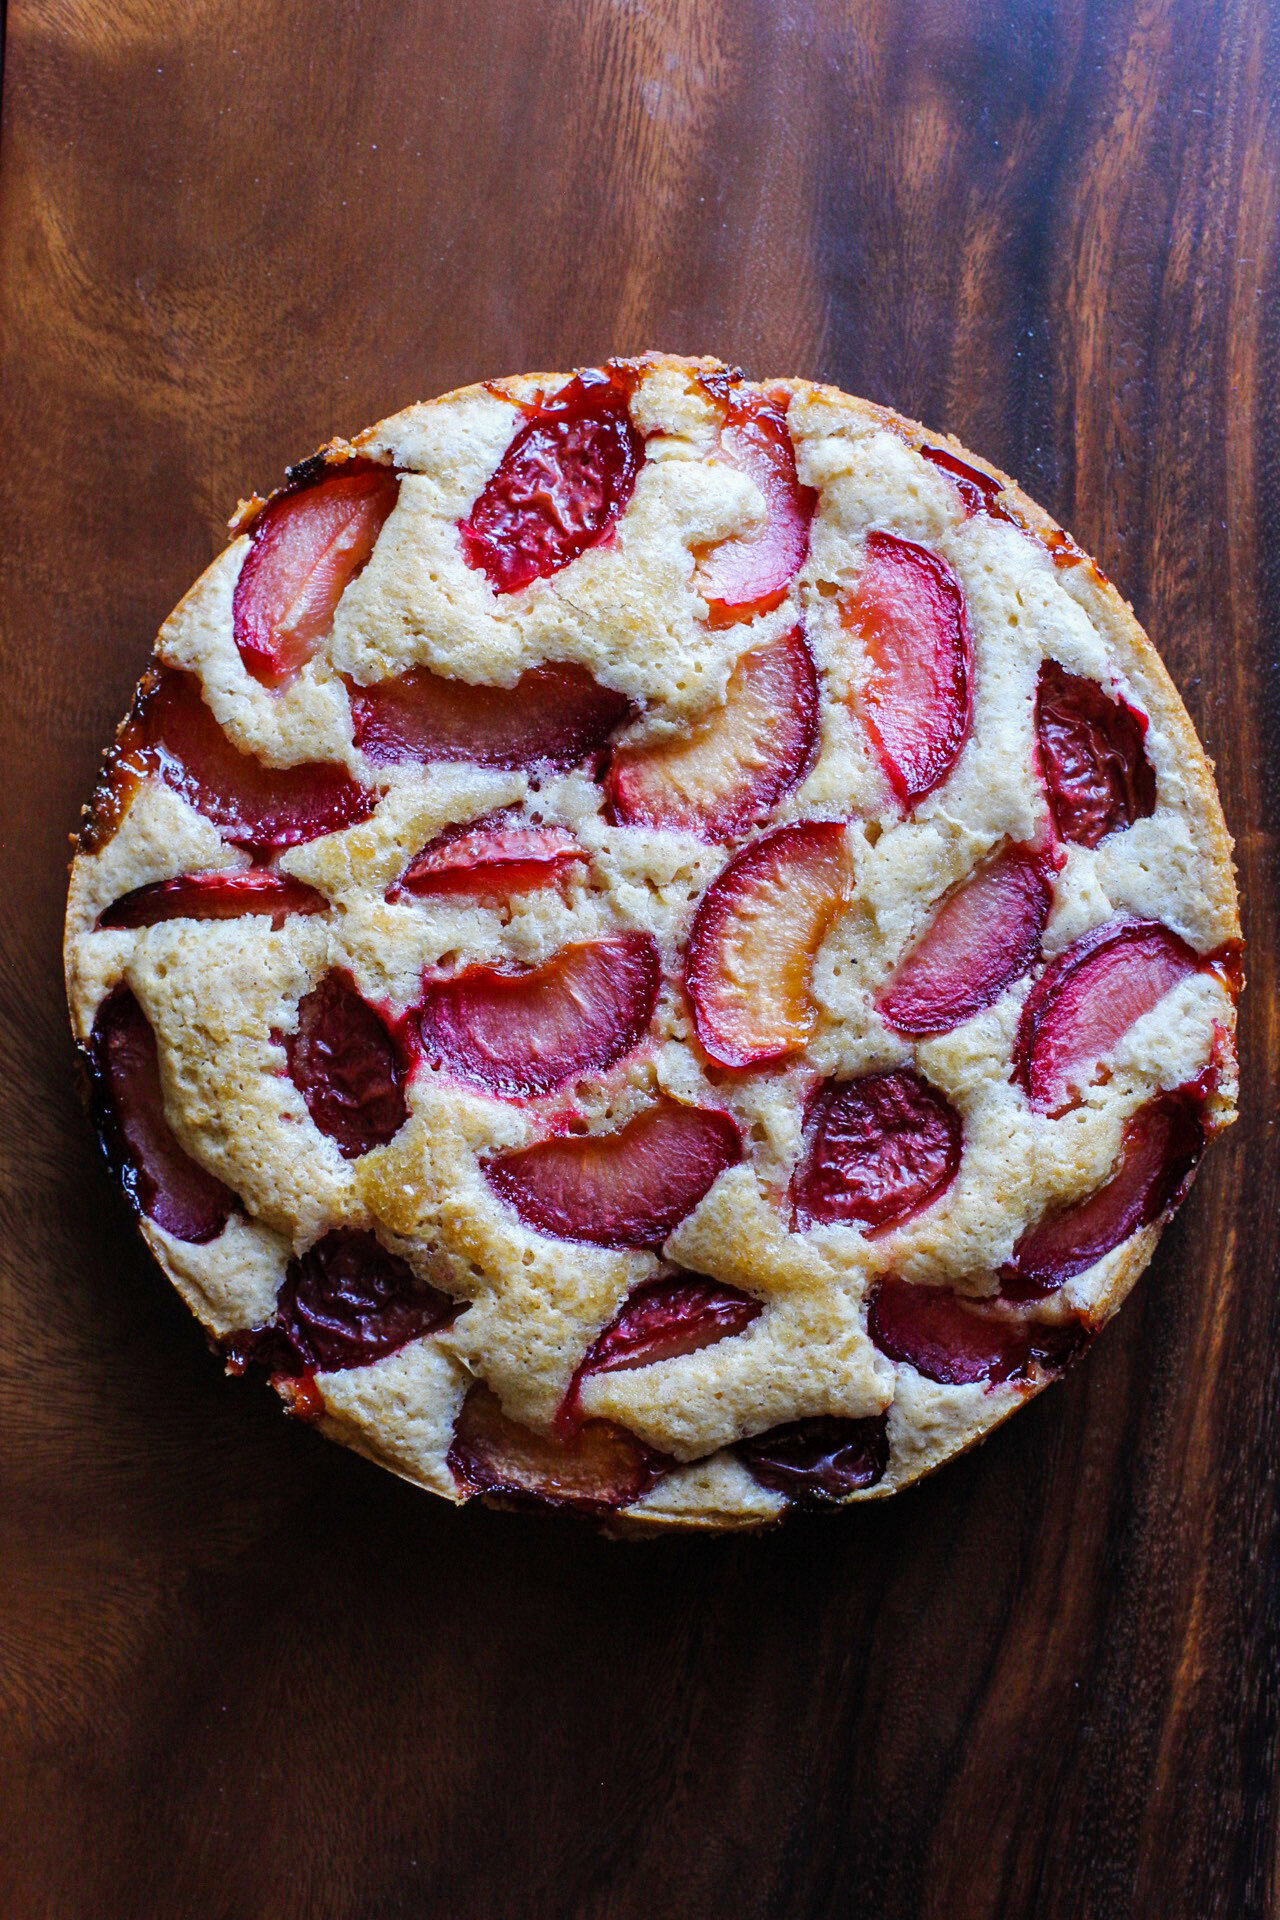
Simple Summer Plum Cake

Makes (1) 9" or 10" Cake

Recipe adapted from Smitten Kitchen

Ingredients

IMG_3193.jpeg
  • 6 tbsp. unsalted butter, room temperature, plus more for pan

  • 1 1/2 cups (188g) all-purpose flour

  • 1 1/2 tsp. baking powder

  • 1/2 tsp. salt

  • 1 tsp. ground cinnamon

  • 3/4 tsp. ground ginger

  • 1/4 tsp. ground cardamom

  • 1 cup granulated sugar

  • 1 large egg, room temperature

  • 1 tsp. vanilla extract

  • 1/2 cup milk (any kind will work, including non-dairy - I used unsweetened almond milk)

  • 1 pound plums (about 4) halved, pitted, and cut into about 8 wedges per plum

  • 2 tbsp. turbinado sugar

  • Confectioners' sugar, whipped cream, and/or thinly sliced fresh plums, to finish

Directions

  1. Preheat oven to 350°F. Generously butter a 9-inch or 10-inch springform pan (or pie pan).

  2. Whisk together the flour, baking powder, salt, cinnamon, ginger, and cardamom in a medium bowl and set aside.

  3. In the bowl of a stand mixer fitted with the paddle attachment (or in a large bowl if using a hand mixer) cream the butter and sugar together, on medium speed, until light and fluffy, about 3 minutes. Add the egg, vanilla extract, and milk and mix until incorporated. Scrape down the side of the bowl.

  4. With the stand mixer on low speed, gradually add the flour mixture until smooth. The batter will be quite thick.

  5. Evenly spread the batter into prepared pan. Arrange the plums in a single layer over the batter with the skin side up. Sprinkle the two tablespoons of turbinado sugar over the top.

  6. Bake in the oven for 10 minutes, then lower the temperature to 325 degrees F and bake for another 50-60 minutes until the cake is golden brown and a toothpick inserted in the middle of the cake comes out clean.

  7. If using a springform pan, allow the cake to cool 10-20 minutes before running a knife around the edge of the pan and carefully remove the top. Allow the cake to cool completely on a rack before adding your topping of choice (confectioners' sugar, whipped cream, and/or thinly sliced fresh plums).

THICK + CHEWY DARK CHOCOLATE CHUNK + PISTACHIO COOKIES

C85D42F5-B09F-455D-9AE1-097ECC9CBF67.jpeg

So far on The Vivid Kitchen I've shared two cookie recipes that are very near and dear to my heart: 1) the always popular and uniquely-flavored salted toffee and brown sugar cookies and 2) the classic winning combo of white chocolate and macadamia nut. Today, I am giving you a cookie that is a re-creation of one  that I had while on vacation.

Like I've said before, a couple of summers ago Alex and I traveled to Prague for the first time ever. Our hotel was smack-dab in the heart of the city center and although it was VERY touristy, we were beyond excited to be so close to everything. One day when we were walking back to our hotel, I noticed the most charming looking café, largely due to the desserts (including perfect chocolate chip cookies) that were on display in the window. Alex and I went in without hesitation and ordered half a dozen of the cookies to take back with us to the hotel. When we got back, we realized that we were actually given all different kinds of cookies: some with cranberries, some with walnuts... but our favorite pairing by far was one with chunks of chocolate and crunchy bits of beautiful, green pistachios. 

AB1ED001-091B-422D-98EA-E8EB75813275.jpeg

Up until that glorious moment in Prague, I had never had pistachios in my cookies and so it completely blew my mind. After that day, we went back to the same bakery a couple of times just in order to get more of those cookies before our vacation was sadly over. When we got back home a week or so later, I immediately set out to recreate the "Prague cookies" that Alex and I fell in love with. I needed to keep the consistency similar because that aspect was very important as to why we loved it, and therefore the cookies needed to be very thick and very chewy. In order to get that amazing chewy and dense texture, this recipe calls for melted butter instead of room temperature, as well as an extra egg yolk. As for the thickness of the cookie, this comes from chilling the dough; chilling the dough for at least an hour ensures that the cookies won't spread as much as not chilling the dough at all. Cookie science!

6D7FD43D-F607-4CD8-910A-47B53AB5E78C.jpeg

The one difference between my cookies and the Prague café cookies is the amount of chocolate and pistachios added to the dough. Unlike the Prague cookies, where it was more dough-centric with sporadic bites of chocolate chips or pistachios, my cookies are filled to the brim with both. If I'm giving you a chocolate chunk and pistachio cookie, then by all means, that is exactly what you'll be getting in every single bite! 

When making chocolate chip cookies at home, I actually don't use chocolate chips but instead get the HUGE dark chocolate bars from Trader Joe's. This chocolate bar, weighing in roughly over a pound, is a staple in my refrigerator, and when I'm not breaking off pieces of it for dessert, I am saving it for cookies and other baked goods. I like using chocolate bars for the chocolate component in cookies because I get to chop it up into all different shapes and sizes, which leads to some interesting (re: delicious) pools of chocolate in the cookies. If you're forever a true fan of chocolate chips, then of course feel free to substitute for them here. But please make sure they are dark chocolate chips, or bittersweet! 

FD48980E-9BAF-463D-A66D-A6D913D56ABA.jpeg

Thick and Chewy Dark Chocolate Chunk and Pistachio Cookies

Makes about 25-30 cookies

Recipe adapted from Cook's Illustrated

F4BDDCF0-885A-49F4-B616-8C18F44F497D.jpeg

Ingredients

  • 2 cups plus 2 tbsp. all-purpose flour

  • 1/2 tsp. baking soda

  • 1/2 tsp. salt

  • 3/4 cup (12 tbsp., 6oz.) unsalted butter, melted and cooled slightly

  • 1 cup light or dark brown sugar, packed

  • 1/2 cup granulated sugar

  • 1 large egg

  • 1 large egg yolk

  • 2 tsp. vanilla extract

  • 3/4 cup unsalted pistachios, toasted and roughly chopped

  • 1 cup (about 8oz.) dark chocolate chunks

  • Flaky sea salt, to finish (optional)

Directions

  1. In a medium bowl, sift together the flour, baking soda, and salt. Set aside.

  2. In the bowl of a stand mixer fitted with the paddle attachment, or in a bowl large enough for a hand mixer, mix the melted butter, brown sugar, and granulated sugar for about 2 minutes.

  3. Add in the egg, egg yolk, and vanilla extract. Mix until incorporated. Scrape down the sides of the bowl.

  4. All at once, add in the flour mixture and carefully mix on low speed for about 10 seconds before turning the speed up to medium until everything is combined. Do not over mix. Using a spatula, fold in the chocolate chunks and pistachios. Cover bowl with plastic wrap and refrigerate for at least 1 hour.

  5. Preheat the oven to 325°F. Line a baking tray with parchment paper, and using a spoon or a cookie scoop, scoop out 1-2 tablespoons of dough for each cookie. Bake for 10-12 minutes. Finish cookies with a sprinkle of flaky sea salt if desired. Allow the cookies to sit on the tray for a couple of minutes before transferring to a cooling rack. Enjoy!


FRUIT TART W/ MASCARPONE CREAM FILLING

IMG_4703.jpg

Last week, we celebrated the birthday of my forever best friend, ultimate confidante, and #1 person I go to when I need advice or an opinion on just about anything: my mom, Tania. Since my mom lives about 10 minutes away from me, I see her just about every other day and I honestly wouldn't have it any other way. Although some might think that would be an annoyance having their mom be so close in proximity, I actually love it. Even though my mom and I look nothing alike, we are pretty much identical when it comes to our personality and interests, and she almost always knows exactly what I'm thinking and feeling. To put it simply: no one understands me more than my mom, and I don't know what I'd do without her. 

IMG_4589.jpg

Alex and I decided to gift my mom this year by taking her to our favorite summer activity in Los Angeles: seeing a screening at the Hollywood Forever Cemetery via Cinespia. Alex and I are OBSESSED with going to Cinespia screenings and have been going at least twice every summer for years. Some of our favorite screenings over the years include: Purple Rain (which they played right after Prince passed away), The Fifth Element, Scream, and the original Psycho. The movie that we took my mom to see this past weekend was the classic film, The Graduate, which was amazing to see on the big screen. The night was perfect with great weather, prime seats, and the most delicious food spread for our picnic before the film started.

Every year, I always bake up a birthday treat for my mom, and this year she requested a simple yet very delicious fruit tart. Funny enough, I had actually never made a fruit tart before and so I set out to make the ultimate version of one. I made the crust of the tart a pâte sablée, or a French shortcrust. The difference between pâte sablée and a pâte brisee, which I made for my blueberry galette in a different post, is that pâte sablée is sweetened with more sugar and uses room temperature butter; the process of making the dough is pretty akin to making cookie dough. The end result of this particular pastry dough is not flaky like pâte brisée, but actually more crisp and sandy-like. Therefore, pâte sablée is the perfect base for a fruit tart.

IMG_4608.jpg

Now let's talk about the filling: a creamy mascarpone filling that is just slightly sweetened, with a hint of lemon and vanilla. It pairs perfectly with the sweet pastry dough and will not make you feel too full after having a slice or two. A very important note for when making the filling is that the mascarpone and heavy cream NEED to be at room temperature, or else the mascarpone may curdle. I would suggest taking these ingredients out of the fridge at least an hour before working with them. 

IMG_4637.jpg

Because we are filling the dough with a mascarpone filling that does not require any baking in the oven, the dough must be blind-baked. This requires rolling the dough out into a 9-inch tart pan with a removable bottom, covering it in foil, and filling the pan with either pie weights, rice, or dried beans. I recently bought these pie weights and they worked perfectly. 

One last thing: feel free to use any fruit of your choosing for the topping! Strawberries, kiwi, peaches, bananas... anything that looks good and is in season at your local grocery store! I was going to use the sunshine raspberries pictured above, but the strawberry design I made was just too beautiful to change. 

IMG_4680.jpg

Fruit Tart w/ Mascarpone Cream Filling

Yields (1) 9-inch Tart

Pate sablée recipe adapted from The Kitchn / Mascarpone filling recipe adapted from Sally's Baking Addiction

Ingredients

For the pâte sablée:

IMG_4657.jpg
  • 1/2 cup (1 stick/8 tbsp.) unsalted butter, room temperature

  • 1/3 cup powdered sugar

  • 1 large egg yolk

  • 1/2 tsp. salt

  • 1 1/4 cups all-purpose flour

For the mascarpone filling:

  • 8 oz. mascarpone, room temperature

  • 1/2 cup heavy cream, room temperature

  • 1/4 cup confectioners' sugar

  • 1 1/2 tsp. vanilla extract

  • Zest of 1 medium lemon

  • 2 tbsp. lemon juice

To finish:

  • Assorted fruit

  • Confectioners' sugar

Directions

Make the crust:

  1. In the bowl of a standmixer fitted with the paddle attachment, or, in a large bowl if using a hand-mixer, cream the butter and sugar together on medium speed until creamy. Add in the egg yolk and mix until fully combined.

  2. In a separate smaller bowl, whisk the flour and salt together. Add this to the butter/sugar mixture on low speed, and mix until the flour is no longer visible. Do not overmix. The dough should be similar to a cookie dough.

  3. Transfer the dough onto a sheet of plastic wrap and shape it into a round disk. Wrap the dough up tightly and refrigerate for at least 1 hour, or up to 2 days.

  4. When you're ready to roll the dough out, allow the dough to sit out at room temperature until it's more malleable.

  5. Place the dough in between two pieces of wax or parchment paper and roll it out to an 11-inch circle. Be careful to not make the edges too thin.

  6. Take off the top layer of wax paper, and carefully invert the dough onto your 9-inch tart pan. This dough is very forgiving, so if any areas break off in this process, simply just patch and press the dough together - no one will ever know. Trim off any extra dough that is hanging over the sides.

  7. Cover in plastic wrap and place the tart pan in the refrigerator for 30 minutes.

  8. Preheat the oven to 375°F.

  9. Line the tart pan (including the edges) with foil, and fill the pan with pie weights, dried beans, or uncooked rice. Bake in the oven for about 15-20 minutes. Take the tart out of the oven and remove the pie weights and foil. Place the tart pan back into the oven for another 3-5 minutes until golden brown. Times may vary depending on your oven, so I would check the tart both when covered in foil as well as after, because you do not want to burn the crust.

  10. Let the tart cool completely before adding the mascarpone filling.

Make the filling:

  1. In the bowl of a stand mixer fitted with the paddle attachment, or in a large bowl if using a hand-mixer, add the mascarpone and mix for about a minute on medium-high speed. With the mixer on low, slowly add the heavy cream to the bowl. Do not add the cream all at once or it may curdle the mascarpone. Scrape down the sides of the bowl.

  2. Add the sugar, vanilla extract, lemon zest and juice, and beat on medium-high speed until the mixture is fluffy and light, about a minute.

  3. Evenly spread the filling into the cooled crust and top with your fruit toppings of choice. Dust with confectioners' sugar if desired. Store in the refrigerator (this makes it easiest to cut the tart).