PEACH + BLACKBERRY PIE BARS

IMG_3731.jpg

Hi. It’s me. The food blogger who has been posting recipes for about a year and a half now and who still hasn’t shared ONE traditional pie recipe yet! I believe I’ve mentioned it before in a previous post, but pies aren’t my strong suit and if someone asked me to make them a pie, I would most likely have a panic attack and then pick one up from Marie Callendars and said I baked it.

When I tell other bakers that I’m nervous of making pies, they’re usually understanding… if you didn’t grow up baking them or at least practice the process over the years, pies can definitely be daunting. There’s the stress of making the dough, from having to worry about your warm hands melting the butter to allowing the dough to chill in the fridge. You have to be proactive when it comes to avoiding a “soggy bottom”, which means figuring out if you need to parbake the crust or not. And then (what I fear the most) is making your pie look beautiful whether it’s with a perfect lattice crust or the cutesy little dough flower or leaf cut-outs that you see bakers doing on Pinterest and Instagram. I am not an arts and crafts kind of person (I can barely cut in a straight line) and therefore the thought of decorating a pie is just not fun to think about. I’m not saying pie is the hardest thing to make! I’m just saying that there is a lot to consider when attempting to bake one.

public.jpeg

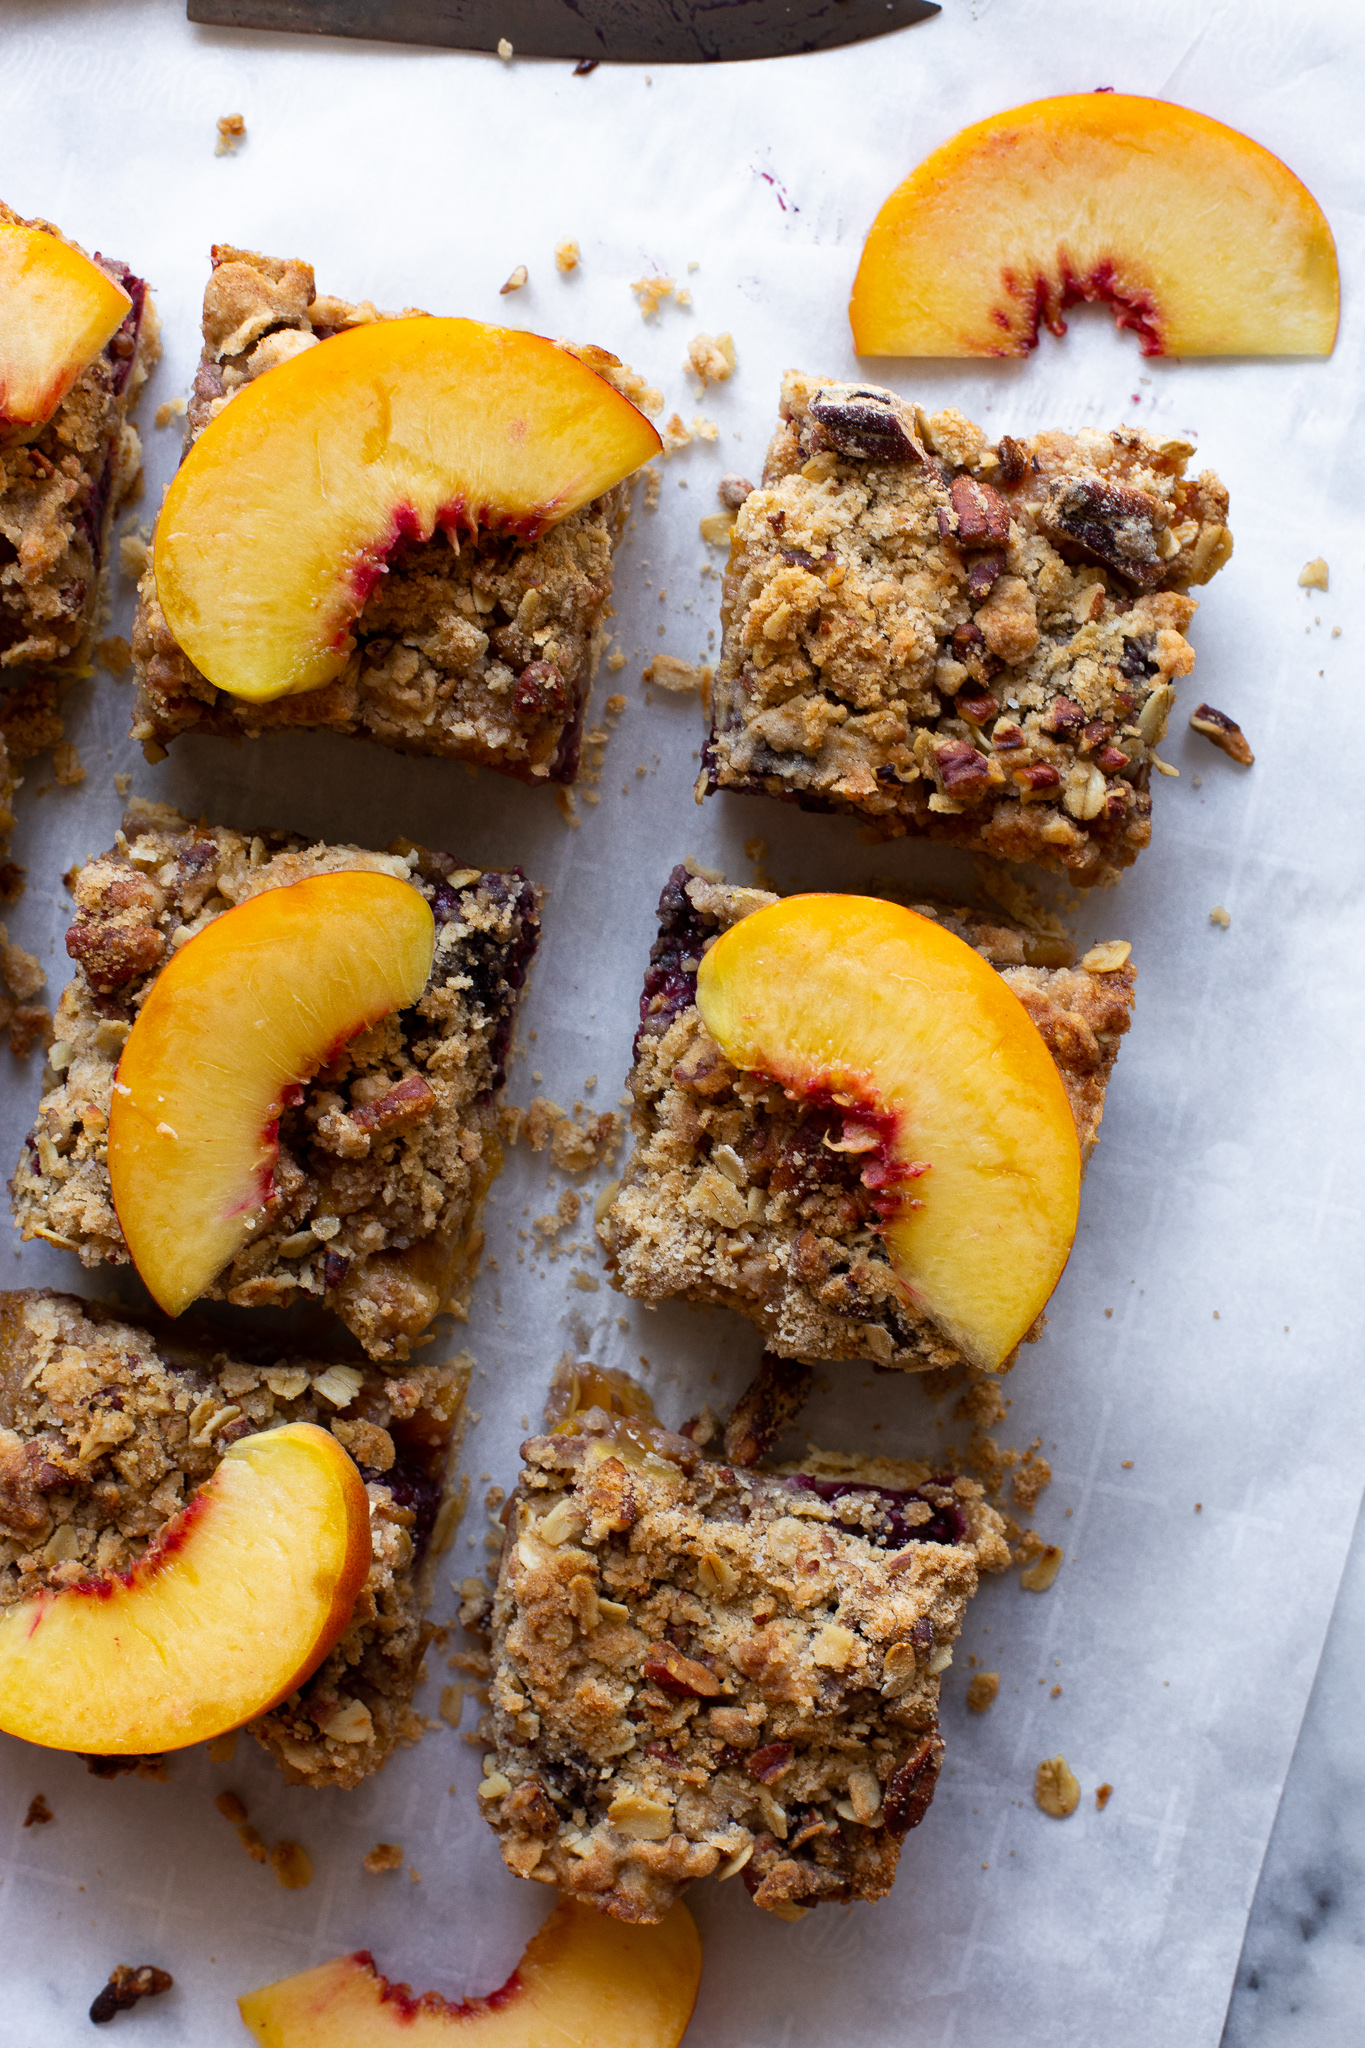
So, this is why I LOVE making galettes, tarts, and today’s recipe: pie bars. These three categories of desserts are all super forgiving in almost every step along the way and just seem to be much less fussy than when tackling a pie. Since I’ve given you a recipe for a galette and a tart, it’s time to work with the very straightforward and simple recipe of pie bars. Pie bars take everything you would normally find in a pie - a crust, a filling of your choice, and a topping in the form of a crisp or streusel. No difficult lattice work to be found here!

And mark my words, I promise that I will do an apple pie recipe around Thanksgiving time. Apple pie à la mode is up there when it comes to my favorite desserts, so I will definitely work on perfecting a recipe to share with you all.

public.jpeg

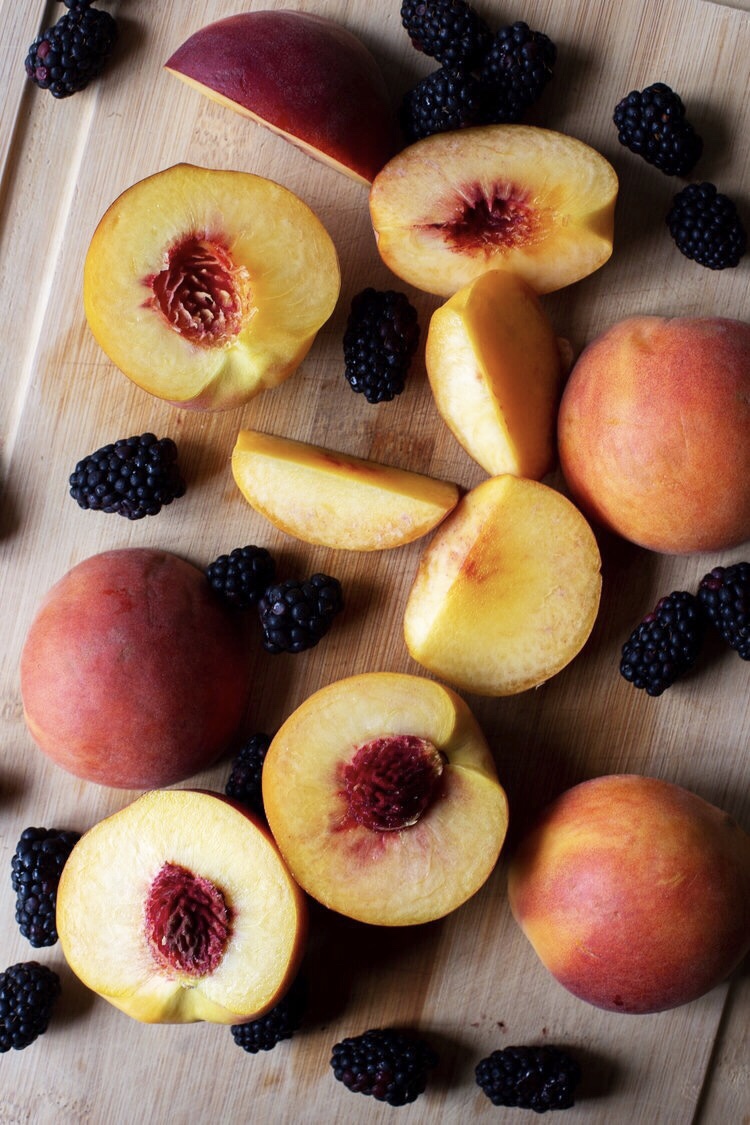
Since we’re in the midst of stone fruit and berry season, I thought we’d take a fruit from each category and marry them together for these pie bars. I choice to work with yellow peaches and blackberries, but feel free to switch it up to your liking and substitute the stone fruit with apricots, nectarines, plums or pluots, and the berry component with raspberries or blueberries.

Sidenote: I visited the Laguna Beach Farmers Market this past weekend and tried the most amazing stone fruit I’ve come across yet: cherums! It’s a hybrid of cherries and plums and they’re so crunchy and flavorful, and they were the perfect dessert for our beach picnic later that day. Try to get a hold of them at your local farmers market! Picture of them above (along with the pluots that I also bought).

IMG_3707.jpg

The crust for these pie bars isn’t exactly a typical pie crust recipe, but actually the shortbread crust that I used for my lemon bars. This crust is made with three ingredients (flour, powdered sugar, and melted butter) and comes together in less than 5 minutes. There’s no chilling, no rolling out; all you need is to mix the ingredients together and then press it into the bottom of the baking dish with your hands or a spatula.

As for the filling, you can play around a bit with a couple of things: 1) how much sugar you’ll be adding and 2) what kind of spices you wish to use. If your fruit isn’t exactly at the peak of ripeness, I would suggest adding an additional tablespoon or so of sugar to what I have suggested below in the directions, and if your fruit is perfectly sweet, follow the recipe as written. For the added spices, I stuck to those that are most commonly found in pies, but you can use your favorites whether than means adding only cinnamon, a combo of nutmeg and ginger, or a little bit of each.

Lastly, for the topping, we’ll be using a crisp mixture, which basically means a streusel topping but with old fashioned/rolled oats added. I kept it simple and added only a bit of cinnamon to my mixture but once again, you can add more spices to your liking, but I’d recommend sticking to adding no more than 1 teaspoon of spices combined. I also added chopped pecans for extra crunch and flavor, but adding nuts is totally optional.

public.jpeg

Peach and Blackberry Pie Bars

Makes about 9-12 bars, depending on size

Ingredients

For the crust:

public.jpeg
  • 1 cup all-purpose flour

  • 1/4 cup confectioners’ (powdered) sugar

  • 6 tbsp. unsalted butter, melted

For the filling:

  • 2 medium unpeeled peaches (about 1.5-2 cups), chopped

  • 1 (6 oz.) package of blackberries

  • 1/4 cup granulated sugar

  • 1 tbsp. all-purpose flour

  • 1/4 tsp. ground cinnamon

  • 1/4 tsp. ground ginger

  • 1/4 tsp. of ground nutmeg

  • Pinch of salt

  • 1/2 tsp. lemon zest

  • 1/2 tsp. vanilla extract

For the crisp topping:

  • 1/2 cup all-purpose flour

  • 1/4 cup old-fashioned/rolled oats

  • 1/4 cup brown sugar, packed

  • 1/2 cup chopped pecans (optional)

  • 1/2 tsp. cinnamon

  • 1/4 tsp. salt

  • 1/4 cup (half a stick) unsalted butter, chilled and cut into small pieces

Directions

  1. Preheat the oven to 350°F. In a bowl, mix together the melted butter, flour and sugar until well incorporated. The dough will be a bit crumbly. Transfer the dough to an ungreased 8x8 baking dish (alternatively, you can line the dish with a piece of parchment paper if you wish to pull the entire baked good out). Using your hands or the back of a spatula, press the dough evenly into the dish.

  2. Bake the shortbread crust for about 15-17 minutes, or until the dough has firmed up and is golden. Set aside to cool, but keep the oven on at 350°F.

  3. In a large bowl, toss all “filling” ingredients (everything from peaches to vanilla extract) together gently using a spatula. Set aside to allow the fruit to macerate a little.

  4. For the crisp topping, add all ingredients except for the chilled butter to a medium bowl. Mix together using a whisk. Add the butter and use your fingertips to work it into the mixture until crumbs form.

  5. Pour the fruit filling over the slightly chilled shortbread crust and then evenly sprinkle the crisp topping over the fruit (using a spoon or your hand). Bake in the oven for 35-45 minutes, or until the crisp topping is golden brown and the fruit is bubbling. Allow the pie bars to cool completely before cutting into them. Serve with ice cream or whipped cream.

PEANUT BUTTER SWIRL BROWNIES

IMG_1888.jpeg

This past week was pretty eventful due to the fact that Alex and I took care of my mom’s two dogs while she was away on vacation. Lily and Oliver are like my babies and are the cutest pups in the world, but they require a lot of attention. Not having any pets of our own at the moment, mostly because we live in an apartment, we realized just how much work and responsibility goes into taking care of dogs, and by the end of the week, we joked that the dogs were our children because they were all we talked and thought about every day. Even though I barely slept (the dogs are used to sleeping on beds and will give you hell if you don’t oblige), I’m honestly so sad that they’re gone and back at my mom’s. The apartment is so quiet and lonely and I’m counting down the days until we can get a cat (no dogs until we own a house with a yard!).

IMG_1844.jpeg

I don’t know how today’s recipe - peanut butter swirl brownies - is my first one featuring peanut butter, considering I eat the stuff every single day. I got my love for peanut butter from my mom at a young age when I’d see her walking around the house with a spoonful of it as a snack (ahem, dinner). Of course back then, it was all about commercial brand peanut butters like Jif or Skippy, but I’ve grown up since then by upgrading to the natural varieties from Trader Joe’s or Whole Foods. Although these kinds are much healthier for you, using the commercial brands that have the added sugars and whatnot are usually the norm to use when it comes to making peanut butter desserts, and therefore the type of PB I want you to buy for this recipe. This is so we don’t have to worry about the natural oils or lack of sodium/sugar that is found in the natural types of PB.

The only other brownie recipe on my site, my forever go-to chewy and fudgy brownies, is quite different from the jazzed up brownies in today’s post. These peanut butter swirl brownies are anything-but-basic, muuuch thicker, and filled with crunchy peanuts. I am normally not a fan of nuts in my brownies, but I really think the peanuts work well in these because you get double the peanut flavor and a nice added texture. To put it plainly: today’s PB brownies are very decadent, but that doesn’t mean it’ll stop you from having more than one piece at a time.

IMG_1832.jpeg

Looking at the recipe itself, I’m sure you’ll notice how I am also giving metric measurements (grams, milliliters) for the ingredients. When working with something messy like peanut butter, it’s so much easier weighing it out in a bowl set over a scale than with measuring cups which can be a pain to clean. Furthermore, I’ve made the recipe both ways, and although the consistency of the batters were a bit different, I could barely notice a difference after they came out of the oven. So if you can weigh your ingredients, certainly do it, and if not, don’t worry about it.

I hope everyone has a great Memorial Day Weekend! Alex and I are going to our first Cinespia screening of the year at the Hollywood Forever Cemetery (aka my favorite summer activity to do) and I cannot wait! The movie we’re seeing is Alfred Hitchcock’s Rear Window so it should be a pretty mixed crowd. I’m very excited to be sipping on a cocktail and snacking on these brownies, while surrounded by other cinephiles come Sunday.

E2A7C2EE-F2B0-4925-BA96-B6B3282E6B89.jpeg

Peanut Butter Swirl Brownies

Recipe slightly adapted from Smitten Kitchen

Ingredients

IMG_1893.jpeg

For the peanut butter batter:

  • 3/4 cup (190 grams) smooth peanut butter

  • 2/3 cup (135 grams) granulated sugar

  • 1 large egg

  • 1/4 tsp. vanilla extract

  • A good pinch of coarse sea salt

For the brownie batter:

  • 1/2 cup (115 grams) unsalted butter

  • 3 oz. (85 grams) unsweetened chocolate (like this one), roughly chopped

  • 1 1/4 cup (250 grams) granulated sugar

  • 2 large eggs

  • 1 tsp. (5 ml) vanilla extract

  • 1/4 tsp. espresso powder (optional but recommended - it helps intensify the chocolate flavor)

  • 1/4 tsp. coarse sea salt

  • 2/3 cup (85 grams) all-purpose flour

  • 1/2 cup (60 grams) chopped toasted peanuts

  • 1/4 cup (40 grams) chocolate chips, semisweet or bitter

  • Flaky sea salt or confectioners’ sugar, to finish

Directions

  1. Preheat the oven to 350°F. Line a 8in. square baking pan with parchment paper and then grease the pan (bottom and sides) with cooking spray or butter. Set aside.

  2. Make the peanut butter batter: In a medium bowl, whisk all ingredients together until well combined and smooth.

  3. Make the brownie batter: In a microwave-safe bowl, melt the butter and unsweetened chocolate together. Do this in 30 second intervals, stirring well after each time, being careful not to burn the mixture. Once melted, transfer the mixture into a large bowl. To this, add the eggs one at a time, whisking well after each addition. Then add the vanilla extract, espresso powder (if using) and salt. Whisk until combined. Using a spatula, fold in the all-purpose flour until no dry ingredients remain. Stir in the chopped peanuts.

  4. Pour a thin layer (about a 1/3 of the batter) of the brownie batter into the baking dish and spread evenly. Take the peanut butter batter and drop big spoonfuls of it in a random fashion over the thin layer of brownie batter. Use the rest of the brownie batter and fill in the spaces between the peanut butter batter so that it looks like image #2 above. Using a butterknife or wooden skewer, start to swirl the brownie and peanut butter batters together. Don’t worry if you don’t get perfect swirls, the flavor will still be there. Sprinkle the chocolate chips over the top.

  5. Pop the baking dish in the oven and bake for 30-35 minutes or until a toothpick inserted in the center comes out fairly clean (a few crumbs are okay). Sprinkle with flaky sea salt and/or confectioners’ sugar. Allow the brownies to cool completely before cutting - this makes it much easier and gives you cleaner pieces.

LEMON BARS

In past blog posts I have spoken about my mom's side of the family, the Czech side, and shared with you the history of my Czech grandparents (including a recipe of theirs). Today, I am speaking about my paternal grandmother, or who my sister and I refer to as 'Grammy'. (Side note: Grammy is one of my biggest supporters of The Vivid Kitchen and always emails me her thoughts on my posts and pictures. So, hi Grammy!) 

Anyway! Grammy, who lives in Los Angeles, has been cooking and baking pretty much all her life, and is honestly amazing at both. She's actually taken cooking classes over the years, with her favorite class being "Cooking Cordon Bleu" that she took when she was living in Ottawa, Canada years ago. Despite the knowledge she gained from these classes, I know Grammy would qualify herself as a "home-cook": she loves cooking simple, yet delicious recipes that aren't fussy and always deliver on taste and flavor. 

Growing up, I would see Grammy just about every weekend, which meant I was fed very well and looked forward to whatever she was serving us. Besides the delicious dinners she would prepare for me and my sister (don't even get me started on how perfect her Thanksgiving dinner is every year), it's really all about her baked goods. To say that Grammy has a sweet tooth is a severe understatement - the lady loves her candy, chocolates, pies, cookies, etc. etc. etc. When we're together, we love talking about baking and certain recipes we've come across - in a sense, baking has brought us closer together. 

One of Grammy's desserts that I grew up eating constantly was her lemon bars. Lemon bars are a traditional American baked good that were invented in the early 1960s, and eventually made their way into every kitchen across the country when the cookbook Betty Crocker's Cooky Book published the recipe. The recipe starts off with making a shortbread crust that is pressed into a 9x13 baking dish, which is baked in the oven until firm and golden; then it is topped with a lemon custard-like filling that is once again baked in the oven until set. Super easy and straightforward. If you're eating a lemon bar, 99.99% of the time, it'll be dusted with confectioners' sugar (powdered sugar) because that's tradition, and I'll be damned if I didn't include this.

The recipe I am giving you today comes directly from Grammy: every ingredient and step follows what she sent me earlier this week, except for the addition of lemon zest that I included (I wanted to get the most use out of my lemons!). I also changed the quantity for the filling measurements by adding 50% more of each ingredient, except for the sugar. I did this because I wanted the filling layer to be a bit thicker, but didn’t feel the need to add any more sugar since I think it’s plenty sweet already.

The crust, which is a shortbread, is made with only three ingredients - butter, confectioners’ sugar and flour - and comes together in minutes. It is then pressed into a 9x13 baking dish and par-baked for about 15 minutes before adding the filling. Speaking of the filling, it’s made entirely with a blender and is, once again, as simple as it gets when it comes to the ingredients and directions. The moment the crust has been partially baked, you pull the pan out of the oven, pour the filling mixture in, and immediately return the pan back into the oven for another 20 or so minutes. The “hardest” part of this recipe is the chilling time: for best results, you want to let it cool at room temperature for about an hour and then pop it in the fridge for another two hours.

Lemon Bars

Ingredients

For the crust:

  • 3/4 cup (1 1/2 sticks) unsalted butter, melted

  • 2 cups all-purpose flour

  • 1/2 cup confectioners' sugar (powdered sugar)

For the filling:

  • 6 large eggs, room temperature

  • 2 cups granulated sugar

  • 1.5 tbsp. lemon zest (from about 2 lemons)

  • 1/2 cup fresh lemon juice

  • 6 tbsp. all-purpose flour, sifted

  • 3/4 tsp. baking powder

  • Confectioners' sugar, to finish

Directions

  1. Preheat the oven to 350°F. In a bowl, mix together melted butter, flour and sugar until well incorporated. The dough will be a bit crumbly. Transfer the dough to an ungreased 9x13 baking dish (alternatively, you can line the dish with a piece of parchment paper if you wish to pull the entire baked good out). Using your hands and/or an offset spatula, press down the dough evenly into the dish. It may seem like there isn’t enough to fill the pan, but trust me on this, it’ll spread perfectly the more you work it.

  2. Bake the shortbread crust for about 15-17 minutes, or until the dough has firmed up and is lightly golden.

  3. While the crust is baking, work on the filling. In a blender, mix the eggs, sugar, lemon zest and juice for about 30 seconds. Add the sifted flour and baking powder and blend for another 15 seconds.

  4. When the crust is done, pull it out of the oven and immediately pour the lemon filling over the top of the hot crust and place back into the oven. Bake for about 25 minutes, or until the filling is set.

  5. Cool on a wire rack for at least 1 hour and then refrigerate it for 2 hours more before cutting into the lemon squares. When ready to serve, dust the lemon bars with confectioners’ sugar and cut them with a sharp knife. They can either be stored at room temperature or in the fridge.