SALTED TOFFEE + BROWN SUGAR COOKIES

public.jpeg

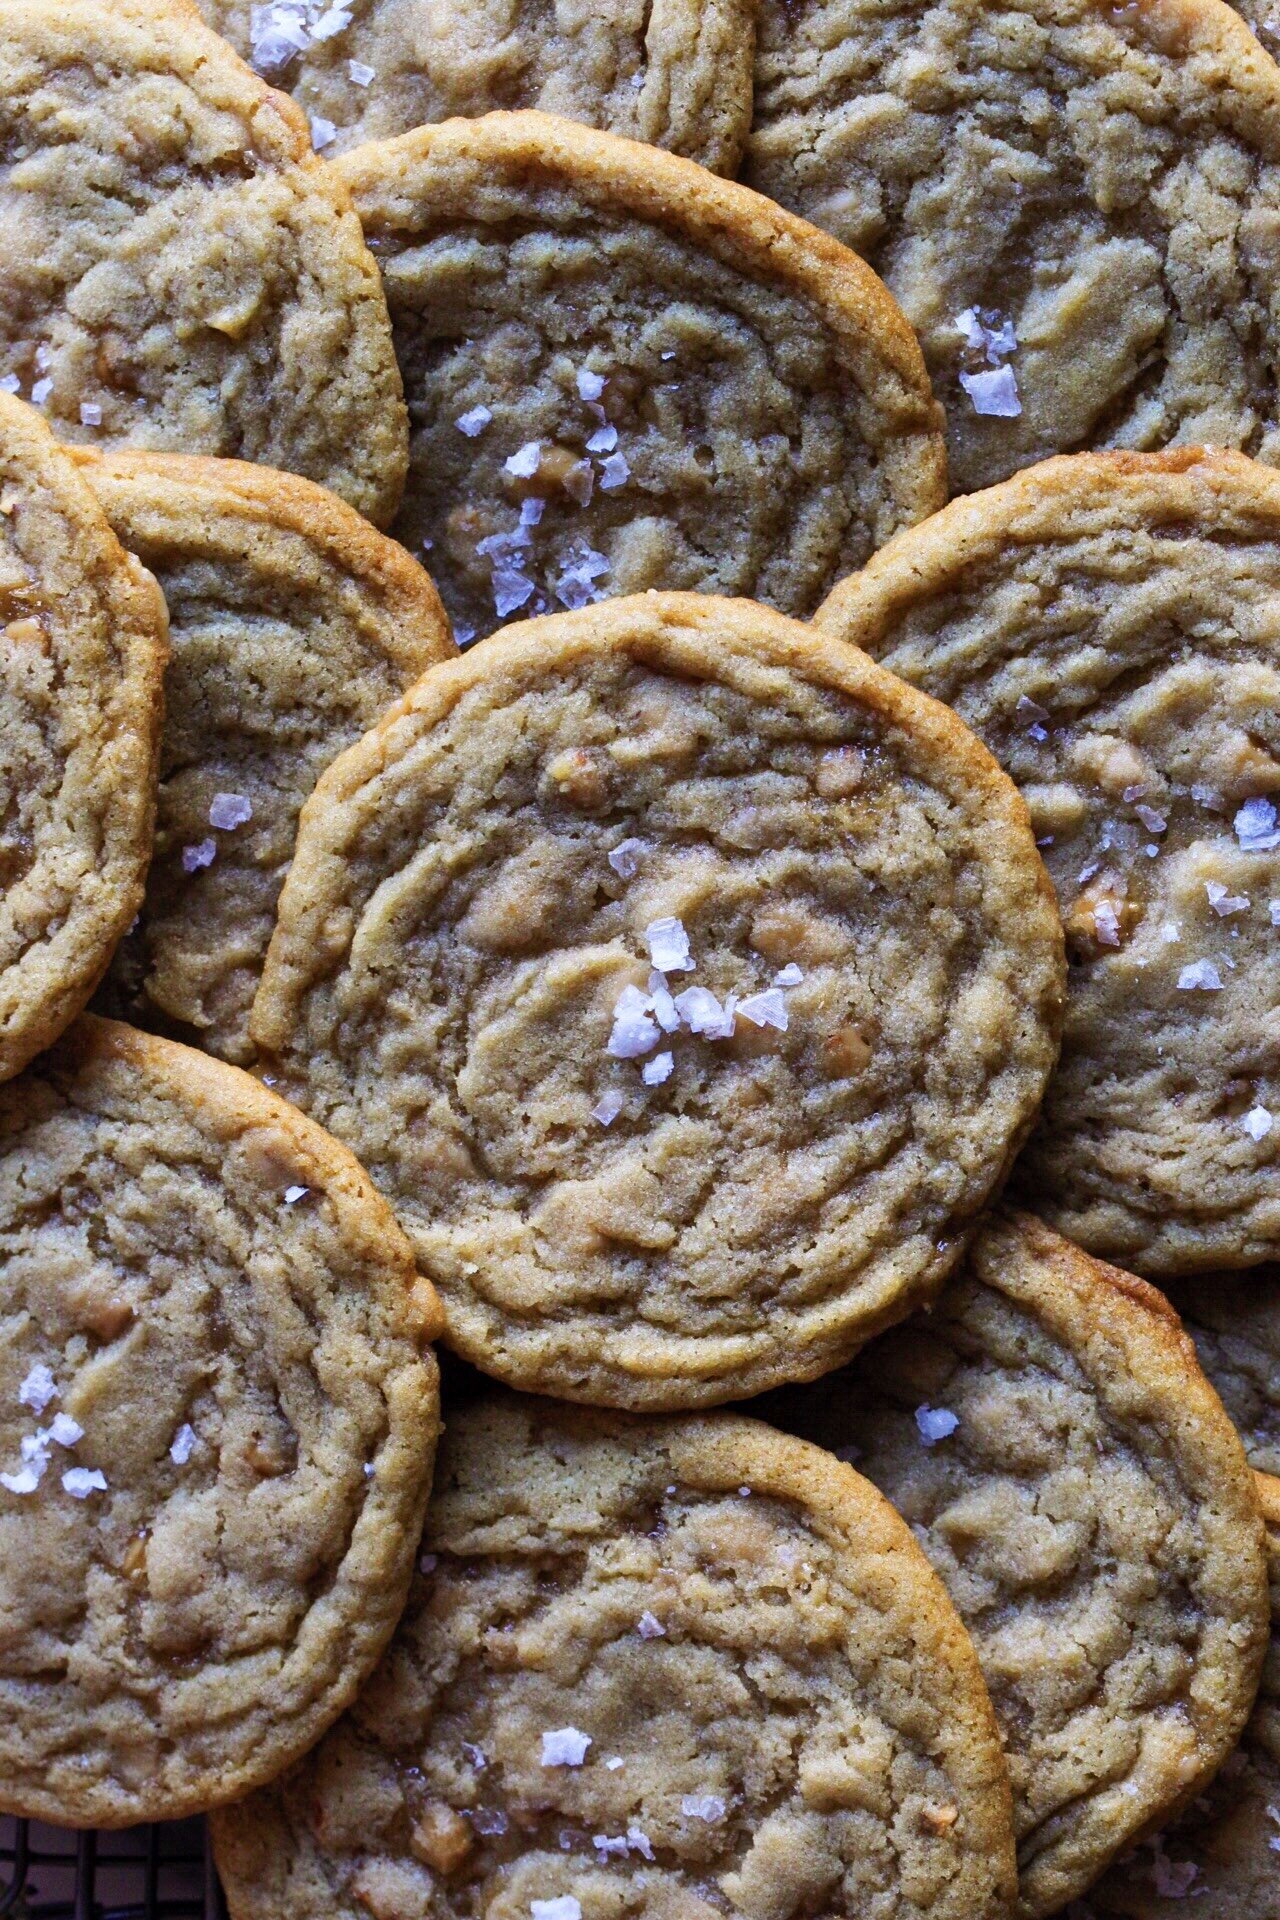
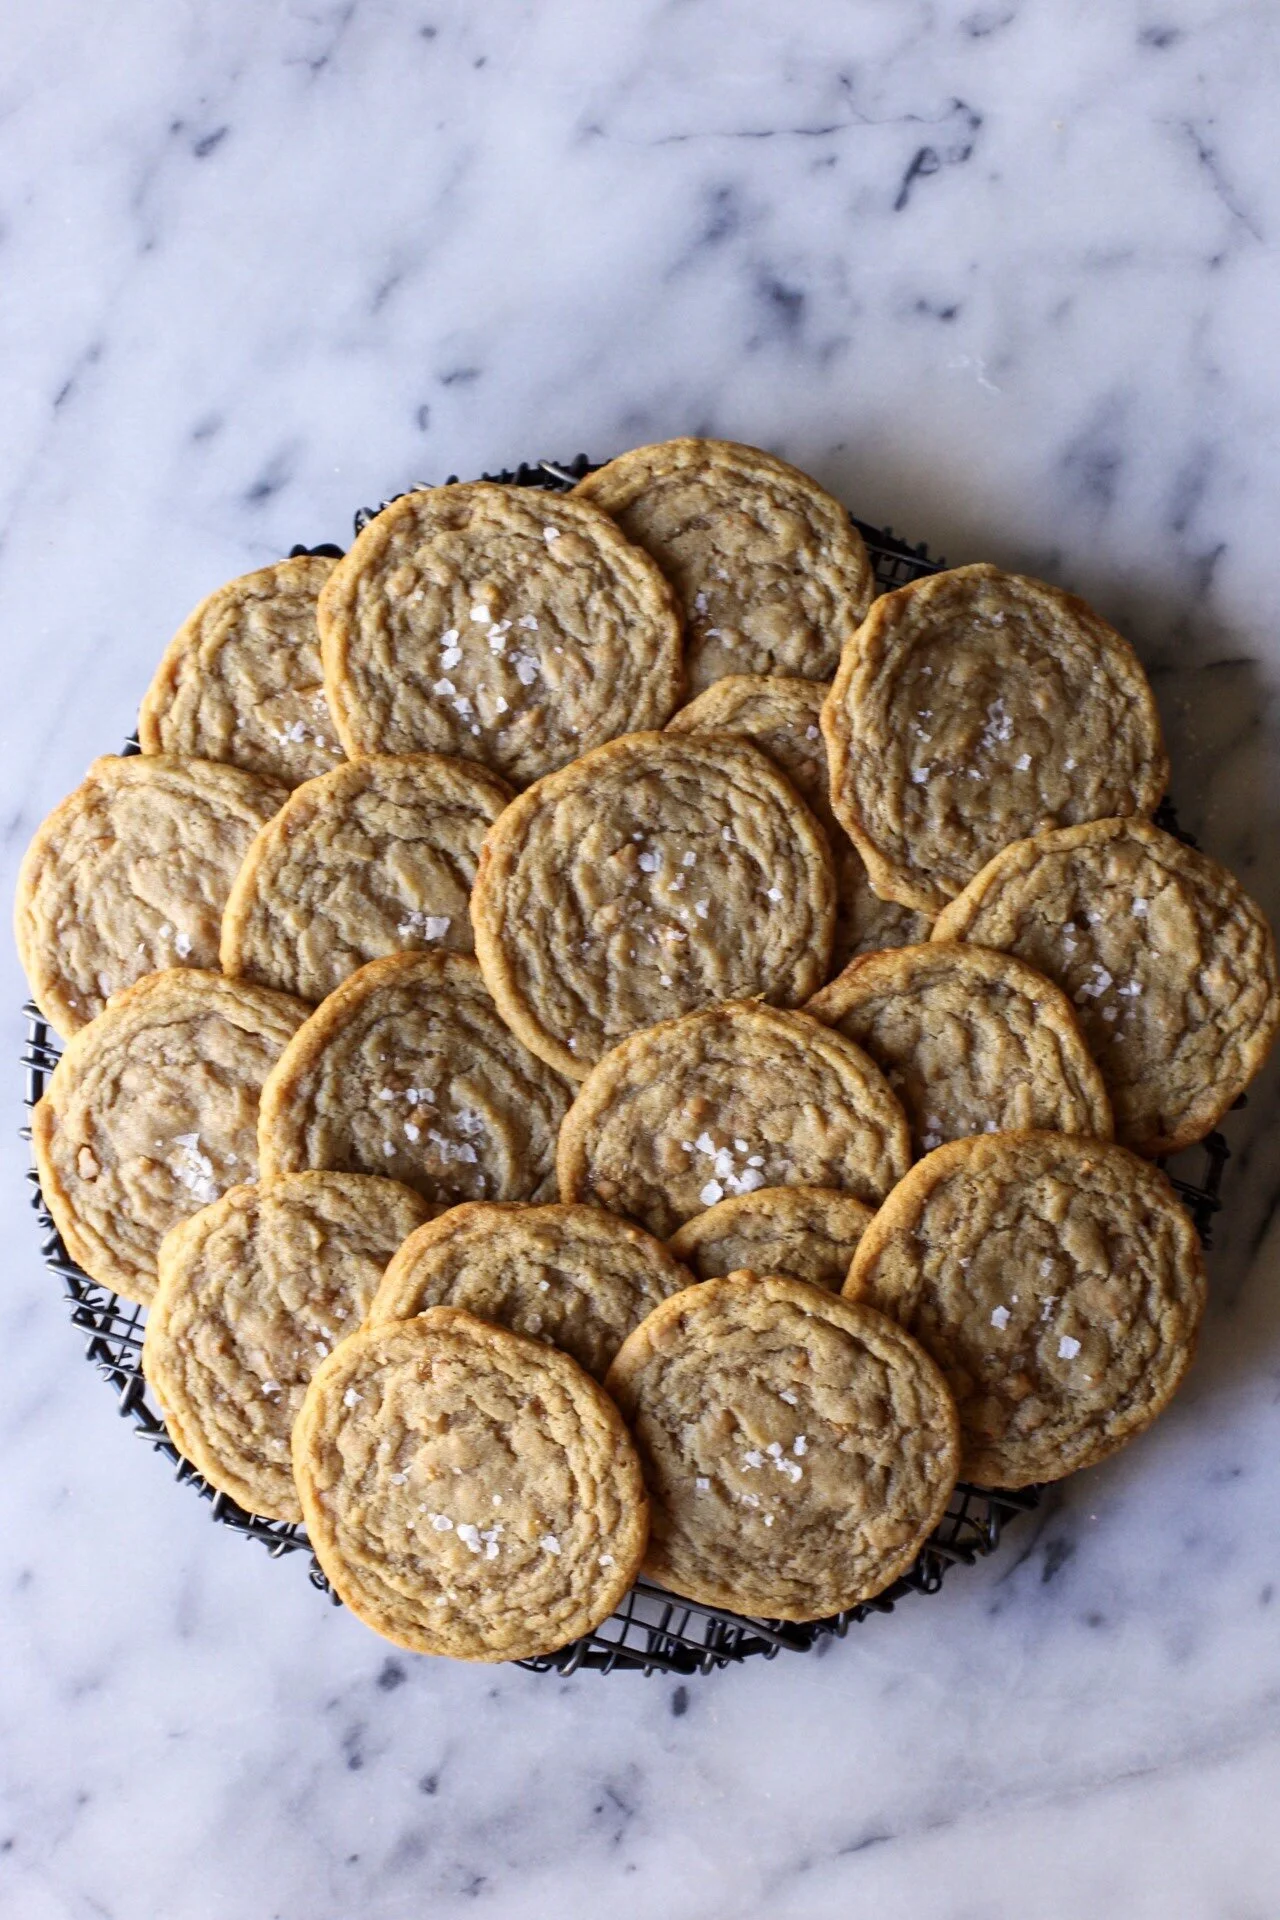
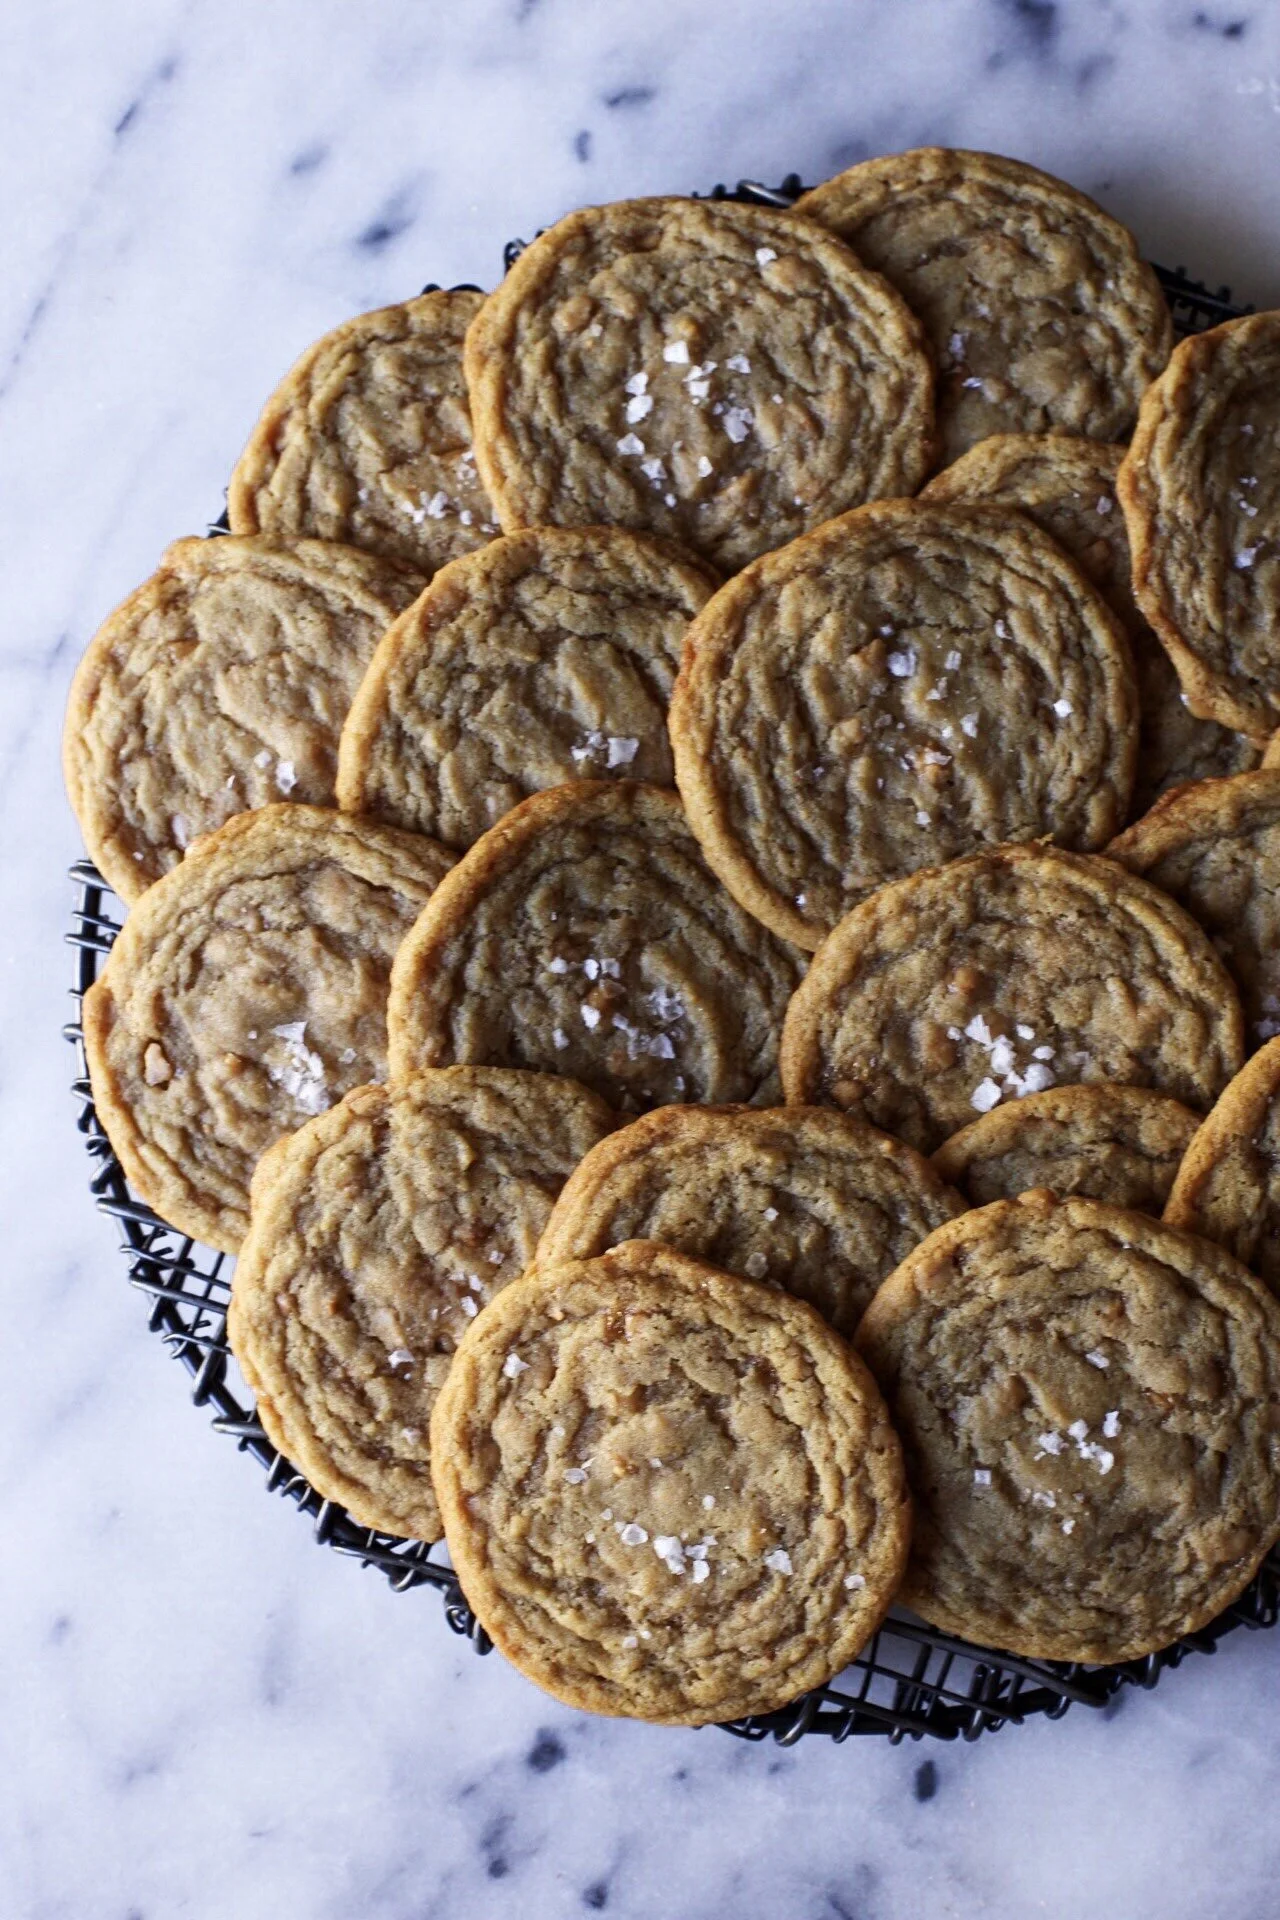
I remember a very dark period in my life when I didn't care for toffee. I know, I know it's crazy to think that there are people in this world who don't like toffee, but they exist, and I sadly used to be one of them! I don't remember when I switched over to the other side (re: the happier side) but I kind of have a feeling that these salted toffee and brown sugar cookies had something to do with it.

public.jpeg

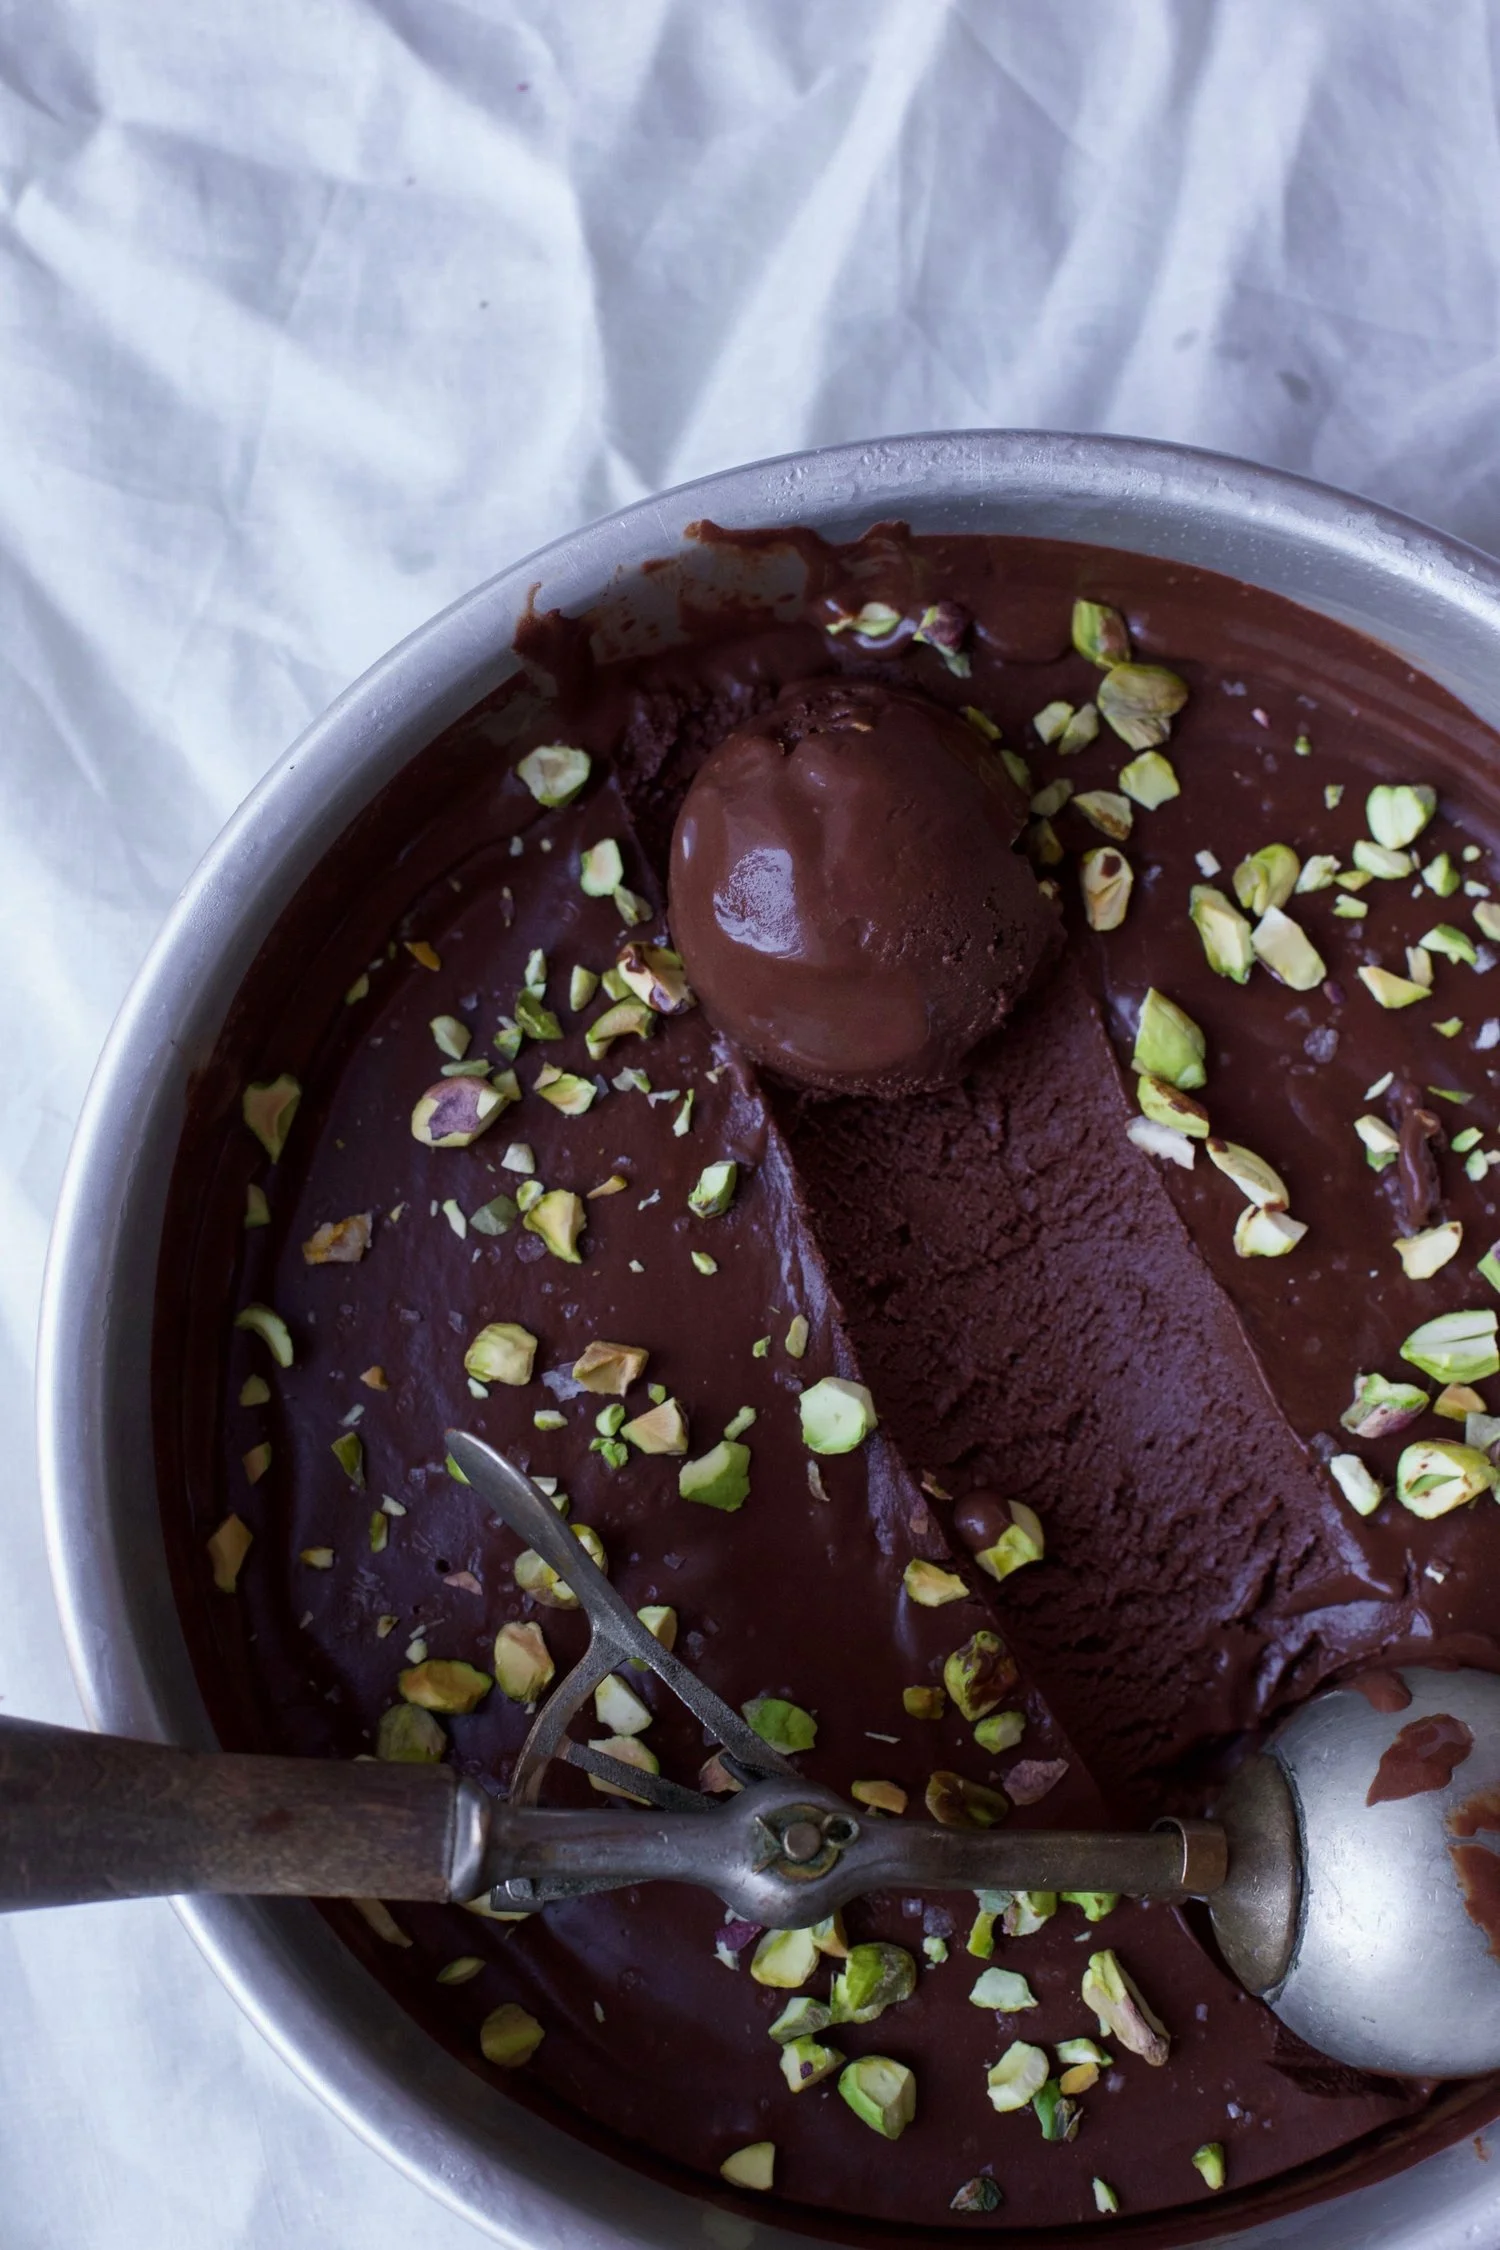
I'm a pretty simple person when it comes to cookies: any kind that has chocolate in it I will most likely eat and love until the end of time. And any other kind of cookie that doesn't have chocolate in it like a peanut butter or sugar cookie are perfectly adequate in my opinion, but I don't usually go gaga over them. 

public.jpeg

But with these non-chocolate cookies, I can and will eat 5 in a sitting without even thinking twice about it. The toffee just melts in your mouth, the texture is so chewy and addicting, and the juxtaposition between the brown sugar/toffee combo and salty topping is perfect. Who needs chocolate when a cookie can deliver all of this?

So the next time you're at the grocery store and you find yourself in the baking aisle right near the chocolate chips (I find myself here more often than not), grab a bag or two of toffee bits, make sure you have a good supply of brown sugar, and for the love of God don't forget the precious flaky sea salt. I know I'm a bit zealous with my sprinkling of sea salt on baked goods (evidence #1 and evidence #2), but trust me on this one: you NEED the salt on top. 

public.jpeg

Salted Toffee and Brown Sugar Cookies

Yields about 25-30 cookies, depending on size

Recipe adapted from Everyday Annie

Ingredients

public.jpeg
  • 2 cups all-purpose flour

  • 2 tsp. baking soda

  • 1/2 tsp. salt

  • 1/4 tsp. ground cinnamon

  • 1/4 tsp. ground ginger

  • 3/4 cup (1 1/2 sticks, 6oz.) unsalted butter, room temperature

  • 1 1/4 cup brown sugar (any kind works)

  • 1 large egg, room temperature

  • 2 tsp. vanilla extract

  • 1 cup toffee bits

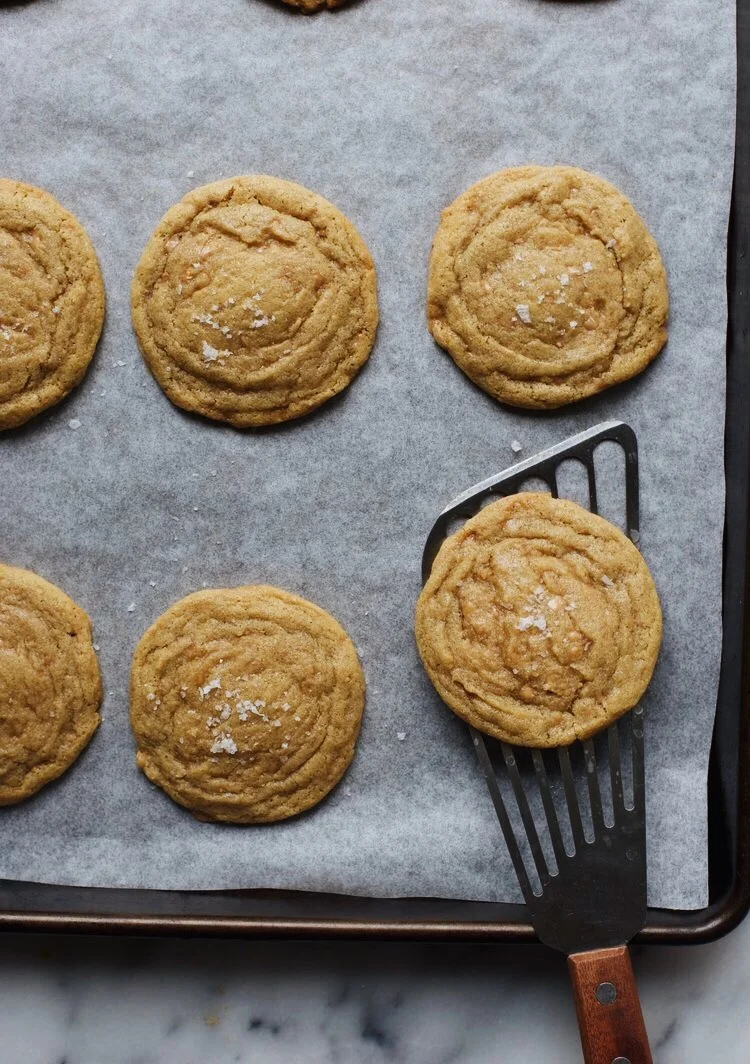
  • Flaky sea salt, to finish

Directions

  1. In a bowl, whisk together the flour, baking soda, salt, cinnamon, and ginger. Set aside.

  2. Using a hand mixer, or in the bowl of a stand mixer fitted with the paddle attachment, cream the butter and brown sugar together until light and fluffy, about 2-3 minutes. Scrape down the sides of the bowl and add the egg and vanilla extract. Mix until combined and scrape the bowl again.

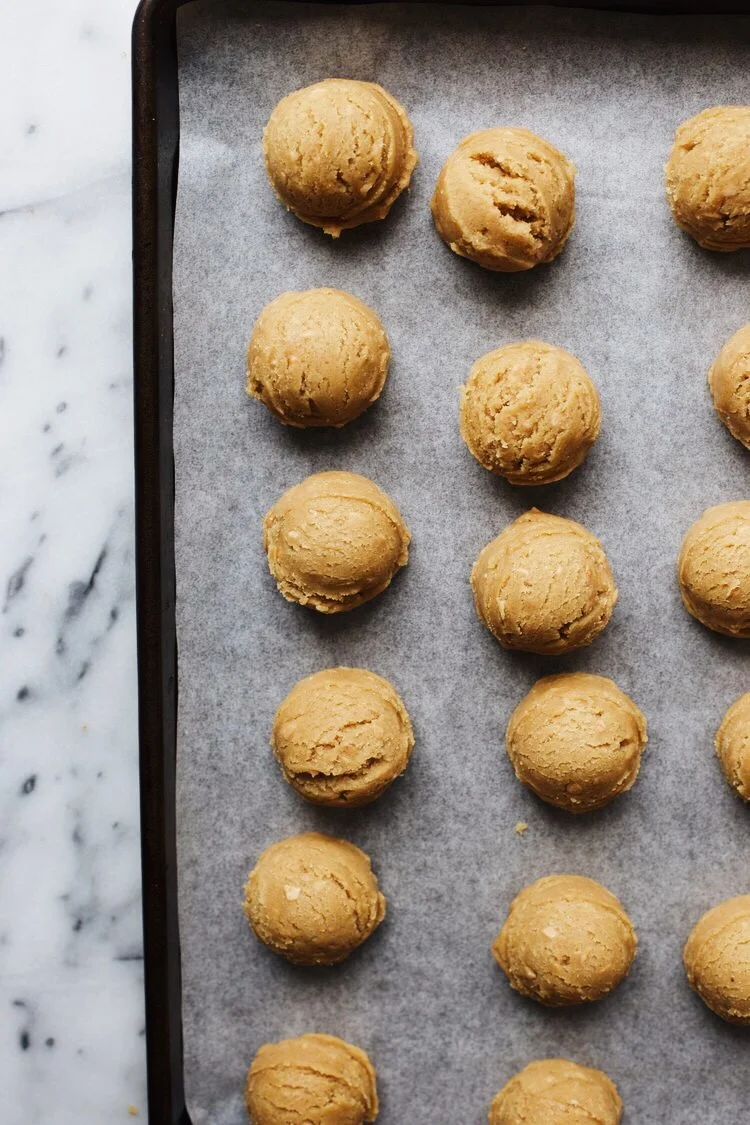
  3. Add the dry ingredients to the stand mixer and mix on low until just combined. Fold in the toffee bits with a spatula. Cover the bowl with plastic wrap and refrigerate the dough for 30 minutes.

  4. Preheat the oven to 350°F. Line a baking tray with parchment paper, and using a spoon or a cookie scoop (I use the medium size), scoop out 1.5-2 tablespoons of dough for each cookie.

  5. Bake the cookies for 8-10 minutes, rotating the cookie sheet halfway through. The cookies are done when the edges are set and slightly browned, with the center still soft. Do not overbake! Once taken out of the oven, sprinkle with flaky sea salt and allow the cookies to sit on the pan for about 5 minutes before transferring to a cooling rack.

APPLE CRUMB MUFFINS

IMG_1715.jpg

I've gotta be honest and say that these weren't the muffins I was intending on giving you today. My plan was to make my favorite muffins but silly me forgot that the main ingredient of that kind is only available in grocery stores from about October to December. Any idea as to what I could be hinting at? CRANBERRIES!  

I really wanted to share my cranberry orange muffins (or scones!) with you, but I forgot that fresh cranberries come and go so quickly. Smart people very wisely save and freeze cranberries for when a craving occurs in the middle of the year, but I am not one of those people apparently! Also, even though fresh cranberries are obviously the way to go, I just realized that Sprouts, a grocery store with an amazing bakery and home to some delicious cranberry muffins, actually uses dried cranberries in their recipe. So maybe I'll try using dried next time and see if they are just as good as muffins with fresh cranberries.

IMG_1613.jpg
IMG_1614.jpg

But I digress. Today I offer you another great muffin option: apple crumb muffins. And yes I know that apples are usually favored in autumn when the leaves are falling and Thanksgiving is right around the corner, but I like to enjoy apples all year round. Don't we all?

These muffins are perfectly moist from the addition of any yogurt of your choosing (Greek, plain, flavored - I used nonfat plain Greek yogurt) or can be substituted with sour cream. And everyone knows that the best part of any muffin is the top, and this recipe in particular takes it up a notch with a crumb/streusel topping. I won't judge you if you make a batch of these and just eat the muffin tops... it's your life, and I may or may not do the exact same thing. 

Enjoy these muffins with your coffee first thing in the morning, and know that within time, I will be gifting you with cranberry orange muffins. 

IMG_1703.jpg


Apple Crumb Muffins

Makes 12-14 muffins

Recipe adapted from Sally's Baking Addiction

Ingredients

For the crumb topping:

  • 1/4 cup (half a stick, 60 g) unsalted butter, melted and slightly cooled

  • 1/3 cup (67 g) brown sugar (light, golden, or dark works), packed

  • 1 tbsp. (15 g) granulated sugar

  • 1 tsp. cinnamon

  • 2/3 cup (84 g) all-purpose flour

For the muffins:

IMG_1798.jpg
  • 1/2 cup (one stick, 115 g) unsalted butter, room temperature

  • 1/2 cup (100 g) brown sugar (any kind), packed

  • 1/4 cup (50 g) granulated sugar

  • 2 large eggs, room temperature

  • 1/2 cup (120 g) yogurt or sour cream, room temperature

  • 2 tsp. vanilla extract

  • 1 3/4 cup (220 g) all-purpose flour

  • 1 tsp. baking soda

  • 1 tsp. baking powder

  • 1 tsp. cinnamon

  • 1/2 tsp. salt

  • 1/4 cup milk (any kind), room temperature

  • 1 3/4 cup peeled and chopped apples (any variety you want, I used Honeycrisp) - about 2 small apples

Directions

  1. Make the crumb/streusel topping. In a small bowl, mix together the melted butter, both sugars, and cinnamon. Fold in the flour with a spatula until incorporated. Set bowl aside.

  2. Preheat oven to 425°F. Grease a 12-count muffin tin with cooking spray or butter, or line with cupcakes wrappers. Depending on the size of your muffins, you may need to make the muffins in batches.

  3. With a hand mixer or in the bowl of a stand mixer fixed with the paddle attachment, cream the butter and both sugars until fluffy, a couple of minutes. Scrape down the sides of the bowl. Add the eggs, one at a time, allowing each to incorporate before adding the next. Add the vanilla extract and yogurt (or sour cream), and mix until combined. Scrape sides of bowl again.

  4. In a separate bowl, whisk the flour, baking soda, baking powder, cinnamon, and salt together. Add this mixture to the wet ingredients, along with the milk and mix on low until just incorporated. Fold in the chopped apples.

  5. Using a spoon or an ice cream scoop, fill each muffin cavity to the brim with batter. Sprinkle the crumb mixture over the top of each muffin, making sure to press down on the crumbs so they will stick while baking.

  6. Bake for 5 minutes at 425°F, and then turn the oven down to 350°F and bake for another 15-17 minutes, or until a toothpick inserted in the center comes out clean. The blast of initial heat helps the muffins get their height.

  7. Allow the muffins to cool in the pan for a couple of minutes before taking them out. Muffins are best eaten on the day they are baked, but can be enjoyed for 1-2 days after if covered and left at room temperature.


CHOCOLATE SORBET

IMG_1600.jpg

Today I'm sharing a tried-and-true recipe that I find myself making more often than not: chocolate sorbet. And it's not just any chocolate sorbet; it's David Leibovitz's recipe. David, an amazing and well-known pastry chef, is my go-to guy for the best ice cream-related recipes for many reasons, but mainly because he wrote the book on it - literally. When I was gifted my Cusinart ice cream machine years ago, the first recipe I tried was David's mint chocolate chip ice cream. Even though the recipe was pretty daunting because I had never even attempted making custard before (it was a custard-based ice cream), I was hooked when the final product was better than any other mint ice cream I had ever tried. Don't worry, I'll do a post for this ice cream in the future! 

But today, we're not discussing ice cream... we are discussing its much easier to make cousin, the sorbet. Sorbet by definition has no dairy in it, but makes up for that loss with plenty of sugar. Fruit flavors are usually the standard when it comes to sorbet, but being the chocolate lover that I am, I tend to stray from those kinds. With that said, I knew that I had to try David's chocolate sorbet when I came across it on the internet.

With only six ingredients, one of those being water, this sorbet goes against all odds. Sorbet may tend to have an icy texture due to the lack of dairy in it, but this recipe yields a very creamy and rich sorbet, almost to the point that you are 100% sure that there has to be dairy in it. David actually credits the amazing texture to the high proportion of bittersweet chocolate that is added.  

This recipe is just so easy and delicious that it's almost a given to find a batch of it hidden in my freezer somewhere. When Alex and I are trying to cut back on dairy but are craving ice cream (we both would eat ice cream every day if we could), this is the perfect dessert to reach for. And if you want to impress your vegan or lactose-intolerant friends, I highly suggest whipping this recipe out. It's much, much better than the fruit salad you were planning on putting out instead. I promise.

IMG_1570.jpg
IMG_1583.jpg

Once again, I am giving you the option to weigh out your ingredients in grams using a kitchen scale. David includes both options (weight and volume), as do I, so feel free to use either. This was my first time making the chocolate sorbet using the scale, and I gotta say that I think it yielded my best batch yet. Just saying! 

ALSO, if you're wondering about my ice cream cones, I simply dipped store-bought sugar cones into melted dark chocolate and sprinkled chopped pistachios on top. I thought it not only would look cute, but compliment the sorbet perfectly, especially since my favorite way to enjoy the sorbet is with pistachios.

Chocolate Sorbet

Yields about 1 quart

Recipe from David Leibovitz

IMG_1596.jpg

Ingredients

  • 2 1/4 cups filtered water

  • 1 cup (200 g) sugar

  • 3/4 cup (75 g) unsweetened Dutch-process cocoa powder

  • Pinch of salt

  • 6 oz. (170 g) bittersweet or semisweet chocolate, finely chopped (use a higher quality bar, not chips)

  • 1/2 tsp. vanilla extract

  • Flaky sea salt, chopped pistachios, for topping (optional)

Directions

  1. In a large saucepan, bring 1 1/2 cups of the water, the sugar, cocoa powder and salt to a boil over medium heat, whisking frequently. Let it boil for 45 seconds, as you continue to whisk it. If the mixture is about to boil over, quickly lower the heat!

  2. Take the saucepan off the heat and stir in the chopped chocolate. Once smooth, stir in the remaining 3/4 cup of water and vanilla extract.

  3. Pour the liquid into a blender and blend for 15 seconds (make sure to remove the small lid cap since it’s hot - hold a dishtowel or napkin over the top to prevent a mess). Transfer to a bowl, cover with plastic wrap, and refrigerate for at least 4 hours, or overnight.

  4. Before churning, give the mixture a mix with a whisk, since it’ll have firmed up in the fridge. Churn the mixture in your ice cream machine according to the manufacturer's instructions. Serve with flaky sea salt and chopped pistachios sprinkled on top, if desired. Enjoy!