GLAZED CRANBERRY-ORANGE SCONES

IMG_9649.jpg

Since starting this blog just over 6 months (!!!) ago, I’ve been patiently waiting to give you a cranberry recipe. My go-to pick for either muffins or scones is almost always cranberry-orange (with blueberry being a very close second) because it’s such a classic combination that works so well in baked goods. But back in April, there were absolutely no cranberries for sale and I knew I would have to wait until at least October to get my hands on a bag of Ocean Spray fresh cranberries.

IMG_8943.jpg

Last week, I went to Trader Joe’s wishing and hoping it would be cranberry time, but alas, they were nowhere to be found and I was told by an employee that the berries wouldn’t be in stock until a week or so into November. I was pretty bummed about it, but that all changed when I went to Growers Direct: a small grocery store that only sells fresh fruits and veggies. There, they had bags upon bags of beautiful cranberries and I bought three immediately - I will not forget to save and freeze them this year! Moral of the story, your local grocery store may not have cranberries in stock just yet, but with November just around the corner, they’ll be available very, very soon. You can maybe try looking at your city’s farmers market as well.

IMG_9535.jpg

When it comes to making scones, there are a few tips that I need to give you to succeed:

1) You want to keep the dough as cold as possible. This means none of your ingredients will be room temperature, and actually, I’d prefer that you’d measure out your buttermilk and cut up your butter into its small pieces, and then place them back into the fridge until they’re needed for the recipe. You can even freeze the butter if it’s extra hot in your kitchen the day you bake them. To take this one step further, I also would suggest using frozen cranberries over fresh (and of course, you can use dried cranberries as well if that’s all you can get your hands on at the time). Keeping the dough cold ensures that your scones get the rise that defines these baked goods and it also gives you that flaky and crisp exterior that we all love. I also strongly suggest popping the scones into the freezer for 30 minutes before baking them.

IMG_9583.jpg

2) It is very important that you refrain from over-mixing the dough. Too much mixing causes your scones to be tough and won’t give you the perfect scone texture. Therefore, I highly suggest not using a food processor or a stand mixer/hand mixer. When I add my wet ingredients to my dry ingredients, I only use a wooden spoon, and then I rely on my hands to do the rest (mixing in the cranberries and rolling out the dough). A lot of professional bakers prefer using their hands to mix scone and biscuit doughs, and I don’t think anyone should shy away from this method.

IMG_9740.jpg

3) Brush the unbaked scones with liquid and sprinkle with sugar. The liquid can be either buttermilk, heavy cream, or an egg wash, and since we’re using buttermilk in the actual scones themselves, it makes the most sense to use it for the tops as well. This step allows the scones to have a more golden color. As for the sugar, the scones themselves aren’t that sweet so it’s nice to add a bit more sweetness as well as creating a slight crunchy texture. You can use granulated sugar, but I prefer using turbinado sugar. Either works just fine!

And that’s it! I hope baking scones doesn’t sound too overwhelming to you. Just carefully read through the directions before making any moves and you’ll have delicious scones in no time.

P.S. I hope everyone has a great Halloween!

IMG_9764.jpg

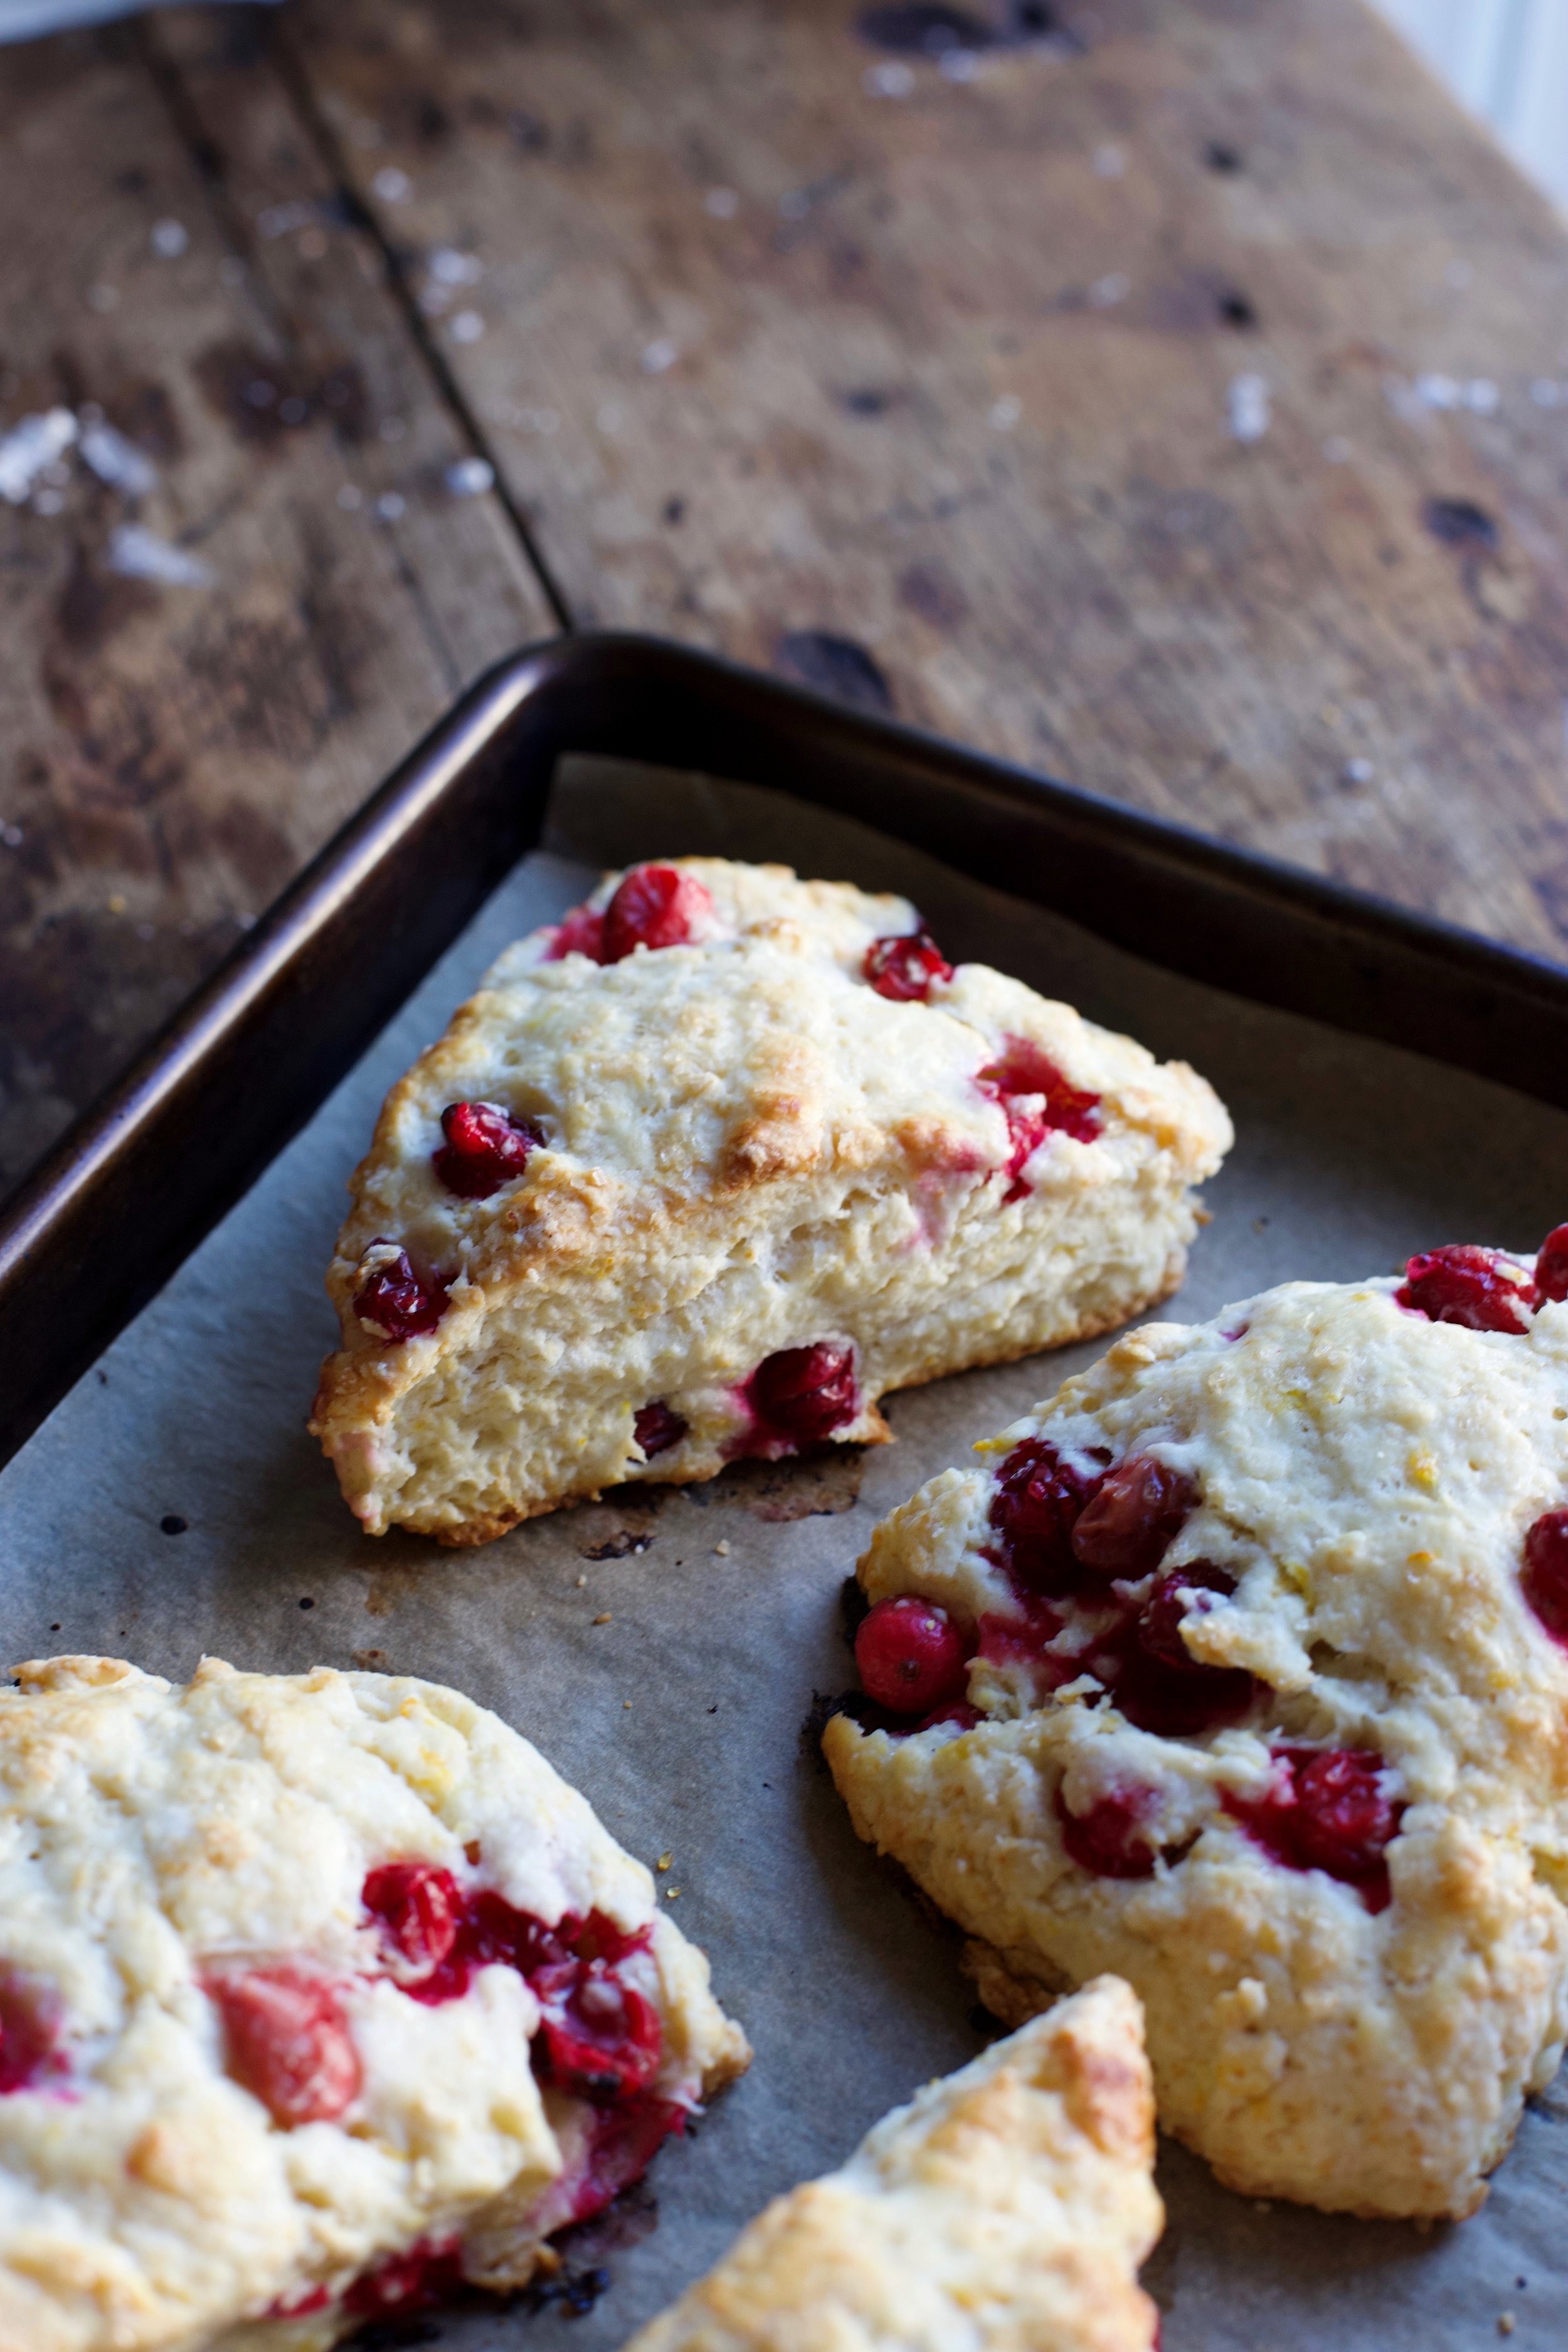
Glazed Cranberry-Orange Scones

Yields 8 scones

Recipe adapted from Epicurious/Bon Appétit

Ingredients

IMG_9662.jpg
  • 3 cups all-purpose flour

  • 1/3 cup granulated sugar

  • 2 1/2 tsp. baking powder

  • 1/2 tsp. baking soda

  • 1 tsp. salt

  • Zest of 1 large orange (save the juice for glaze)

  • 3/4 cup (1.5 sticks) unsalted butter, chilled and cut into 1/2” pieces

  • 1 cup buttermilk, chilled, plus more for brushing

  • 1 cup cranberries, preferably frozen but fresh works too

  • Turbinado sugar (or granulated sugar), for sprinkling on top

For the glaze:

  • 1 cup confectioners’ sugar

  • 2-3 tbsp. fresh orange juice

Directions

  1. Sift the flour, sugar, baking powder, baking soda, and salt together into a large bowl. Whisk in the orange zest.

  2. Add the butter pieces to the mixture by working with your hands or a pastry cutter, and rub the mixture together until it resembles course crumbs. Slowly add the buttermilk, mixing it in by hand or by a wooden spoon. Very carefully, fold in the cranberries.

  3. Turn the dough out onto a lightly floured surface and knead it a couple of times (some cranberries may roll away, but you can just stick them back in). Using your hands or a rolling pin, work the dough into a 1-inch thick circle. Using a sharp knife, cut the circle into 8 wedges and pop them into the freezer for 30 minutes.

  4. Preheat the oven to 400°F and line a baking sheet with parchment paper Transfer the wedges to the prepared baking sheet, leaving about 2 inches between each scone. Brush each scone with buttermilk and sprinkle with turbinado sugar.

  5. Bake the scones in the oven for 20-25 minutes, rotating halfway through, until the tops are a light golden brown. Let the scones cool for about 15 minutes before adding the glaze.

  6. In a small bowl, whisk the confectioners’ sugar and orange juice. Drizzle the glaze generously over each scone. Enjoy fresh out of the oven, or store in an airtight container at room temperature.

APPLE CIDER DOUGHNUTS + HOMEMADE APPLE BUTTER

E2DA20AE-5438-47A7-A0EB-879E11535023-090F8AFC-03F3-4231-B7D4-81FE2511A66E.jpeg

With today being exactly a month into autumn, and the fact that Halloween is just next week, I’m trying to embrace the season as much as I can. The only problem living in Southern California is that October doesn’t necessarily equate to cold, chilly days, but rather we usually get stuck with 80° or higher days mixed with Santa Ana winds. This combination leaves us with very dry and warm air, and sadly, can lead to pretty bad wildfires. Doesn't sound like the cozy fall days that other parts of the country get to enjoy, does it? (Hello, I’m Debbie Downer!)

IMG_8036.jpg

I’ve been doing my best to ignore these non-ideal temperatures by partaking in events that are perfect for the season. Last week, my family and I did our annual night out at Universal Studio’s Halloween Horror Nights, where the whole theme park is turned into a haven for all things spooky and Halloween-related. And just this past Saturday, I went with a group of friends to the Hollywood Forever Cemetery via Cinespia to watch a screening of the original Halloween to celebrate it’s 40th anniversary. Although both of these days were pretty hot and dry (it reached 90° on Saturday), it still helped me get in the spirit.

A38243B6-E97D-4B03-8B11-F4B577843DCD-9F46AD22-2D9C-4549-86D4-7B87768E33BC.jpeg

Of course, I’ve been taking this sentiment with me to the kitchen. The recipe(s) that I’m providing you with today are ones that define the season - I don’t think you can get more “autumn” than with apple cider doughnuts. These babies are a quintessential autumn treat that people go crazy for at apple picking farms, farmers markets, and of course, doughnut shops (like Sidecar and Blue Star - some local favorites of mine). Unlike the last time I posted a doughnut recipe, these will be fried in vegetable oil and therefore not baked in a doughnut pan. There will be a couple of things you’ll need in order to make a successful batch of these fried doughnuts: 1) a large pot or Dutch oven 2) a kitchen thermometer to keep on eye on the oil temperature and 3) a doughnut cutter. This is the doughnut cutter I used and it worked perfectly.

F121A0E5-1FD9-4A3F-8BB1-E81907E68F87-9C7BFBF3-770D-405C-8E0F-238031903C09.jpeg

The day I was frying up these apple cider doughnuts was unfortunately a pretty hot day but I didn’t mind due to the amazing smells it gave my apartment. Although I didn’t have to put a sweater and socks on, I was hugged by the warm spices that define the season (cinnamon, nutmeg, and cloves) and that at least made me feel like it was a proper autumn day.

Besides giving you a recipe for the doughnuts, I’m also including a recipe for apple butter, which is actually one of the ingredients listed for the doughnuts. You of course have the option to buy store-bought apple butter to save time, but I definitely think making your own apple butter is worth it and will feel like such an accomplishment. Although it is a bit time consuming (the apple butter cooks in the oven for about 3 hours), it is fairly a hands-off process with the most tedious step being to peel the apples. My best advice would be to treat this entire post (apple butter and doughnuts) as a weekend project: make the apple butter early on a Saturday, followed by making the doughnut dough and allowing it to chill in the fridge overnight, and finally frying off the doughnuts on Sunday morning for breakfast. That way, it’s not all too overwhelming and allows you to enjoy each process.

839236B0-DA58-4F9A-BEE1-C411B3559E43-D5EE3070-11A5-4182-97DD-29EABD93D54F.jpeg

The apple butter recipe yields about 2 cups and since you only need half a cup of it for the doughnuts, you luckily are left with a good amount to enjoy in other ways. Not only can you gift a jar of it to a friend or family member, which they would LOVE, but you can also choose to be selfish and keep it for yourself to spread on toast, waffles, scones, etc. I say to go with the latter option, but hey, I’m only recommending it because you deserve it after all the work you put in it!

Unlike in apple pies or other fruit desserts where there are specific “baking apples” to use, the apples that work best for apple butter are ones that have a softer skin. These varieties include Fuji, Gala, Braeburn, Honey Delicious, and McIntosh. Feel free to mix and match - I did a mix of Gala and Fuji.

D29E4DA5-BD92-4990-8278-A8764D0C23FC-4C314B4E-C96D-49D6-A3BC-B5E2694FC3B6.jpeg

Apple Cider Doughnuts

Makes about 16-18 doughnuts

Recipe adapted slightly from Bon Appétit

Ingredients

E860BC5E-719A-417F-8082-1B2DAB2F1E68-4FFC35ED-A680-41E3-9B90-A4C1D78144ED.jpeg
  • 2 cinnamon sticks (3 inches in size)

  • 3 cups apple cider

  • 1/2 cup apple butter, store-bought or homemade (see my recipe below)

  • 1/2 cup buttermilk

  • 2 tsp. vanilla extract

  • 3 1/2 cups all-purpose flour, plus more for dusting

  • 1 tbsp. plus 2 tsp. baking powder

  • 1/4 tsp. baking soda

  • 1 tsp. cinnamon

  • 1/4 tsp. nutmeg

  • 1/4 tsp. cloves

  • 1 tsp. kosher salt

  • 6 tbsp. unsalted butter, room temperature

  • 1/4 cup light brown sugar, packed

  • 1/4 cup granulated sugar

  • 2 large eggs, room temperature

  • Vegetable oil, for frying

For cinnamon-sugar topping:

  • 1 tbsp. cinnamon

  • 1 cup granulated sugar

Directions

  1. In a large skillet, bring the apple cider and cinnamon sticks to a boil over medium-high heat and cook until the liquid reduces to a thick and syrup-y consistency, about 20-30 minutes. There should be about a 1/3 cup of liquid when finished. Scrape into a medium bowl, and whisk in the apple butter, buttermilk, and vanilla extract. Set aside.

  2. In another medium bowl, whisk the flour, baking powder, 1 tsp. of cinnamon, nutmeg, cloves, and salt. Set aside.

  3. Using a stand mixer fitted with a paddle attachment, or in a bowl large enough for a hand mixer, beat the butter, brown sugar, and granulated sugar on medium-high speed until light and fluffy, about 3-4 minutes. Add the eggs one a time, making sure to mix well before adding each one.

  4. With the mixer on low, add in half of the dry ingredients, then half of the wet ingredients. Repeat once more, and mix until well incorporated. The dough will be very sticky.

  5. Transfer the dough to a parchment paper-lined baking sheet that is generously dusted with flour (use about 1/3 cup). Sprinkle more flour on top of the dough, and with floured hands, gently press out the dough until it is 3/4” thick. Dust once again with flour. Tightly wrap the baking sheet with plastic wrap and chill in the fridge for at least 3 hours, or overnight.

  6. Whisk the cinnamon and granulated sugar in a bowl (this will be for the doughnut topping). Set aside.

  7. Take the baking sheet out of the fridge, and begin punching out doughnuts using a doughnut cutter. After first batch, gather the scraps and re-roll the dough out gently and punch out more doughnuts. Repeat until you have 16 to 18 doughnuts and doughnut holes.

  8. Using a Dutch oven or large pot, heat about 3 inches worth of vegetable oil on medium-high heat until the oil reaches 350 degrees F (you’ll need a kitchen thermometer for this). Working in batches, fry about 3 to 4 doughnuts at a time for 2-3 minutes per side, until they’ve reached a deep golden brown. Once all doughnuts are done, fry the doughnut holes for about 1-2 minutes per side. Transfer each finished doughnut and doughnut hole to a cooling rack (place paper towels underneath to catch any excess oil), allow them to cool for a few minutes, then toss into the cinnamon-sugar mixture while the doughnuts are still warm. Enjoy! Doughnuts are always best when eaten the day they are made, but are okay the 1-2 days after when stored in an airtight container at room temperature.

Homemade Apple Butter

Makes about 2 cups

Recipe adapted slightly from Food Network Kitchen

Ingredients

7DA853B5-74EB-4C08-8A4E-66CB63A363CF-BBE6297B-8B4F-4A78-82A2-4C6624E1D1BF.jpeg
  • 4 lbs. of assorted apples, peeled and chopped (read above for best apple varieties)

  • 2 cups apple cider

  • 1 cup light brown sugar, packed

  • 1/2 tsp. kosher salt

  • 1 tbsp. fresh lemon juice

  • 1 tsp. vanilla extract

  • 1 tsp. cinnamon

  • 1/8 tsp. cloves

  • 1/8 tsp. nutmeg

  • 1/8 tsp. cardamom

Directions

  1. In a Dutch oven or large ovenproof pot, combine the apples, apple cider, brown sugar, and salt and cook on the stovetop over medium heat. Bring the mixture to a simmer, partially cover with the lid, and cook for about 15 to 20 minutes, or until the apples are soft. Removed from heat, and stir in the lemon juice, vanilla extract, and spices.

  2. Preheat the oven to 250°F. Using an immersion blender (or you can carefully transfer the cooked apples to a blender and work in batches), puree the apples until smooth. Place the Dutch oven or pot into the oven, lid removed, and bake for 2.5 to 3.5 hours, stirring every 30 minutes, or until the apple butter is a deep amber color. The time it takes depends on what kind of apples you use.

  3. Allow the apple butter to cool completely before transferring to an airtight container. Store in the refrigerator for up to two/three weeks. Enjoy on toast, scones, waffles, etc. and/or use for the doughnut recipe above!

SWEET POTATO CHOCOLATE CHIP MUFFINS

IMG_7964.jpg

Before leaving for our trip to Maine last week, I felt like I was in dire need of a break from baking. I kind of felt like I was in a rut and I just wasn’t feeling that inspired - it happens every now and then, and it’s perfectly normal. I’m happy to report that the trip completely helped me out of my slump mostly due to all the incredible and creative pastries/baked goods I consumed over the few days that we were there. Even though I ate healthy for a few days when we returned home (did you see my guide and how much we ate?!), I was SO excited to get back to baking this past weekend.

If you read my Portland city guide, you may have noticed that I recommended a lot of bakeries and cafes, but it wasn't only at these incredible spots where I found my inspiration. One of the mornings, we trekked to the Deering Oaks Park farmers market and perused what Maine had to offer in terms of fresh produce, flowers, dairy products, etc. At one of the numerous booths, they had samples of different fall-flavored baked goods, including sweet potato chocolate chip muffins - a kind of muffin I didn’t even know existed. Alex and I both took a (big) piece and fell absolutely in love with them; as much love as you can with a baked good. I turned to him and said “I can’t wait to go home and figure out how to replicate these”.

IMG_7848.jpg

So, I did exactly that. I returned home and tested out a couple of different recipes until settling on what I thought came as close to the farmers market version. In one batter, I used olive oil while in another I used vegetable oil. In another batch, I roughly chopped up dark chocolate into misshapen pieces, while in another I used semi-sweet chocolate chips. In the end, the winner to me was the combination of semi-sweet chocolate chips and vegetable oil, although if you’d prefer to use olive oil, there wasn’t that huge of a difference in flavor.

Another aspect of this recipe worth noting is that there are two flours being used: regular all-purpose flour and white whole wheat flour, a flour you can easily find at any grocery store. With the addition of half a cup of white whole wheat flour, you’ll get a bit more nutrition and in terms of flavor, the muffins will take on a subtle nuttiness - nothing overpowering though. I noticed that most of the sweet potato muffin recipes that I came across online used only a type of whole wheat flour, mainly to yield “healthy” muffins, but today my goal was to recreate the ones I had in Maine, and in the end, the blend of flours came out on top. Note: whole wheat flour is perfectly acceptable in place of white whole wheat flour.

IMG_7906.jpg

I’m sure you’re wondering a couple of things regarding the sweet potato aspect of these muffins: 1) do the muffins taste savory because of it? and 2) how do I prepare the sweet potatoes? For the former question, these absolutely do not taste savory, and I suppose the best comparison would be to desserts that use pumpkin. Like pumpkin, sweet potatoes have a mild sweetness that works beautifully when used in baked goods and other desserts. In the end, you’ll end up with a hint of sweet potato, but mostly you’ll just be enjoying an incredibly moist muffin with cozy fall flavors and a healthy portion of chocolate chips. As for the latter question, you’ll have to put a little more effort in for these muffins because it requires you to bake the sweet potatoes before even getting to the muffin batter. Just like making a baked potato, you’ll have to roast the sweet potatoes for about 45 min. to an hour, allow them to cool, and then scoop out the interior, no skin included. You only need 1 cup of “mashed” sweet potato, but I would recommend baking 2 medium sweet potatoes just in case.

I strongly recommend topping each muffin with additional chocolate chips before popping them in the oven. This makes the muffins look more bakery-style, aka more appealing to the eye and honestly, there’s nothing wrong with more chocolate. Lastly and most importantly**, pay attention to the oven temperatures (yes, plural) given in the recipe, because this will aide you in getting that lovely domed muffin top that we all enj0y to eat.

IMG_8002.jpg

Sweet Potato Chocolate Chip Muffins

Makes about a dozen muffins

Recipe adapted from Genius Kitchen

Ingredients

IMG_7896.jpg
  • 1-2 medium sweet potatoes, you’ll need 8oz. worth of mashed sweet potato

  • 2 eggs, room temperature

  • 1 cup sugar

  • 1/4 cup + 2 tbsp. milk, any kind, including almond

  • 1/4 cup + 2 tbsp. oil, olive or vegetable

  • 1 cup all-purpose flour

  • 1/2 cup whole wheat flour/white whole wheat flour

  • 1 tsp. baking soda

  • 1 tsp. baking powder

  • 1/2 tsp. cinnamon

  • 1/2 tsp. salt

  • 6 oz. semi-sweet chocolate chips, plus more for sprinkling on top

Directions

  1. Roast the sweet potatoes: Preheat the oven to 400 degrees F. Wash the potatoes and pat dry with a paper towel. With a fork, poke holes all over the potatoes. Wrap tightly in aluminum foil, place on a baking sheet, and bake in the oven for about 45 minutes, or until fork tender. Unwrap the potatoes from the foil, and allow them to cool for about 10 minutes before slicing open and spooning out 80z. (1 cup) worth of sweet potato. Mash with a fork and set aside. You’ll most likely have extra.

  2. Raise the oven temperature to 425°F. Line the muffin tin with liners or coat each muffin cavity generously with nonstick cooking spray.

  3. In a large bowl, whisk together the eggs, sugar, mashed sweet potato, milk, and oil. In a separate bowl, whisk the two flours, baking soda, baking powder, cinnamon, and salt. Add this to the wet ingredients and mix until just combined. With a spatula, fold in the chocolate chips.

  4. Using an ice cream or cookie scoop, fill each muffin cavity almost to the top. Sprinkle 5-6 chocolate chips on the top of each muffin. Bake in the oven at 425°F for 5 minutes, then lower the oven to 350°F, and bake for an additional 15-17 minutes. The muffins are done when the tops are lightly browned and a toothpick inserted in the center of the muffin comes out clean.

  5. Allow the muffins to cool in the pan for 5 minutes before transferring to a wire rack. Enjoy warm, or the next day!