CARROT + COCONUT LOAF CAKE

IMG_9014.jpg

If you’ve been a follower of The Vivid Kitchen since the beginning (almost 2 years now!), then you are definitely aware of my love for Portland, Maine. In the span of less than two years, Alex and I have visited the city three times, with each visit more special and memorable than the last. Although Portland is such a small city, it has so much to offer in terms of culture, beauty and genuinely good people, and we came to the realization that we want to know all that we can about it on a much deeper level.

That’s why on April 1st, Alex and I are leaving the bubble that is Orange County and moving over 3000 miles to Portland. This is no April Fools’ joke and actually something that has been planned for almost a year!

IMG_8943.jpg

I’ve met a lot of people in the past couple of months that after telling them that I’m moving to Maine, they’re a bit confused because most people around the country consider California the place to live. And although I sometimes may agree with that, California simply isn’t doing it for me right now and I’ve felt this feeling of stagnation for years. I know that sounds kind of bratty to say, but I really think that if you’re not happy with your surroundings, why not leave your comfort zone, try something new and see what else the world has to offer? I know it’s easier said than done, but it’s a risk that Alex and I are both willing to make in order to see where this journey takes us.

Moving to Maine, which is literally the furthest state away from where I am now, is of course going to be an exhilarating and new experience, but I would be lying if I said I wasn’t terrified. But I strongly believe that change is something that is healthy and promotes growth and maturity, and although I’m nervous as hell to leave my comfortable life behind (including my family and friends) I know that nothing but good will come from this decision. And if for whatever reason moving to Portland doesn’t work out, then I’ll at least know that I tried and it’ll be a great story to tell my grandchildren.

What I’m trying to say is, if you’re thinking about moving across the country, starting a new business, or thinking about anything else that may be deemed as a “dream”, do it now, because nothing is forever.

IMG_8997.jpg

As for this blog, I’m going to keep truckin’ on because this platform brings me so much joy and I treat it not only as a source for recipes and the occasional city guides, but also as a snapshot of my life’s experiences. I haven’t decided if I’ll keep it exactly the same or if I’ll sprinkle in more photo diaries and lifestyle posts because I know I’ll be living a whole different life out there filled with many firsts… which I would love to share!

Now let’s get to today’s very delicious recipe.

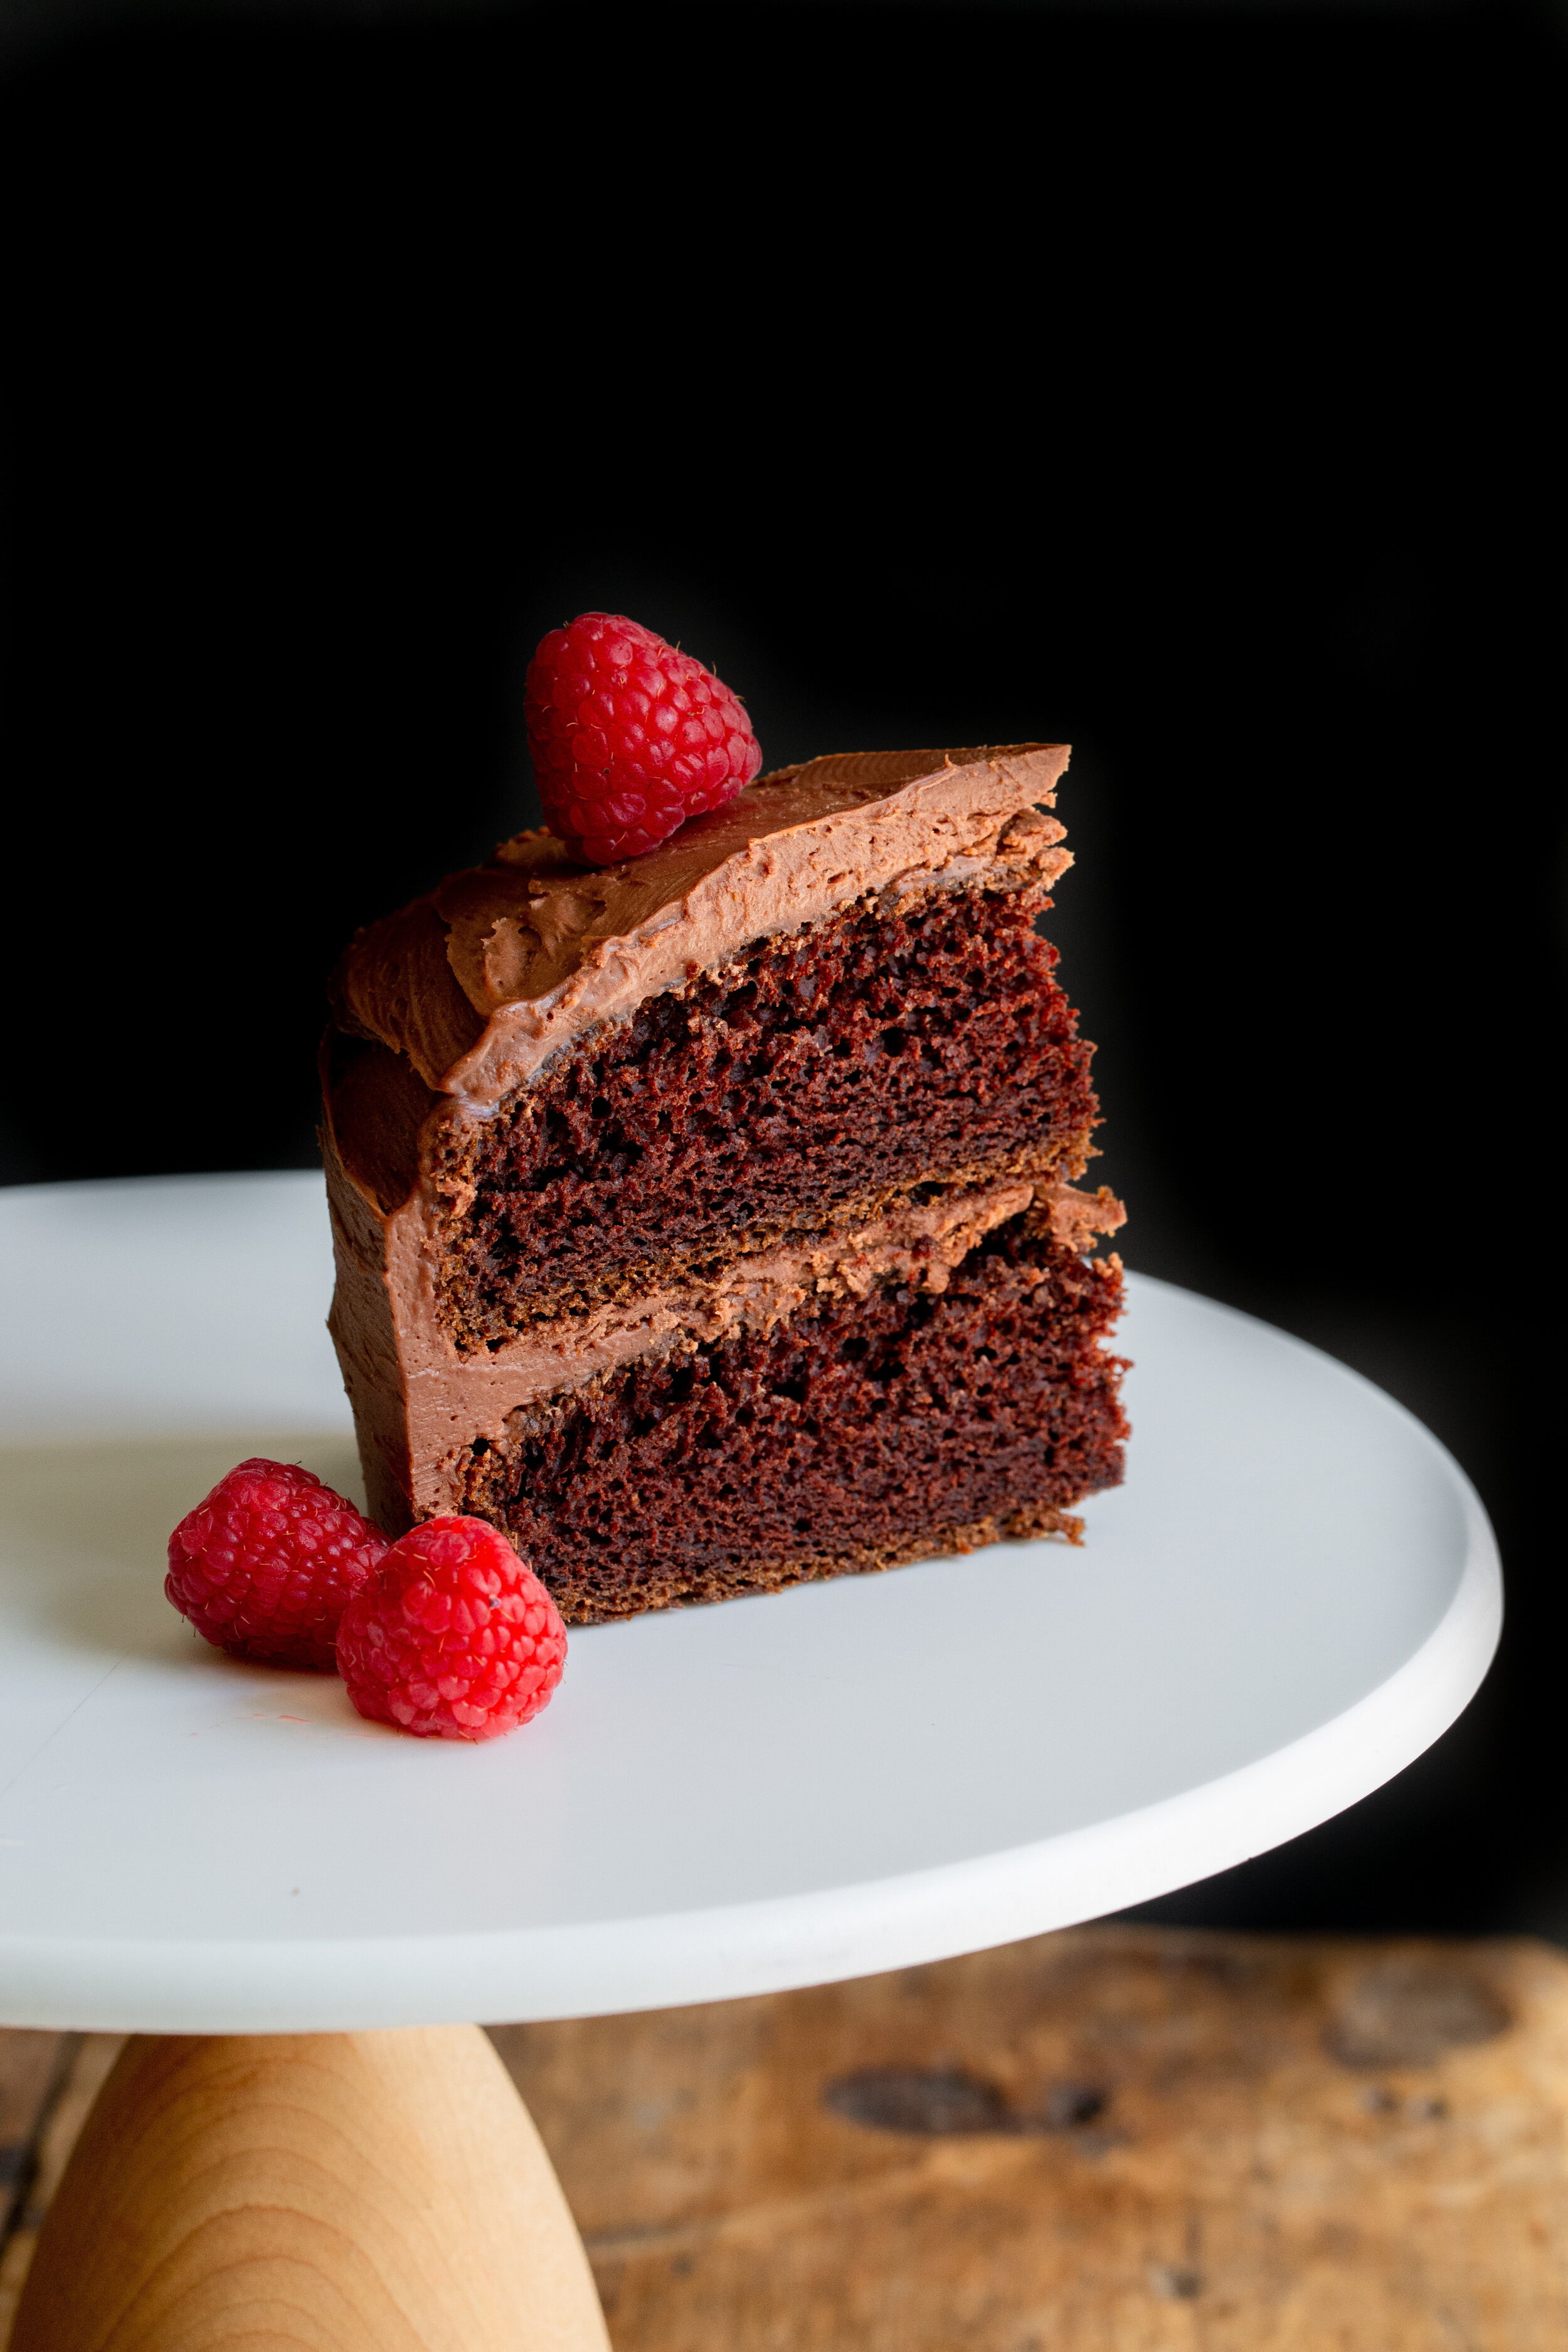
To me, loaf cakes are the best kinds of cake because you can essentially bake any flavor of your choosing, whether it be red velvet, lemon pound cake or carrot cake, but it requires so much less skill and time when compared to a frosted layer cake. For example, I am almost always craving my carrot layer cake, but that recipe in particular calls for a large quantity of each ingredient (grating all those carrots is a chore) and yields a massive cake that serves at least 10 people. This of course isn’t ideal when I just want to snack on it myself and don’t feel like decorating a huge cake. But with a loaf cake, the scale is much smaller, it’s easier to throw together, and more acceptable to bake for oneself. I couldn’t imagine baking myself a two layer cake just because, so loaf cakes are the answer for when you want cake, but without the fuss. Bonus: it’s also easier to transport and thus makes gifting to others much less stressful.

IMG_8955.jpg

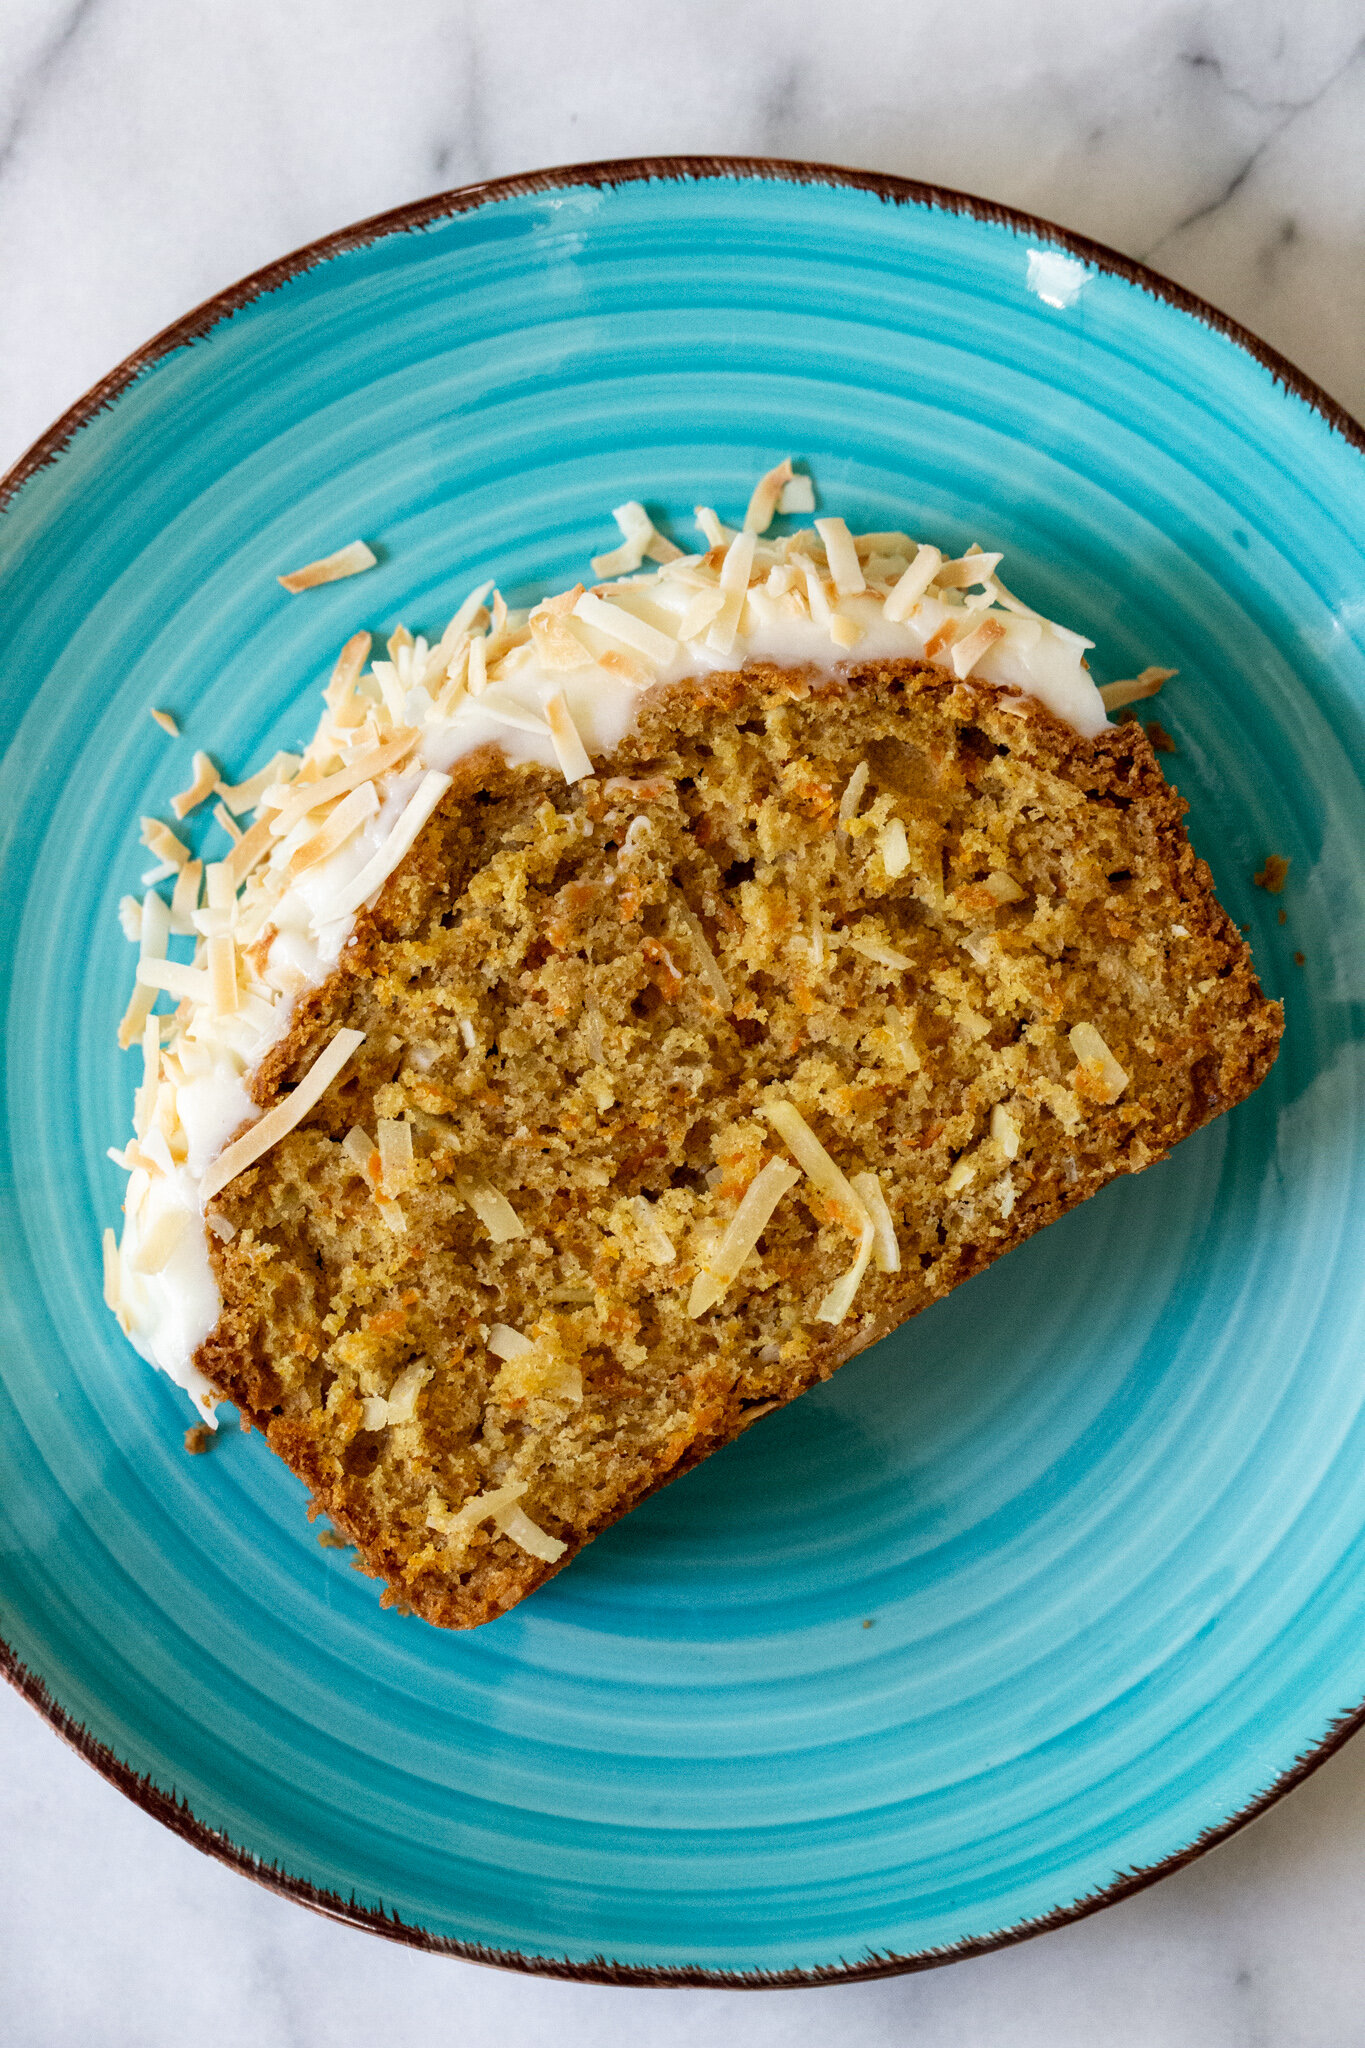
Unlike my carrot layer cake, in today’s version I left out the raisins, chopped pecans and crushed pineapple. The first two are little extras that aren’t necessarily needed (thus making this recipe simpler) while the pineapple was mostly to achieve a moist texture. In my loaf cake version, I’ve added buttermilk to get that needed moisture and unsweetened shredded coconut to give a whole new depth of flavor. Carrots and coconut actually pair really well together and the combination is addicting. I also added toasted unsweetened coconut to the top of the cake not only for aesthetic reasons, but also for more coconut flavor and a nice crunch that was needed since we left out the pecans. In conclusion, I’m probably only going to make this carrot cake from now on.

The cake itself isn’t too sweet which is great if you want to have it without the frosting and eat it for breakfast, but in my opinion, a carrot cake without a cream cheese frosting isn’t a carrot cake at all. But you do you. And lastly, in addition to using all-purpose flour, I added whole wheat flour to get a nuttier flavor, but if you don’t have it in your pantry, just use all-purpose (2 cups worth).

IMG_9007.jpg

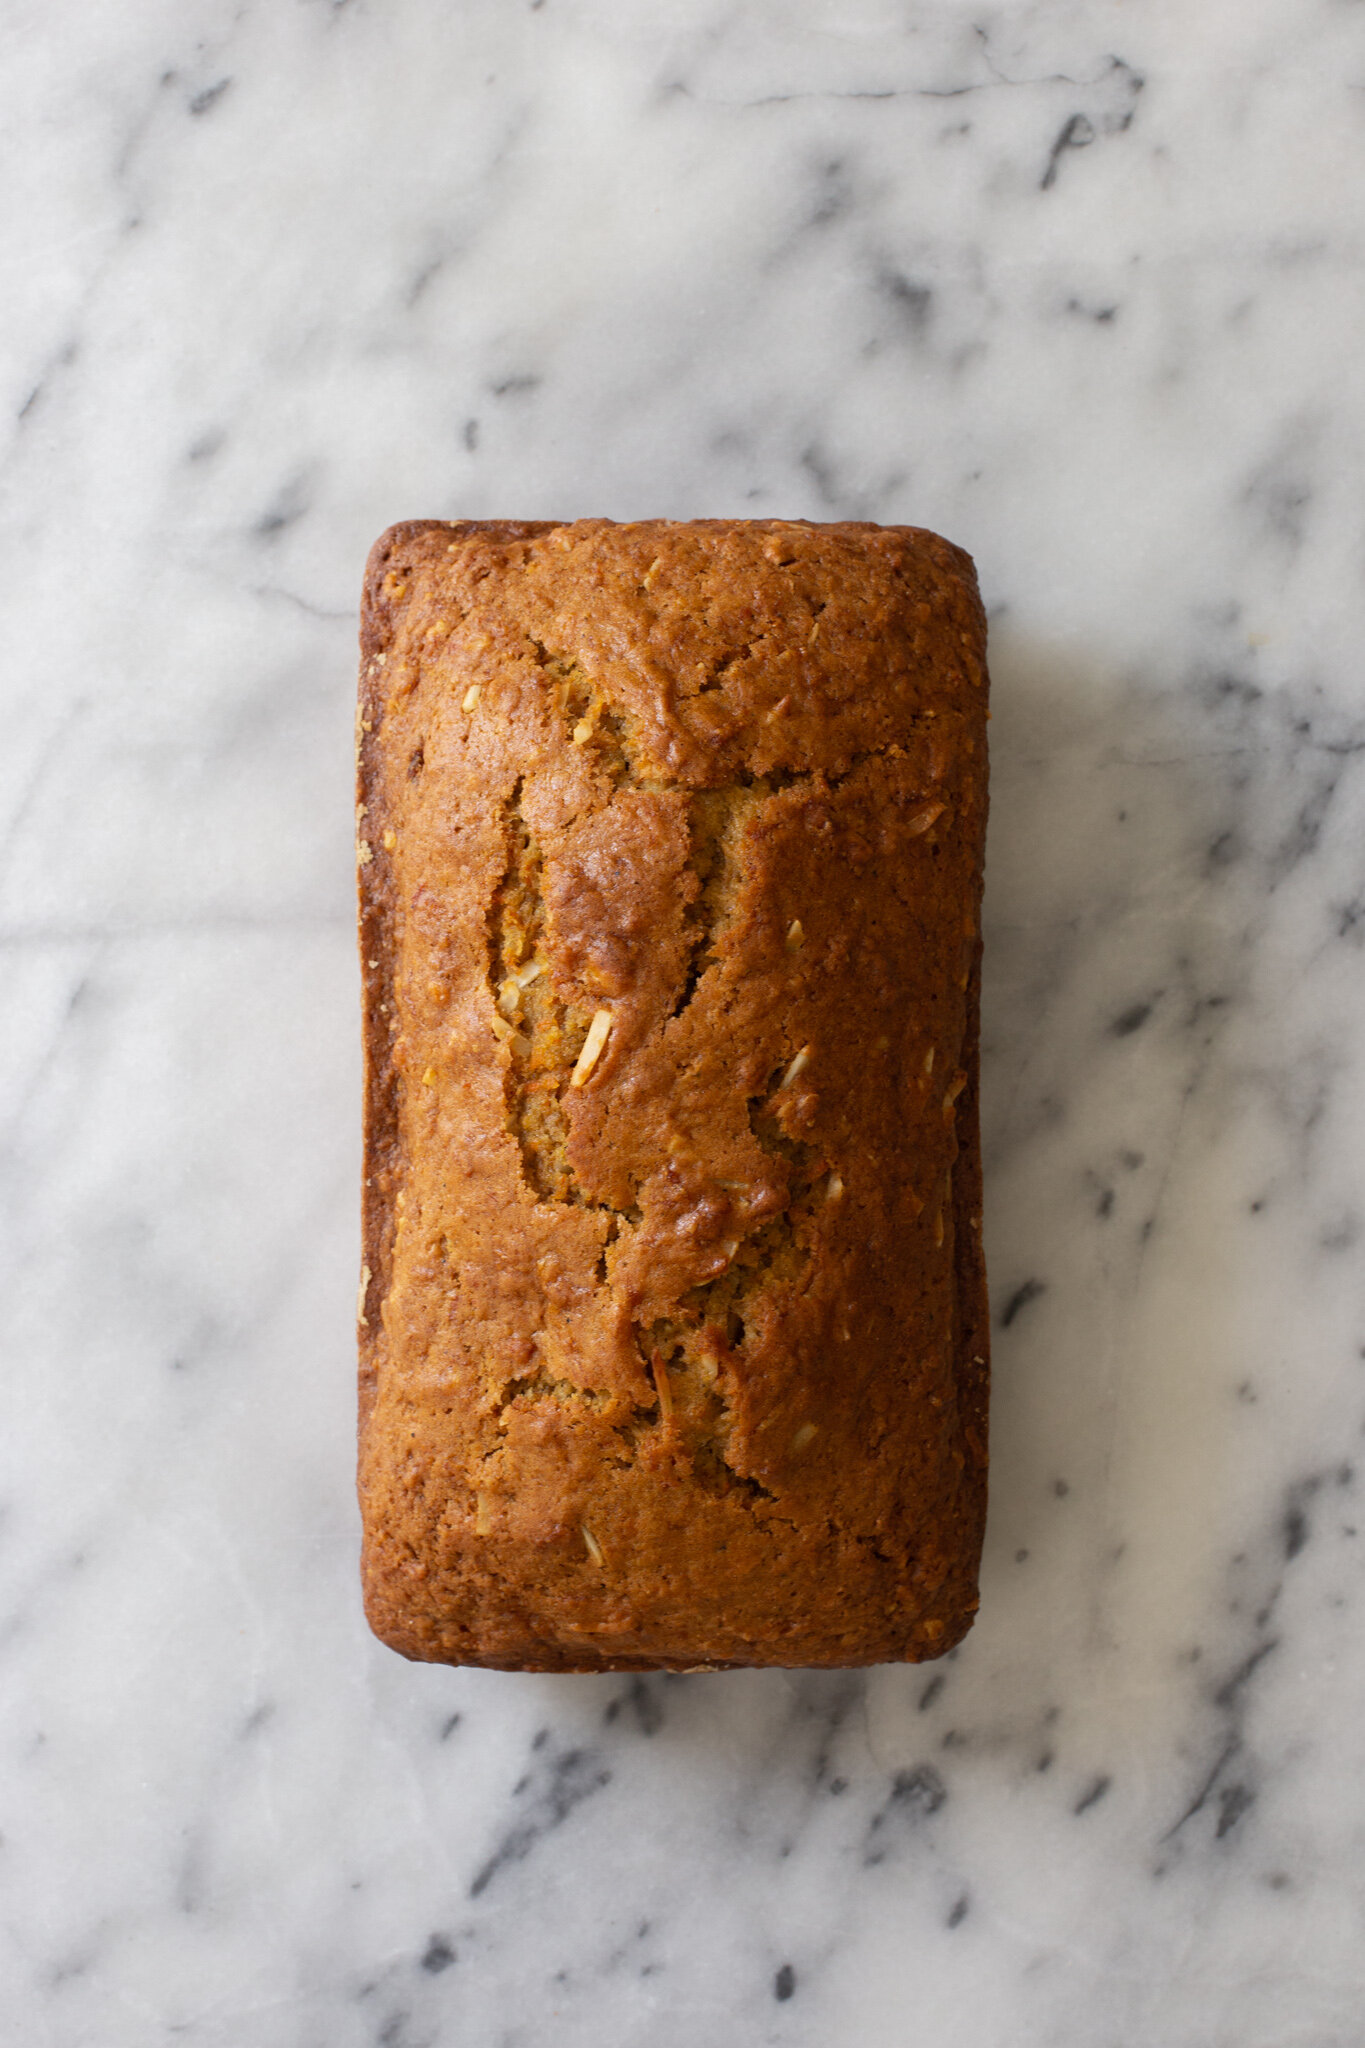
Carrot and Coconut Loaf Cake

Yields (1) 9x5 inch loaf cake

Ingredients

For the cake:

  • 1 cup whole wheat or white whole wheat flour

  • 1 cup all-purpose flour

  • 3/4 cup granulated sugar

  • 1 tsp. baking soda

  • 1 tsp. ground ginger

  • 3/4 tsp. ground cinnamon

  • 1/2 tsp. ground nutmeg, freshly grated recommended

  • 1/2 tsp. kosher salt

  • 1/2 cup vegetable oil

  • 2 large eggs

  • 1/4 cup buttermilk

  • 1 tsp. vanilla extract

  • 1 cup finely grated carrots

  • 1/2 cup unsweetened shredded coconut

For the frosting:

  • 4 oz. cream cheese, softened

  • 2 tbsp. unsalted butter, softened

  • 1 1/2 cups confectioners’ sugar

  • Pinch of kosher salt

  • 1 tsp. vanilla extract

  • 1 tbsp. milk or heavy cream (almond milk works as well)

To finish:

  • 1/2 cup unsweetened shredded coconut, toasted

Directions

Make the cake:

  1. Preheat the oven to 350°F and grease and flour a 9x5” loaf pan.

  2. Whisk the flour, sugar, baking soda, spices and salt together in a large bowl. Set aside.

  3. In a small/medium bowl, whisk the oil, eggs, buttermilk and vanilla extract together until well combined. Add this to the bowl of dry ingredients and combine with the whisk.

  4. Stir in the shredded carrots and coconut with a spatula. Transfer the batter to the prepared cake loaf pan, and smooth the top with a spatula. Bake in the oven for 45-55 minutes, or until a toothpick inserted in the center comes out clean. Transfer the pan to a cooling rack and wait about 5 minutes before removing the cake from the pan.

Make the frosting:

  1. In the bowl of a stand mixer (or a large bowl if using a hand mixer) fitted with the paddle attachment, mix the cream cheese and butter together until smooth and no lumps remain. Add the confectioners’ sugar, mix on low for 10 seconds, and then turn the speed up to medium until incorporated. Add the milk/cream, starting with 1 tbsp., the vanilla extract and pinch of salt. Mix until combined.

  2. When the cake is completely cooled, add the frosting to the top and use an offset spatula to spread it. Sprinkle the toasted shredded coconut on top and enjoy immediately!

6 INCH CHOCOLATE LAYER CAKE

IMG_8899-3.jpg

With Valentine’s Day right around the corner, I thought it would be a great time to give another chocolate-focused recipe. Last year at this time, I posted a recipe for my very decadent chocolate cheesecake which, although amazing, is quite the undertaking and leaves you with a giant cheesecake (which may not be ideal if you’re only making dessert for you and your boo). So, this year I wanted to give an option for a smaller dessert that is also extremely simple to make. Enter the 6” chocolate layer cake with chocolate frosting.

IMG_8440.jpg

Confession: I love chocolate cake. I love it so much that I don’t discriminate where it comes from, whether it’s a from a box combined with store bought frosting, a slice of sheet cake from the grocery store bakery, or a fancy Opera cake with layers of buttercream and ganache. If someone were to ask me what my favorite dessert is, my answer would be a simple slice of chocolate cake (OR vanilla ice cream with hot fudge - I’m pretty basic). Although chocolate cake is a favorite of mine, it took me so long to post a recipe for it because I couldn’t decide on which recipe to be my first. I believe that the recipe I’m providing you with today is perfect and I’m glad I waited to share it with you just in time for a holiday that is synonymous with chocolate desserts.

IMG_8526.jpg

In this recipe, there are only two layers of cake and unlike most cake recipes where the layers are either 8” or 9” in diameter, this recipe calls for using 6” x 2” cake pans. I use these from the company Fat Daddio and they’re great. In the end, you’ll have a baby layer cake that is more than enough for you and your significant other, but also perfect for serving at a “Galentine’s” Day for you and your closest 5 girlfriends (or boyfriends!).

IMG_8879.jpg

The cake itself is made using only one bowl and you don’t even need to use a stand mixer or hand mixer. And while the cake is baking, you can clean out that same bowl and use it for the frosting as well. Less dishes = more time for romance, wink wink.

And speaking of the cake, buttermilk and a little bit of vegetable oil is added to ensure a perfectly moist texture while the addition of freshly brewed coffee intensifies the chocolate flavor. For the coffee, you can use decaf or regular, or if you’re not a coffee drinker, you can replace it with hot water instead. As for the chocolate frosting, you have the choice of using melted semisweet or bittersweet chocolate, but there’s not that much of a difference between the two.

I hope everyone haves a great Valentine’s Day whether you spend it alone, with friends, family or your special someone. Alex and I will be heading out to Scottsdale for the weekend, so we’ll definitely have a day filled with hiking, great food and lots of wine.

IMG_8578-4.jpg

6 Inch Chocolate Layer Cake

Makes (1) two layer, 6 inch cake

Recipe adapted from A Cozy Kitchen

Ingredients

For the cake:

  • 3/4 cup all-purpose flour

  • 1/3 cup unsweetened cocoa powder

  • 3/4 cup granulated sugar

  • 3/4 tsp. baking soda

  • 1/2 tsp. baking powder

  • 1/2 tsp. kosher salt

  • 1 large egg

  • 1 1/2 tsp. vanilla extract

  • 1/3 cup plus 1 tbsp. buttermilk

  • 2 tsp. vegetable oil

  • 1/3 cup plus 1 tbsp. freshly brewed hot coffee

For the frosting:

  • 3/4 cup (1.5 sticks) unsalted butter, room temperature

  • 2 cups powdered sugar

  • 3 oz. bittersweet or semisweet chocolate, melted

  • 1 1/2 tbsp. milk or heavy cream (unsweetened almond milk works as well)

  • 1 1/2 tsp. vanilla extract

Directions

Make the cake:

  1. Preheat the oven to 350° F. Grease two 6” x 2” cake pans and line each bottom with parchment paper. Then grease the parchment paper and flour the pans.

  2. In a large bowl, whisk together the flour, cocoa powder, sugar, baking soda, baking powder and kosher salt. To this, add the egg, vanilla extract, buttermilk and vegetable oil. While whisking, slowly pour in the hot coffee (so not to cook the egg) and mix until just combined.

  3. Divide the batter (which will be very liquid-y) between the two cake pans and bake in the oven for 25-30 minutes, or until a toothpick inserted in the center comes out clean. Allow the cakes to cool in the pan for 5 minutes before removing and transferring to a cooling rack. While the cakes cool completely, make the frosting.

Make the frosting and decorate:

  1. In the bowl of a stand mixer fitted with the paddle attachment (or in a large bowl if using a hand mixer) cream the butter until smooth, a couple of minutes. Into the bowl, sift the powdered sugar and then add in the melted chocolate, milk or heavy cream and vanilla extract. Mix until well-incorporated and no lumps of sugar remains.

  2. Place one of the layers on a cake stand or plate. With a butter knife or offset spatula, spread a thick even layer of the frosting on top. Carefully stack the second layer on top of the frosting and frost the entire cake, including the sides. Decorate the cake with raspberries, strawberries and/or powdered sugar. Enjoy!

PEAR SPICE CAKE WITH MASCARPONE

D7B3E299-9B73-46DD-9959-8A28C5A8C44C-D9E9220B-AE7D-4F79-8150-3B4A19619ACC.jpeg

After a stressful couple of weeks of packing and moving into a new place, we’re finally all settled in! I haven’t moved in three years and now can remember why I try to avoid it at all costs: it’s absolutely no fun. The only good thing that comes from it is purging all the crap that you’ve accumulated over the years and being able to make space for new stuff. I’ve finally figured out a good baking and photography setup as well and I’m beyond happy with it. I was worried that working in a new kitchen would mess up my lighting situation for photography, but I’m ecstatic to report that the lighting is better than my previous apartment.

96AD52DA-FADF-4A90-8974-4022796C2086-4847BA18-CF0E-4BFD-9324-081BB131C581.jpeg

I’d been wanting to include more cake recipes on my blog, whether multi-layered with frosting or simple snacking cakes. Although I love eating the former option, when it comes to baking, I will always go for the latter. A single layer cake, whether it be an upside-down cake, a skillet cake, or one made in a springform pan (like today’s recipe) is much more approachable. They usually are amazing on their own, aka no frosting is needed, but can easily be elevated with a simple dusting of confectioners’ sugar or homemade whipped cream. Furthermore, I strongly believe that these kinds of cakes are perfect for any time of day, not only for dessert, and also are easily transportable. Wins all around.

So I set out to make a new single layer cake and used a fruit that I had not featured on the blog yet: pears! I feel like pears are the ugly cousin to the ever-so-popular apple and are therefore overlooked in the kitchen. I must admit that I even forget about their existence, especially since I eat an apple a day during the autumn season. But I’m happy to report that the pear cake that I made not only highlights the not-so-popular fruit, but makes you crave it even more.

915B765A-F965-461B-BCFD-1DBD400BD056-5B5FC334-0630-43CF-9B28-05601638FDCC.jpeg

Since pears are in season during the cozy autumn and winter months, I wanted to pair it with plenty of warm spices (5 to be exact) including ginger and cloves. The moment you take a bite of the cake, there’ll be no doubt in your mind that you’re eating a spice cake… it’ll hit you right away. And to give the cake an insanely moist texture, I reached for mascarpone cheese instead of what you might find in other cakes (like sour cream, yogurt or vegetable oil). I chose the mascarpone because I wanted to give the recipe a bit of an Italian feeling - mascarpone is essentially Italian cream cheese - and also because I only have one other recipe featuring it (my fruit tart). I was a bit nervous that it wasn’t going to work, but in the end, the risk was worth it. The texture is perfect and makes the cake memorable.

87DC8D1A-E174-41DC-927B-6B0021C565B9-C77B26EA-B9CF-460E-8260-9DA0F5F90D0B.jpeg

I think this cake would be perfect for Thanksgiving and/or Christmas time as a little snack or brunch item for any house guests or family members that are visiting. Like almost all of my recipes, this one is anything but fussy, yet it yields an amazingly delicious treat that also makes the house smell incredible. In my opinion, those kinds of recipes are essential during the chaotic holiday months. Give this cake a try before pears are out of season!

81B9553D-3A90-44EA-8A0B-85F0BB008A41-7B74DB4A-8D75-4198-B573-E1B7B551B698.jpeg

Pear Spice Cake with Mascarpone

Makes (1) 9-inch cake

Ingredients

9C849CDD-DCC7-4435-9AB9-D126589B3817-0E68FEE2-29B7-4596-B29F-C4C98AA01936.jpeg
  • 1 1/2 cups all-purpose flour

  • 1 tsp. baking powder

  • 1 tsp. ground cinnamon

  • 3/4 tsp. ground ginger

  • 1/4 tsp. clove

  • 1/4 tsp. nutmeg

  • 1/8 tsp. allspice

  • 1/4 tsp. kosher salt

  • 1/2 cup (1 stick) unsalted butter, room temperature

  • 1 cup granulated sugar

  • 3 large eggs, room temperature

  • 1/2 tsp. vanilla extract

  • 1/2 cup mascarpone cheese

  • 2 ripe pears, thinly sliced

  • Confectioners’ sugar, to finish

Directions

  1. Preheat the oven to 350°F and grease a 9-inch springform cake (a plain cake pan works as well) with either butter or cooking spray.

  2. In a medium bowl, whisk together the flour, baking powder, spices and salt. Set aside.

  3. In the bowl of a stand mixer fitted with the paddle attachment (or in a large bowl if using a hand mixer) cream the butter and sugar together until light and fluffy, about 3 minutes. Scrape down the bowl with a spatula.

  4. Add in the eggs one at time, making sure each one is incorporated until adding the next. Mix in the vanilla extract, and then finally add the mascarpone cheese. Mix together until no more lumps of mascarpone remain.

  5. With the mixer on low, slowly add in the flour mixture and stop the machine when it’s almost all combined. Finish mixing with a spatula and then transfer the batter to the pan. The batter is on the thicker side, so use your spatula or an offset spatula to create a smooth, even layer. Assemble the pear slices on top of the cake in any pattern you desire.

  6. Bake the cake in the preheated oven for 45-55 minutes, or until the cake has puffed up, is a deep golden brown, and a toothpick inserted in the center comes out fairly clean.

  7. Allow the cake to cool on a cooling rack for about 5 minutes before removing the springform pan attachment. Dust with confectioners’ sugar and enjoy!