BAKED LEMON GLAZED DOUGHNUTS

IMG_9035.jpg

I have a pretty funny relationship with doughnuts. Growing up, my mom would have these huge garage sales (we're talking hundreds of clothes for sale) and my sister, Tianna, and I would have to get up at the crack of dawn to help my mom put up signs around the neighborhood and drag everything from the garage to the driveway. My sister and I absolutely hated doing it, and so the only way my mom could get us to help was by treating us early on with a box of doughnuts from Yum Yum Donuts or Winchell's. Tianna and I were pretty lazy kids, but when food was promised we happily obliged (somewhat).

IMG_9208.jpg
IMG_8887.jpg

This association of doughnuts with garage sales has remained in my mind ever since and so I never really crave doughnuts unless for *special morning occasions* - getting up early for flea market excursions or before long road trips. I honestly beg my mom all the time to have garage sales solely for the excuse to eat a box of doughnuts. Yes, I know I can go buy a box of doughnuts whenever I please but it just wouldn't be the same!

IMG_9005.jpg

My favorite kind of doughnut has been and always will be a Long John, the yeast risen unfilled doughnut bar with chocolate icing. With that said, I have never attempted to re-create Long Johns at home, or any fried doughnuts for that matter. I guess I've just been a little scared of the hot oil and making a greasy mess in my kitchen. Best to leave the frying to the professionals (for now!).

IMG_9081.jpg

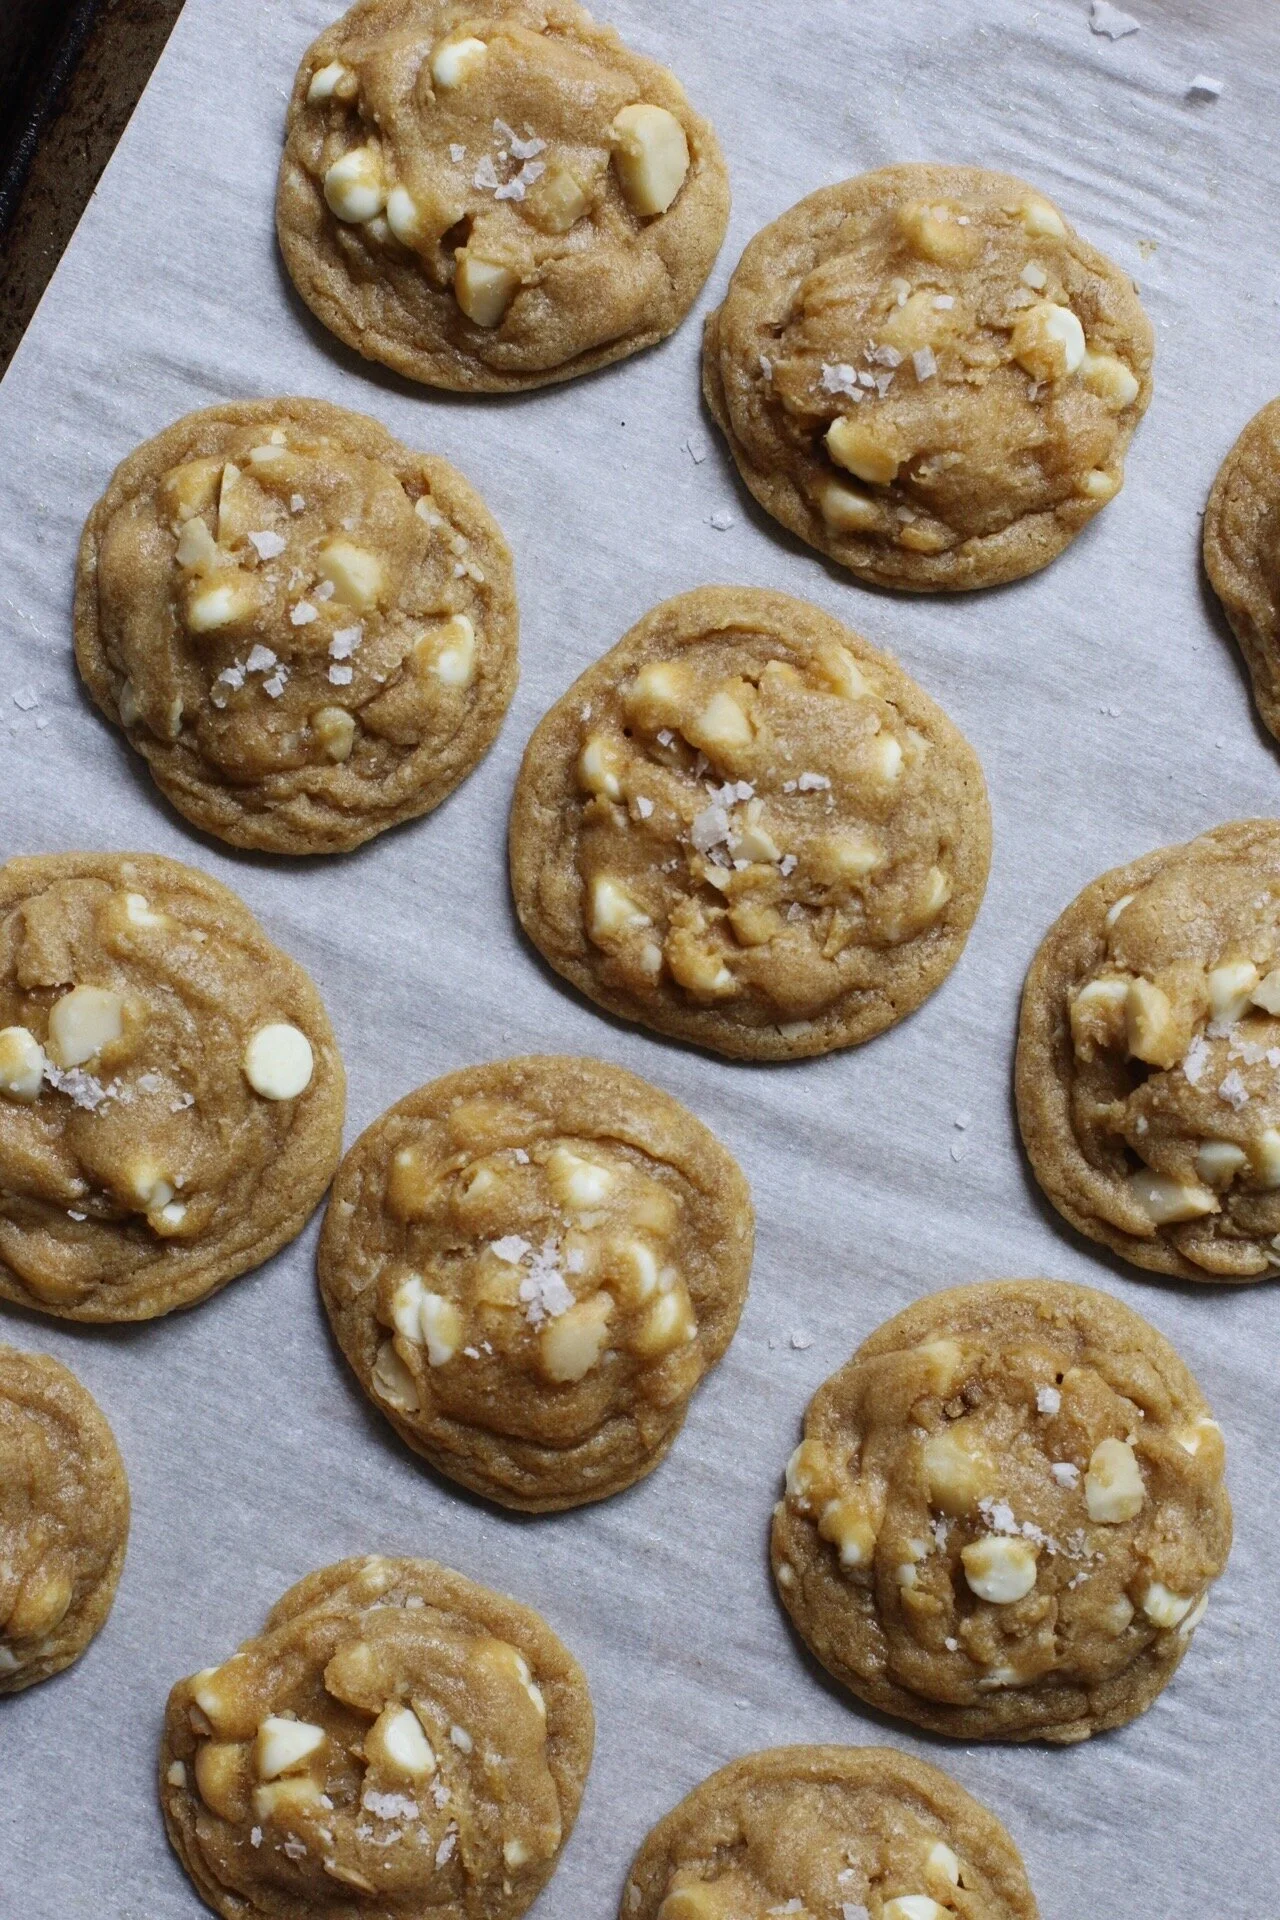
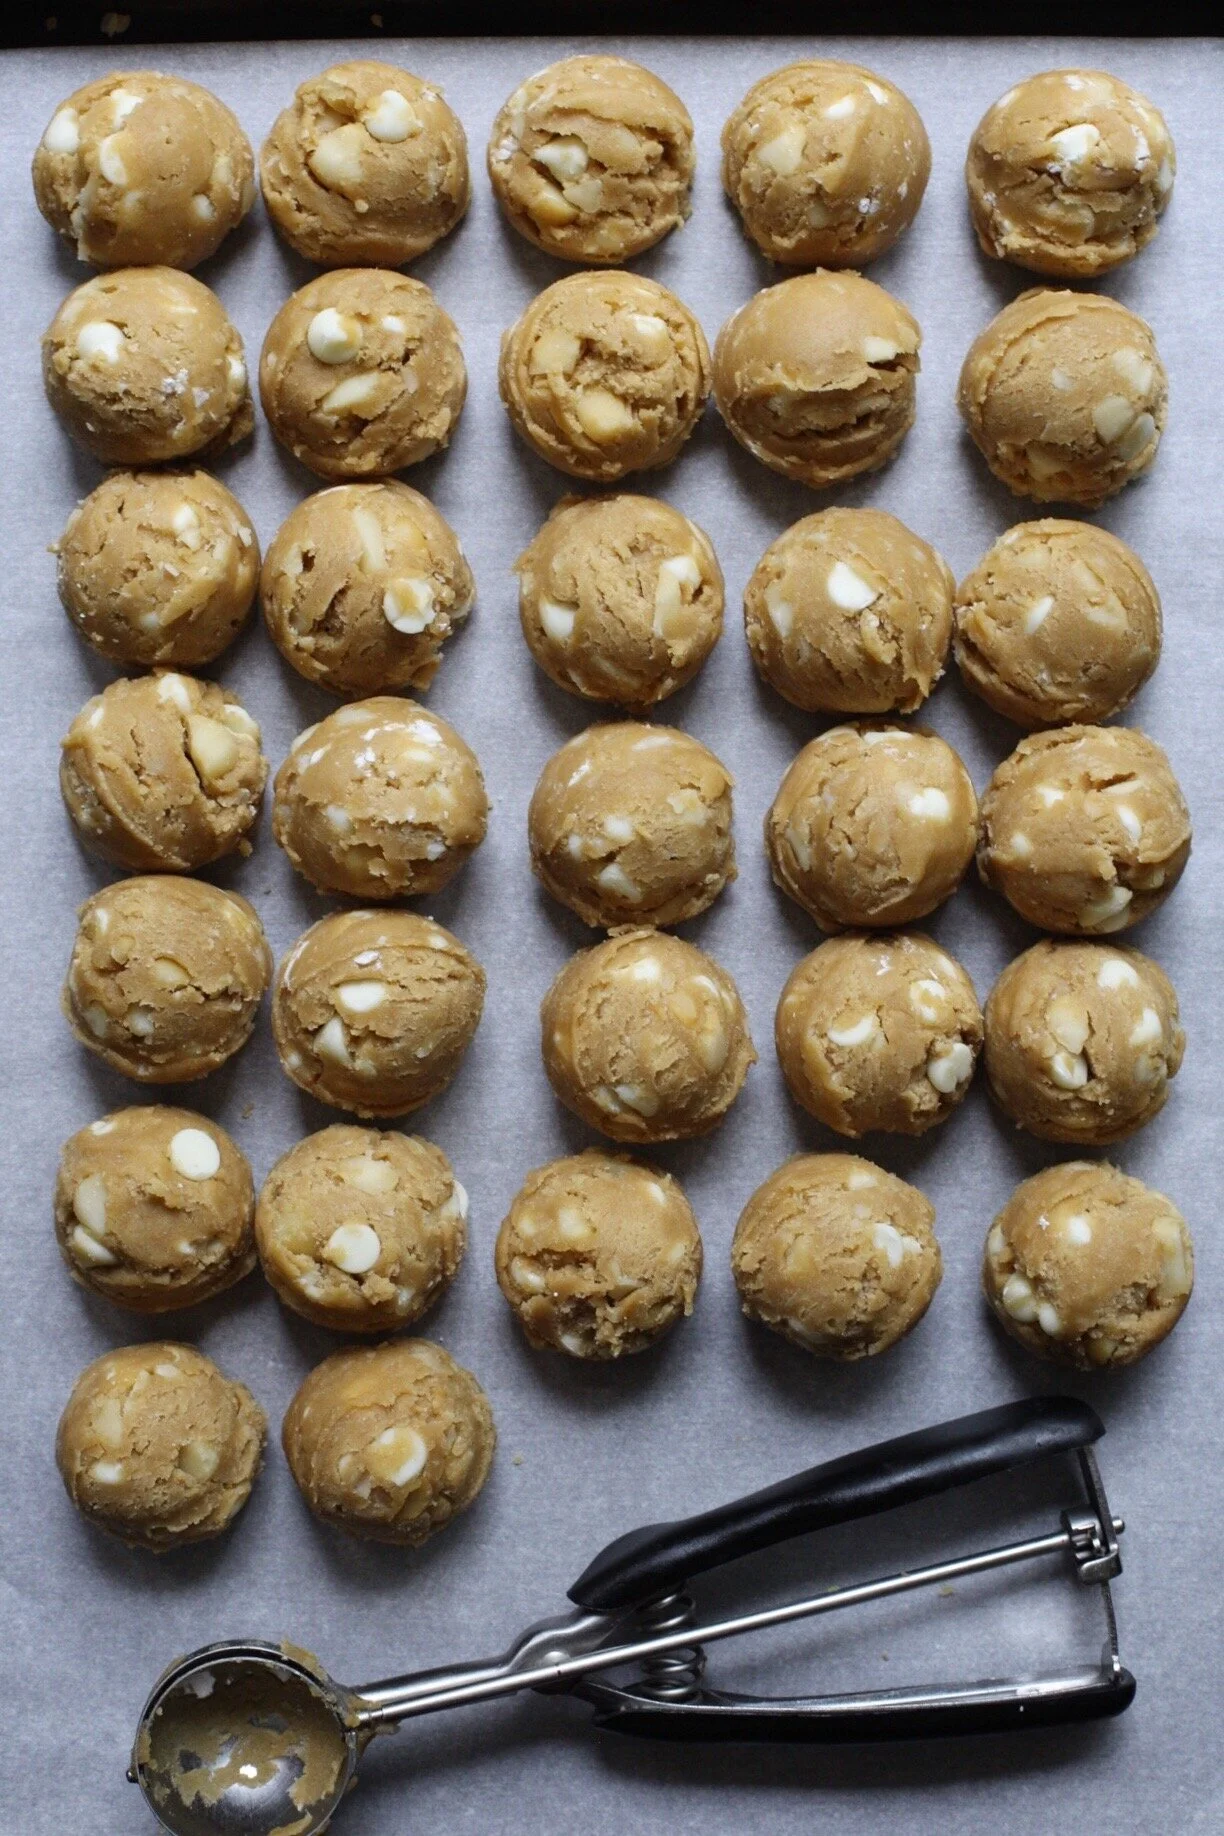
But when it comes to baking doughnuts, I have no problem whipping up a batch whenever Alex has a hankering for a slightly healthier version of doughnuts. What makes baking doughnuts so much easier than frying is 100% due to the invention of the doughnut pan, With this amazing contraption, you don't have to worry about cutting out perfect circles or deal with removing the centers; the hard work is done for you. I will say that baked doughnuts do taste very different than fried doughnuts in the sense that they taste more like cake, but listen to me when I say that they are still very delicious and will satiate your doughnut cravings.

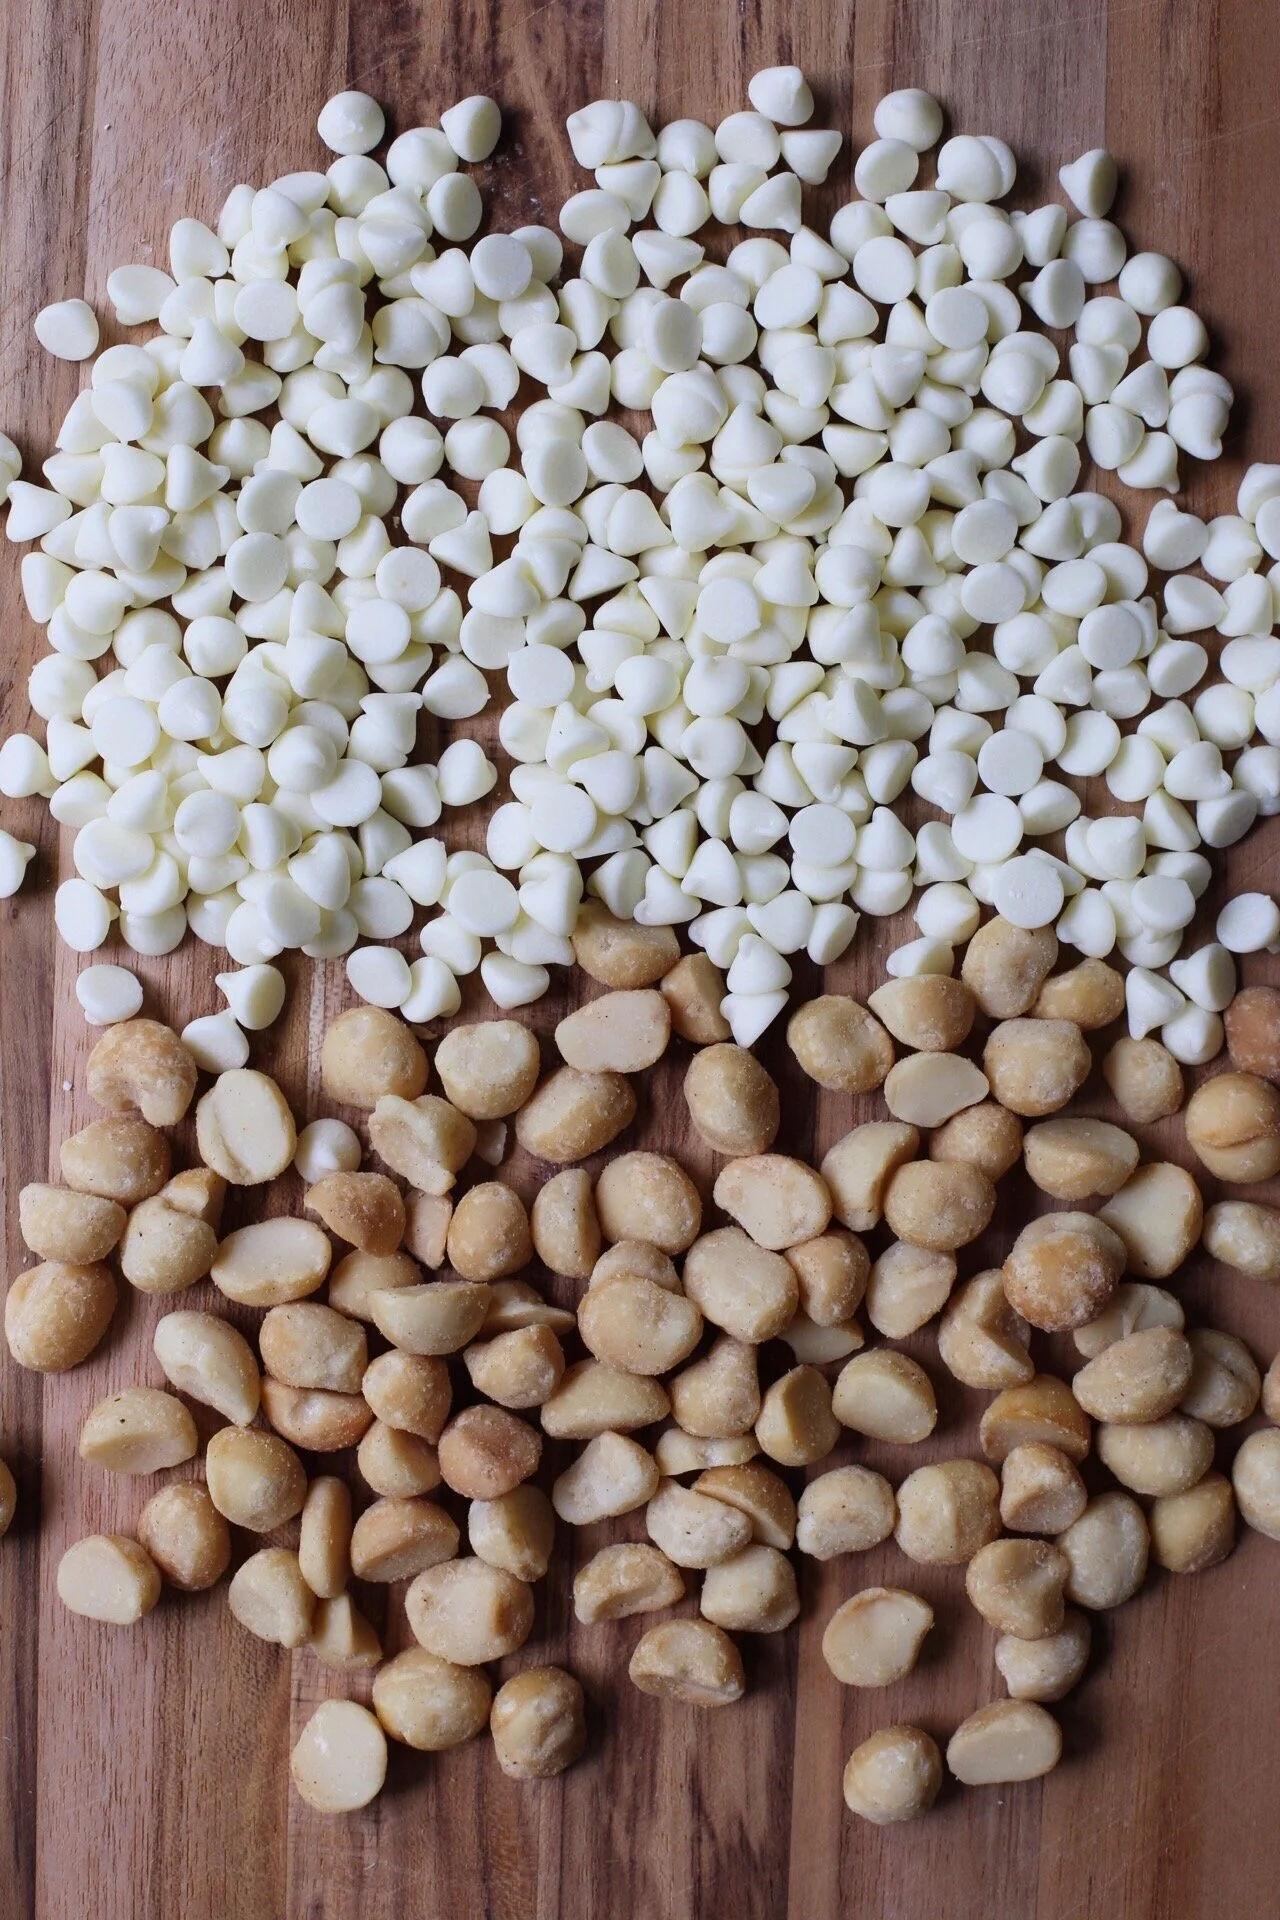
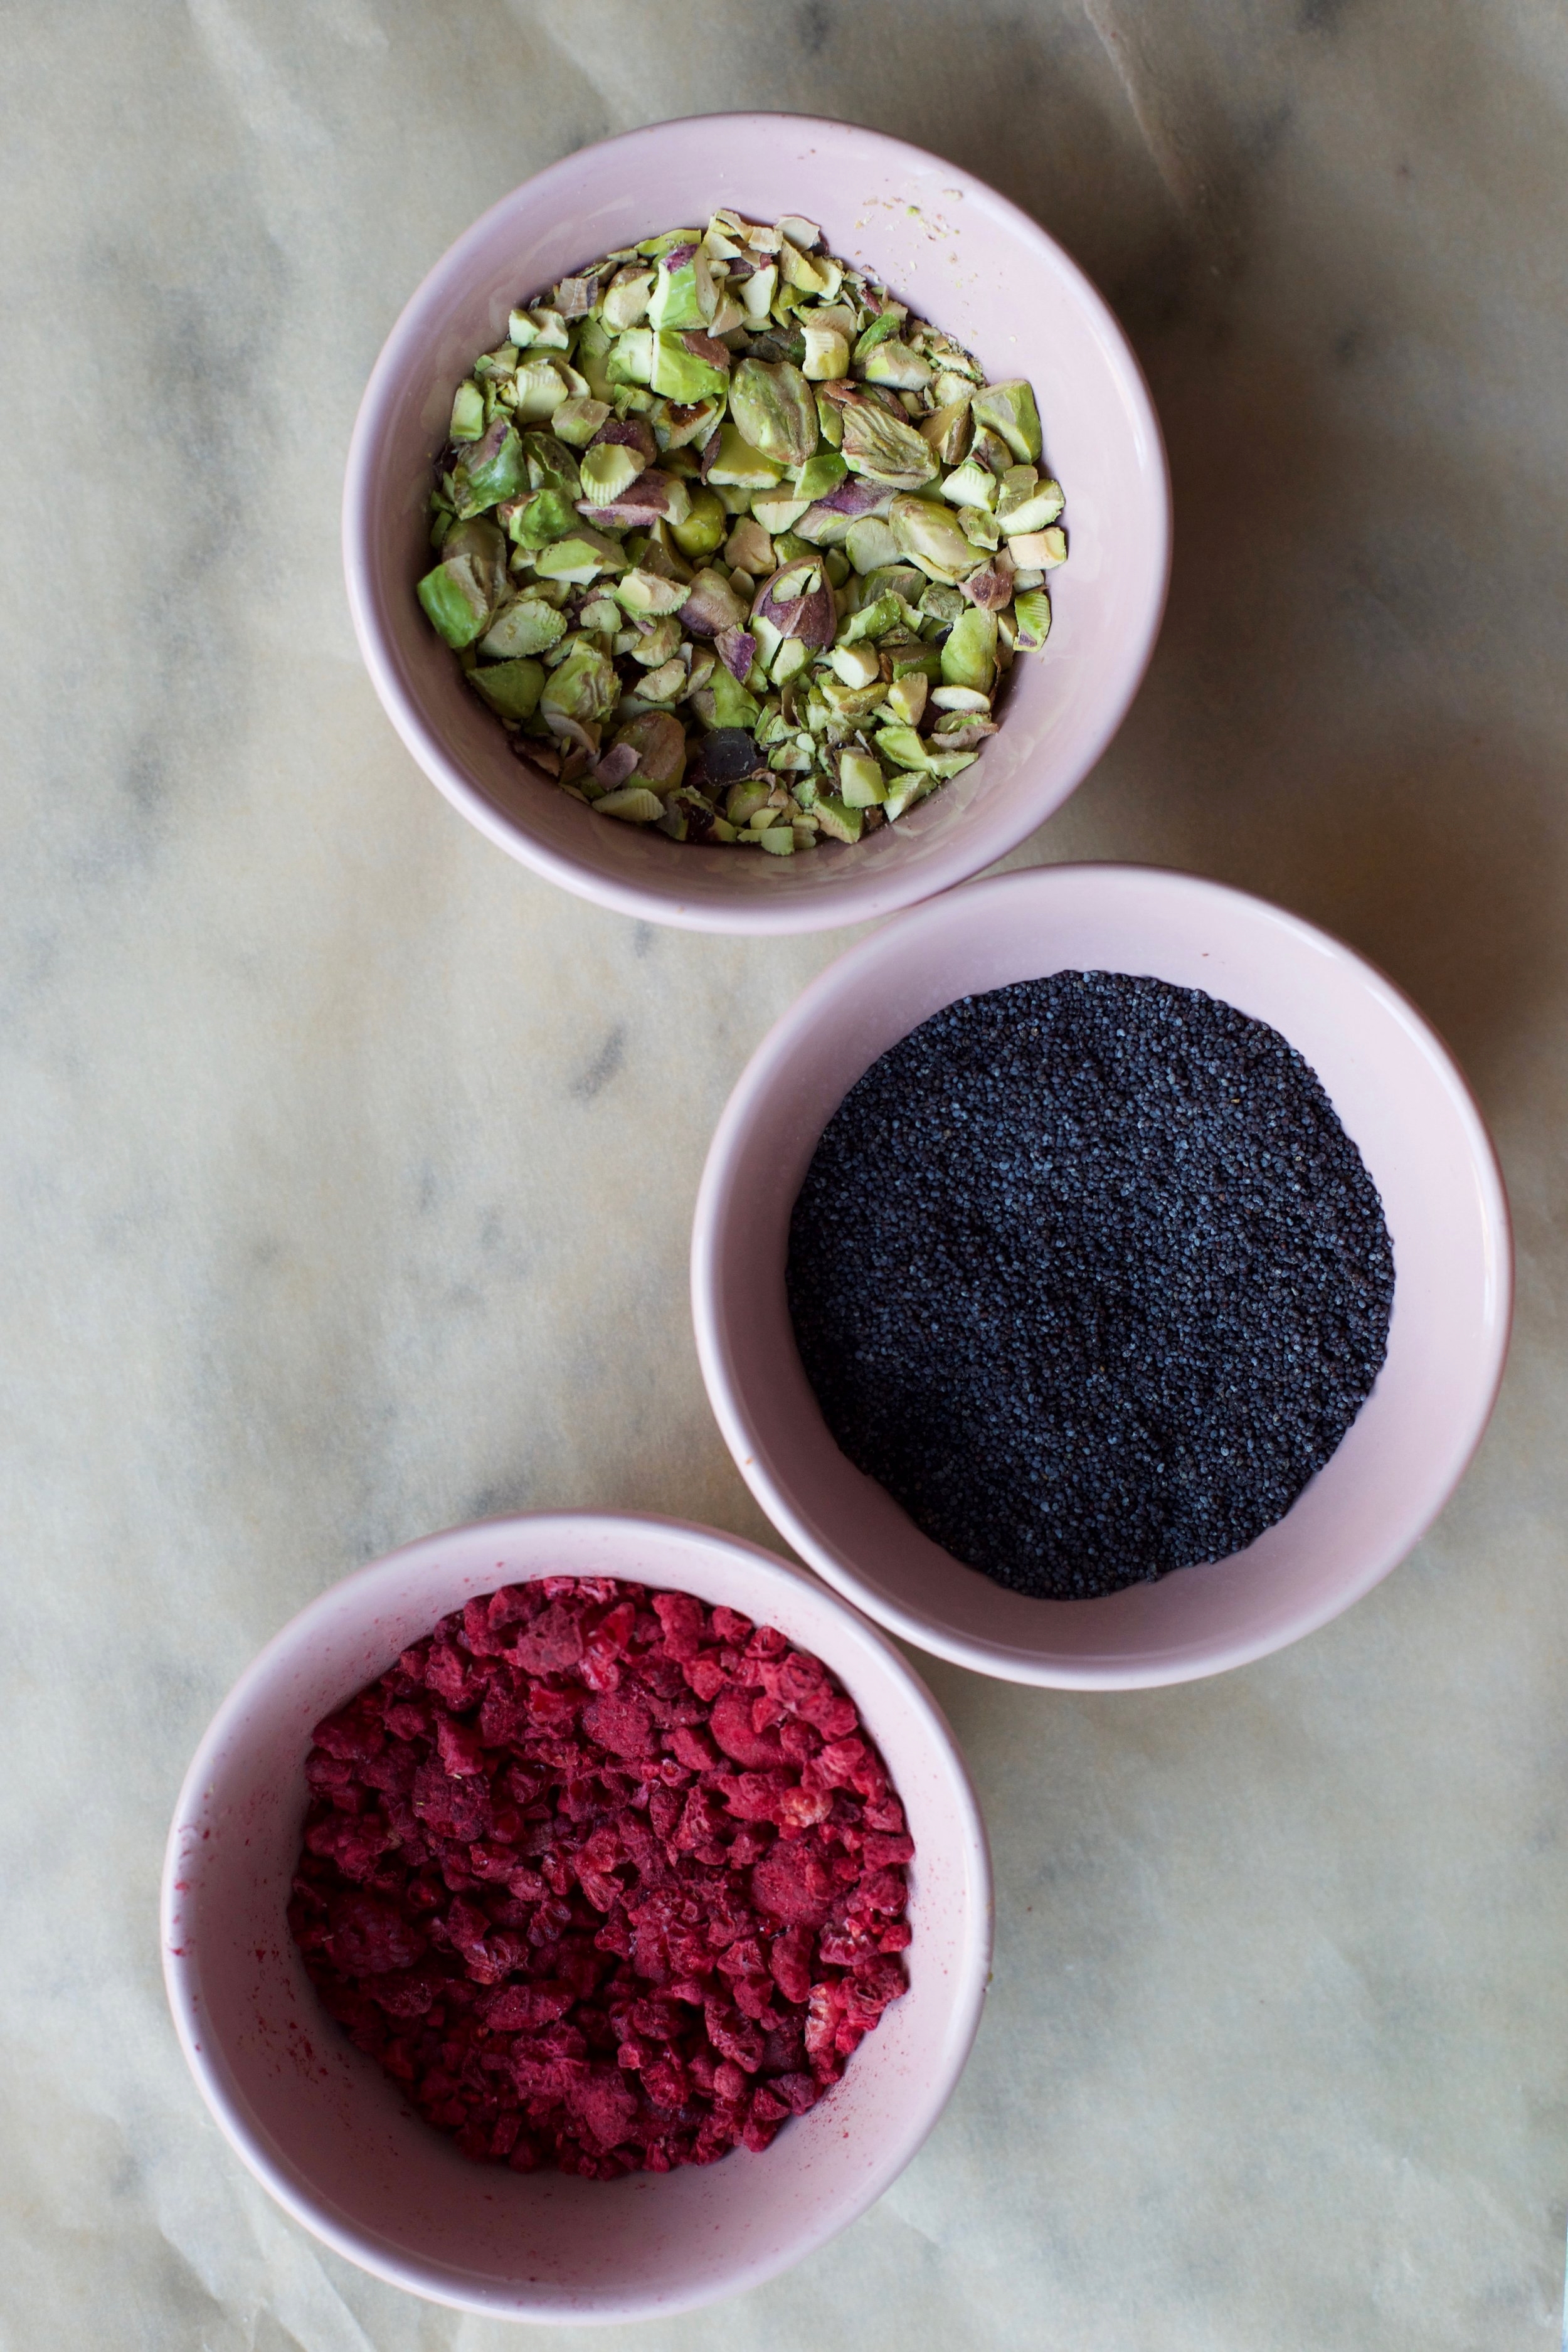
I've made a variety of baked doughnut over the years and one of my favorites was a lemon poppyseed recipe. This time around I decided to simply do a lemon doughnut with a lemon glaze and leave it up to the baker on which topping to add: pistachios, freeze dried raspberries (strawberries will work as well), or poppyseed. All three of these toppings compliment lemon very well and give nice texture to the light and cakey pastries. Feel free to mix it up and use multiple toppings (pistachios and freeze dried raspberries look gorgeous together). 

IMG_9193.jpg

Baked Lemon Glazed Doughnuts

IMG_9037.jpg

Recipe adapted from Williams Sonoma Taste

Yields 14-16 doughnuts

Ingredients

For the doughnuts:

  • Nonstick cooking spray

  • 1 1/2 cups all-purpose flour

  • 1/4 tsp. baking soda

  • 3/4 tsp. baking powder

  • 1/4 tsp. salt

  • 1/3 cup milk (any kind will work)

  • 1/3 cup buttermilk

  • Zest and juice from 1 lemon

  • 1/2 cup sugar

  • 6 tbsp. unsalted butter, room temperature

  • 1 large egg, room temperature

  • 2 tsp. vanilla extract

For the lemon glaze:

  • 2 cups confectioners' sugar

  • 4 tbsp. unsalted butter, melted

  • 2-4 tbsp. milk (any kind)

  • 2 tbsp. lemon juice

  • 1 1/2 tsp. vanilla extract

  • Chopped roasted pistachios, crumbled freeze dried raspberries, and/or poppyseed, to finish (optional)

Directions

  1. Preheat oven to 375°F. Spray doughnuts pan(s) with nonstick cooking spray. In a large bowl, whisk together the flour, baking soda, baking powder and salt.

  2. In a measuring cup, combine milk, buttermilk, and lemon juice.

  3. In the bowl of a stand mixer fitted with a paddle attachment (or in a large bowl that you will use with your hand mixer), mix sugar and lemon zest by hand until combined and very fragrant. Add the butter and beat on medium-low speed until light and fluffy, about 3 minutes. Add the egg and vanilla extract and mix again for about 1 minute. Scrape down the sides of the bowl.

  4. With the stand mixer on low speed, alternate between adding the flour mixture and liquid mixture to the stand mixer bowl in 3 additions, starting and ending with the flour. Mix until well combined.

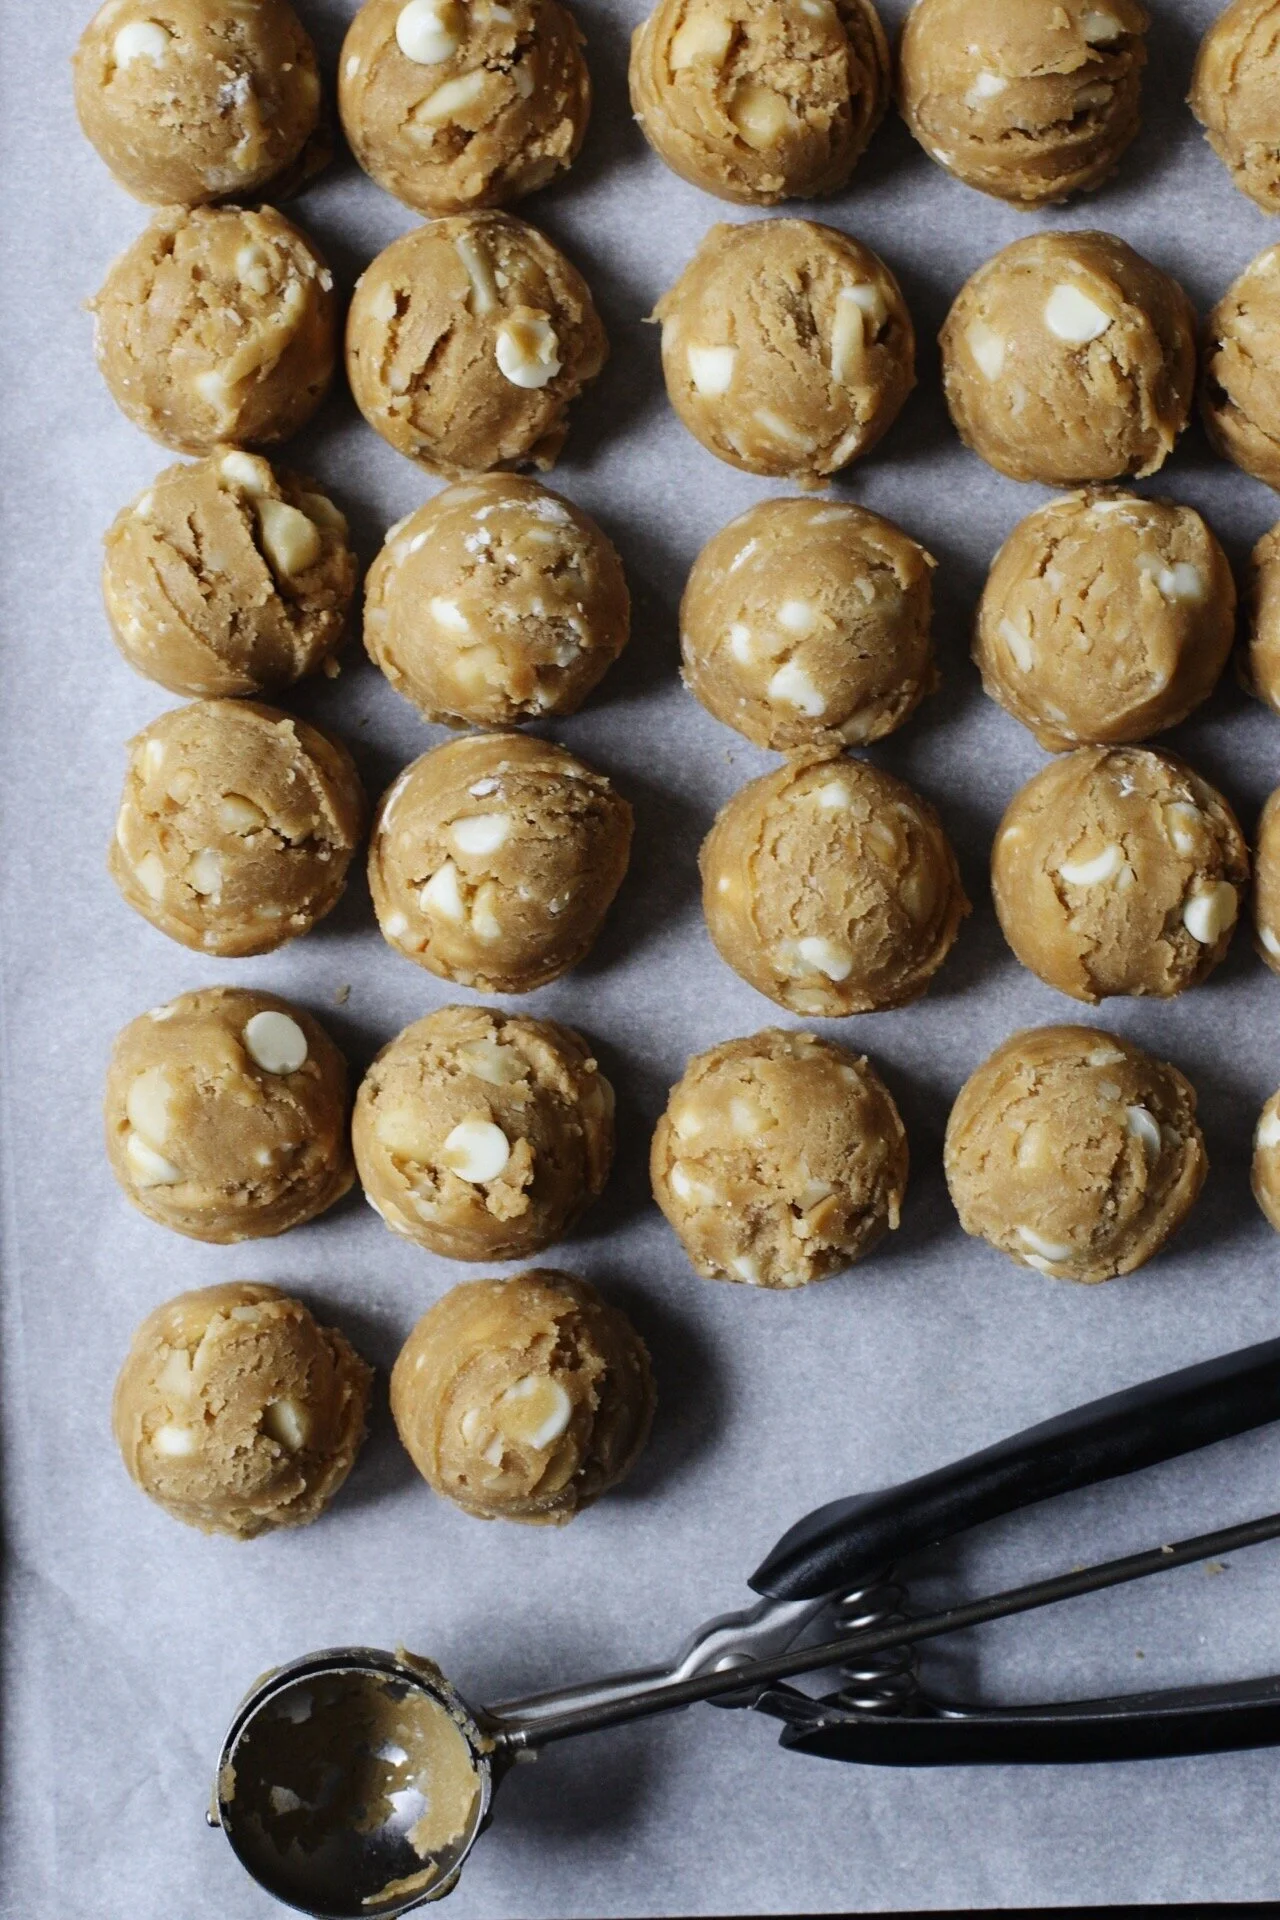
  5. Spoon the batter (it will be pretty thick) into a large Ziploc bag. Cut off one of the bottom corners of the bag and pipe the batter into the doughnut cavities, filling no more than 2/3 of the pan. This step is crucial because if you just use a spoon to fill the cavities, the doughnuts will come out of the oven looking lumpy! Use this video for guidance on how to pipe with a Ziploc bag.

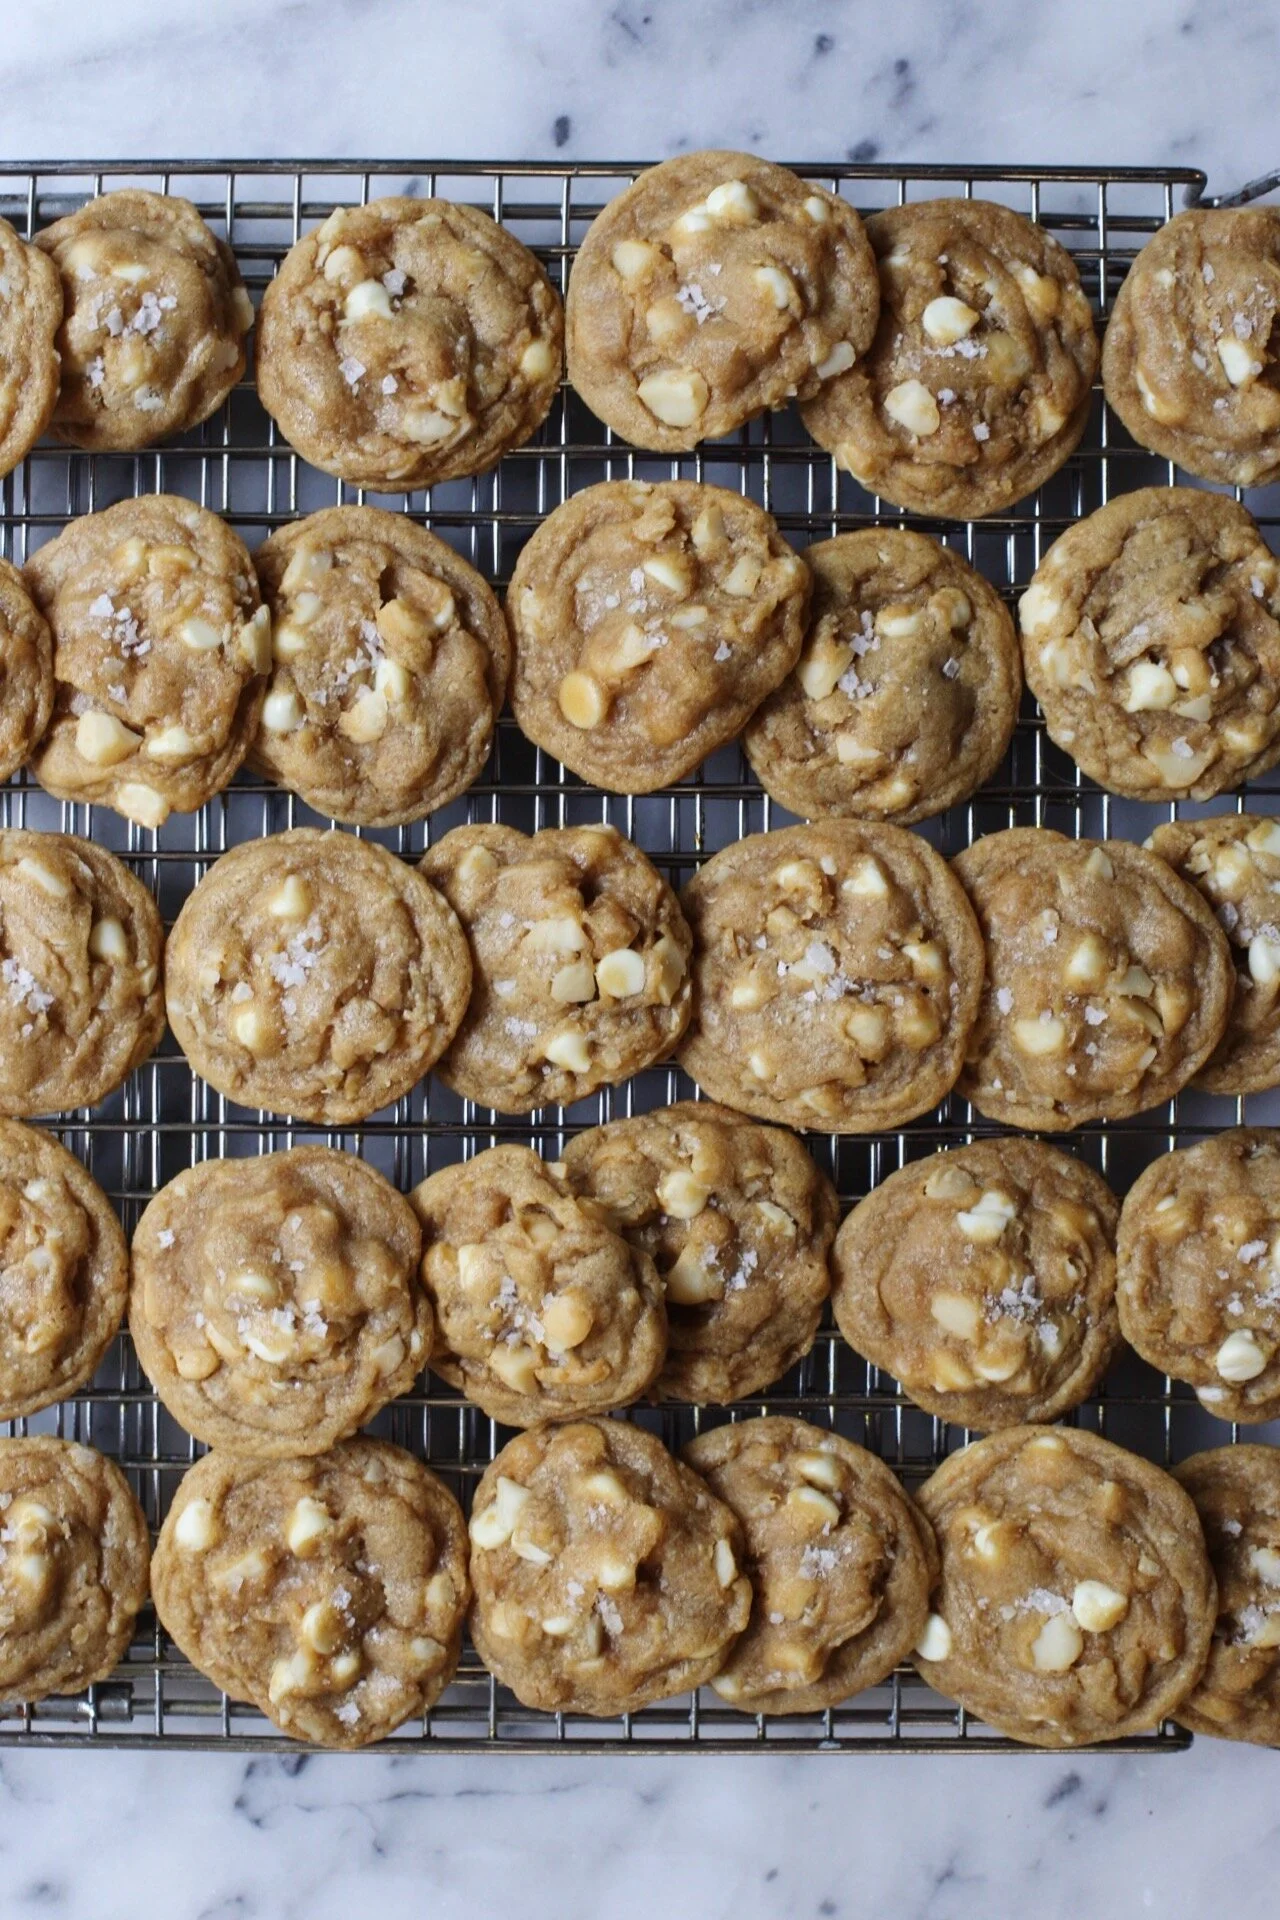
  6. Bake in the oven for about 10 minutes, rotating halfway through, until the edges are lightly brown. Continue filling doughnut cavities and baking until all batter is used up. Let the doughnuts cool in the pan for a couple of minutes before transferring to a wire rack lined with parchment paper. Allow doughnuts to cool while making the glaze.

  7. Make the glaze: in a large bowl, whisk all glaze ingredients together. For a thicker glaze, use 2-3 tbsp. of milk (this is what I did); add 1-2 tbsp. for a thinner glaze.

  8. Dip one side of the doughnut into the glaze and immediately top with either chopped pistachios, freeze dried raspberries, or poppyseed.


CLASSIC SANGRIA

IMG_8619.jpg

Here's the thing - I only allow myself to drink alcohol two or three days per week and have been doing so for about the past three/four years. This means that Fridays and Saturdays are definitely reserved for enjoying a couple of cocktails, and depending on how I'm feeling I may have a drink on Thursday or Sunday, but never both. I do this for a number of reasons, but mostly because I just feel better not drinking! I exercise almost every morning and take my health pretty seriously, so I just feel like it's a no-brainer to cut back on alcohol. 

IMG_8442.jpg

With that said, when I do have a cocktail I make sure it's a good one and not something that's a waste. One of those drinks that I save for the weekend is sangria. Full disclosure here: I am NOT a red wine drinker because I do not like the taste of it, the temperature at which it is served, how it stains your teeth... I can go on and on. But, I do love me some sangria.

Sangria is fruity, a little sweet, refreshing, served chilled, AND I can drink it through a straw without looking like a crazy person with red teeth. Win-win-win all around. 

IMG_8706.jpg

Alex and I started making our own sangria when we first started dating 4 years ago, and so it's kind of "our" drink and it's nice when we make it together. We have made smaller batches for ourselves for movie nights in, and we've made huge batches for Halloween parties or get togethers. No matter what time of year, it always hits the spot.

When it comes to choosing which red wine, don't worry so much about it. You can go the traditional route and pick a nice Spanish wine like a Rioja, OR you can do as Alex and I do and get Trader Joe's very own "2 Buck-Chuck" aka Charles Shaw wine (we get Cabernet Sauvignon). There should be no shame in buying cheap wine for sangria because it's not the star of the show and is masked by brandy and triple sec. 

So with that said, please try out my favorite sangria recipe! Feel free to play around with the ingredients, like instead of using basic oranges you can try blood oranges or even ruby red grapefruit, and maybe pears instead of apples. Do whatever your sangria heart desires! 

P.S. Do not forget to eat the fruit - that's the best part. Seriously. 

IMG_8626.jpg

Classic Sangria

Feel free to double, triple....quadruple the recipe for larger parties or lonely nights

IMG_8627.jpg

Ingredients

  • One bottle of a dry red wine (read my note above on which to use)

  • 1/2 cup brandy

  • 1/4 cup triple sec

  • 1/2 cup of fresh orange juice

  • 1 apple, chopped (I prefer Granny Smith)

  • 1 orange, chopped

  • 1 lime, cut into thin rounds

  • Sparkling water to finish (optional)

Directions

  1. In a large pitcher, mix together all ingredients except for the sparking water (wine, brandy, triple sec, orange juice, and fruit). If time allows it, let the sangria sit in the fridge overnight in order for natural fruit juices to be integrated.

  2. When ready to serve, pour sangria in glasses over ice and if desired, top off with sparkling water.

  3. Enjoy, and please drink responsibly!


WHITE CHOCOLATE MACADAMIA NUT COOKIES

B564D5C9-E6E8-4928-853B-B9AC141AAA2B.jpeg

This past weekend, I celebrated the birth of a very special person in my life... MY DAD. Martin is the one who gave me my chin (ugh), my long legs (yay) and a very nice life filled with 100% of his support in all things I do. I don't want to embarrass him by praising him too much, BUT he is literally the hardest working person I know, will go above and beyond to help others out before he would even think to do something for himself, and makes me laugh every time I talk to him on the phone (every day). Also, he's responsible for introducing me to films that I would have never watched if it weren't for him (The Cabin Boy, Kung Pow: Enter the Fist, Bio Dome... and many other great, GREAT movies). 

A486EAF3-181C-44B0-952B-3638A655F9B1.jpeg
0DF0320C-F085-4AF4-A852-AC6ABDF636F9.jpeg

On top of all of these amazing attributes, my dad really likes his sweets. Whenever I bring him something I baked, he'll usually give me a hard time about the dessert not being good or not wanting any of it, but before I know it he'll have eaten the whole thing and wants more. Typical dad stuff.

6E0546A4-83CA-4F41-BE54-A20AE5CEB552.jpeg

Since we celebrated my dad's birthday by going to a Dodgers game on Saturday and the Grand Prix on Sunday, I wanted to bake him something that was very travel-friendly and not going to sit in the car for hours. Enter these amazingly delicious white chocolate macadamia nut cookies.

White chocolate macadamia nut cookies (which I will refer to as WCMC from now on in order to keep my sanity) are often overlooked in the cookie world. Most people would probably name off at least five types of cookies on their list of favorites (chocolate chip, peanut butter, Oreos, etc.) before even thinking of WCMC. Maybe it's because white chocolate (which is technically not chocolate due to the lack of cocoa solids) isn't as popular among other types of chocolate, but in my eyes all chocolates are equal: I will eat and enjoy all of them equally. When combined with macadamia nuts, which also are delicious and very fragrant, you have a match made in cookie heaven. So with that said, these cookies are REALLY good and smell more amazing than any other cookies I've ever baked, I swear! WCMC need to be appreciated more, ok? Ok.

1B84D75D-A701-497A-B1AE-4B80FB75EDA0.jpeg

White Chocolate Macadamia Nut Cookies

Recipe adapted from Sally's Baking Addiction

Yields about 30 cookies

Ingredients

8881E96A-13A3-42C8-8F0A-101D1213F7DE.jpeg
  • 2 cups plus 2 tbsp. all-purpose flour

  • 1/2 tsp. baking soda

  • 1/2 tsp. salt

  • 3/4 cup (1 1/2 sticks) unsalted butter, room temperature

  • 1 cup packed brown sugar, light or dark

  • 1/2 cup white sugar

  • 1 large egg, room temperature

  • 1 large egg yolk, room temperature

  • 2 tsp. vanilla extract

  • 3/4 cup white chocolate chips

  • 3/4 cup toasted macadamia nuts, chopped

  • Flaky sea salt to finish (optional)

Directions

  1. Whisk flour, baking soda, and salt in a medium bowl and set aside.

  2. Using a stand mixer with the paddle attachment or a hand mixer, cream the butter and sugars on medium speed until it is light and fluffy, about 3 minutes. Add the egg, egg yolk, and vanilla extract to the bowl and mix again on medium speed until incorporated, about 1 minute. Scrape down the sides of the bowl.

  3. With the stand mixer/hand mixer off, add the flour mixture all at once to the bowl and mix on low speed for 10 seconds, and then turn to medium and mix until incorporated. Don't over mix!

  4. Fold in the chocolate chips and nuts with a spatula.

  5. Cover with plastic wrap and let the dough sit in the fridge for at least 1 hour, or overnight if wanted.

  6. After chilling, turn on the oven to 325°F. Using a spoon or a cookie scoop (I use the medium size version) scoop out about a tablespoon and a half to two tablespoons of dough onto a baking sheet lined with parchment paper. Keep the dough cold in between batches.

  7. Bake in the oven for about 10 to 12 minutes, or until the edges of the cookies are golden brown. The centers of the cookies will still look soft and puffy. Sprinkle with flaky sea salt if desired. Let the cookies cool on the baking sheet for a few minutes before transferring to a wire rack. Enjoy!