TRADITIONAL GUACAMOLE

IMG_7820.jpg

If I had to describe my perfect date night to you it would start with dinner at one of my favorite Mexican restaurants, followed by either dancing or going to the movies (this all would depend on how much food I ate at dinner). I would also probably throw in Haribo gummy bears somewhere in that equation. 

So when the often dreaded question of "What should we have for dinner?" is asked, my answer almost always is naming off five different Mexican restaurants in the area. To me, nothing is more fun than having a round of margaritas and eating one too many chips, all before your plate of carnitas comes to the table.

IMG_7730.jpg

Despite all of this, my history with avocados and guacamole has been somewhat of a rollercoaster. When I was little, I was a very picky eater to the point that I'm pretty sure I existed only on chicken tenders and fries for dinner. Even when my family would go out to eat at restaurants, I would still order that exact meal. So when I first tried guacamole at about the age of 10, I was pretty hesitant of the green stuff but it soon grew on me and I eventually became obsessed with it. This obsession was short-lived when my family was all together during the holidays and we had a giant Mexican meal at home. Lil Shawna kind of went ham with the chips and guacamole, and one thing led to the other; before I knew it, I couldn't even look at an avocado without feeling sick.

This food aversion of mine with avocados/guacamole lasted until after I graduated college, so about 12 years! Guacamole came back into my life thanks to Trader Joe's and their free samples where I was able to try their "Guilt-Free" guacamole made with greek yogurt. I guess that version was less in your face with the guacamole flavor and before I knew it I was back to loving guacamole again and adding avocado to everything. Thank you Trader Joe's!

IMG_7792.jpg

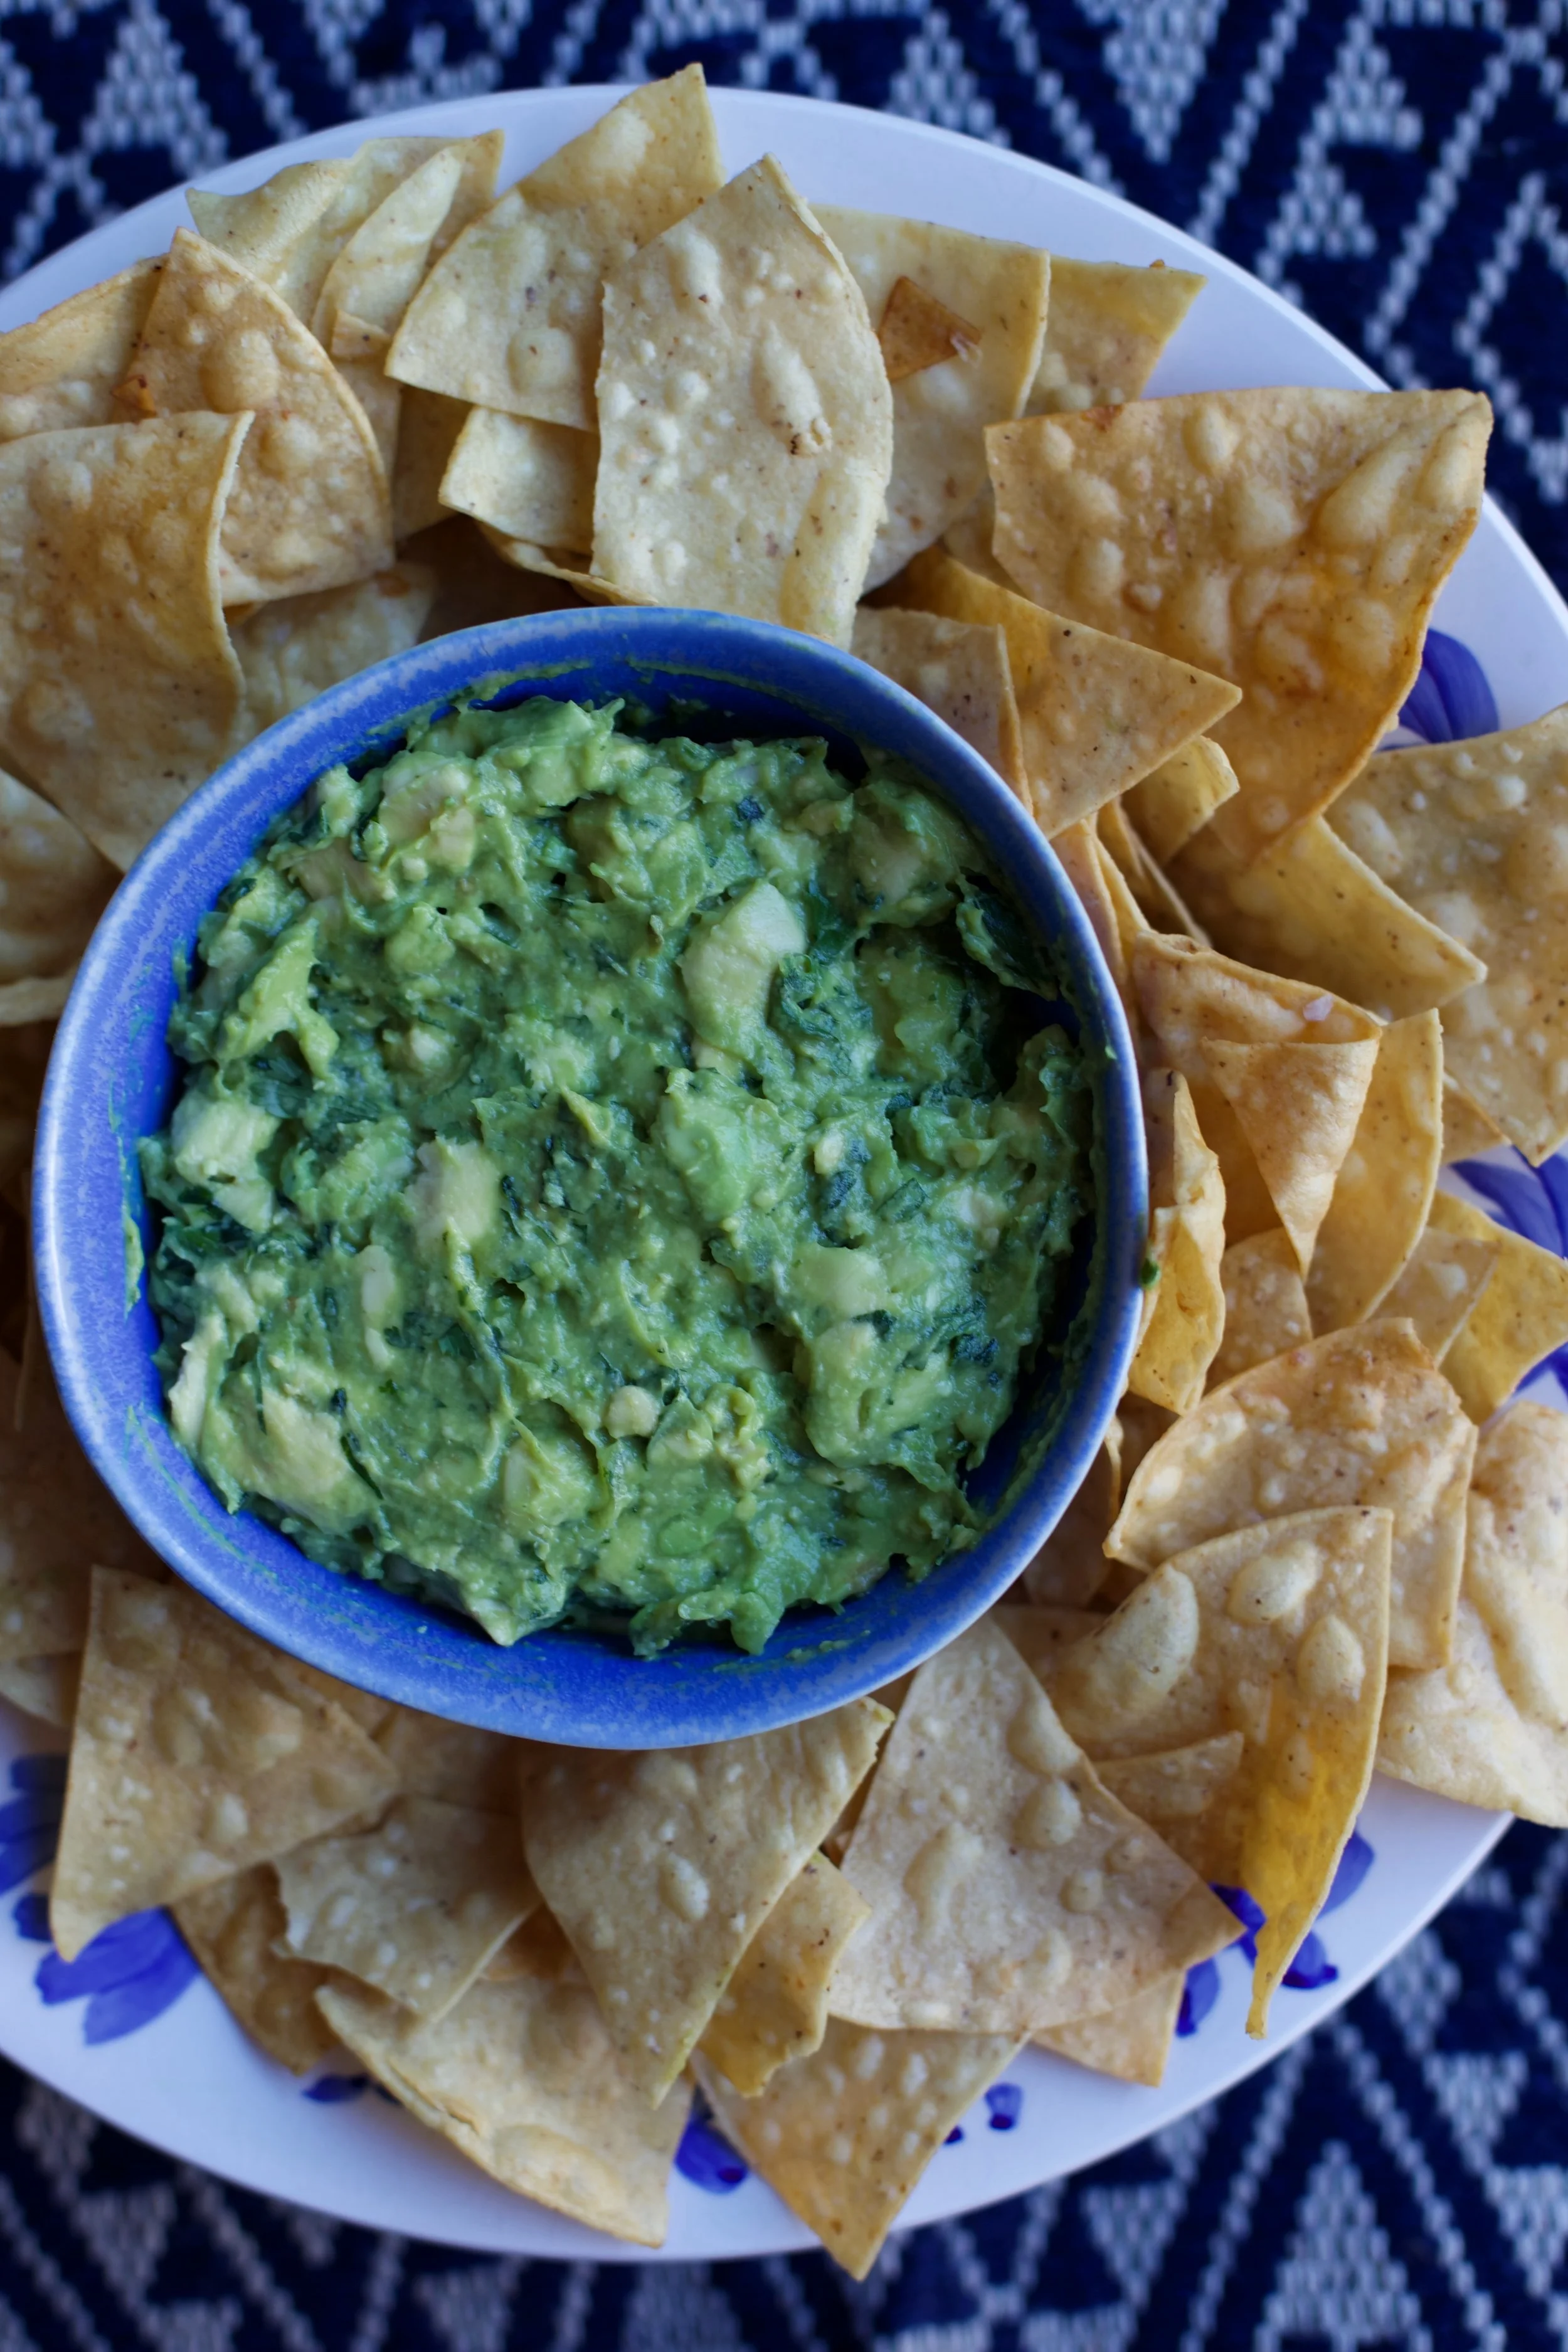
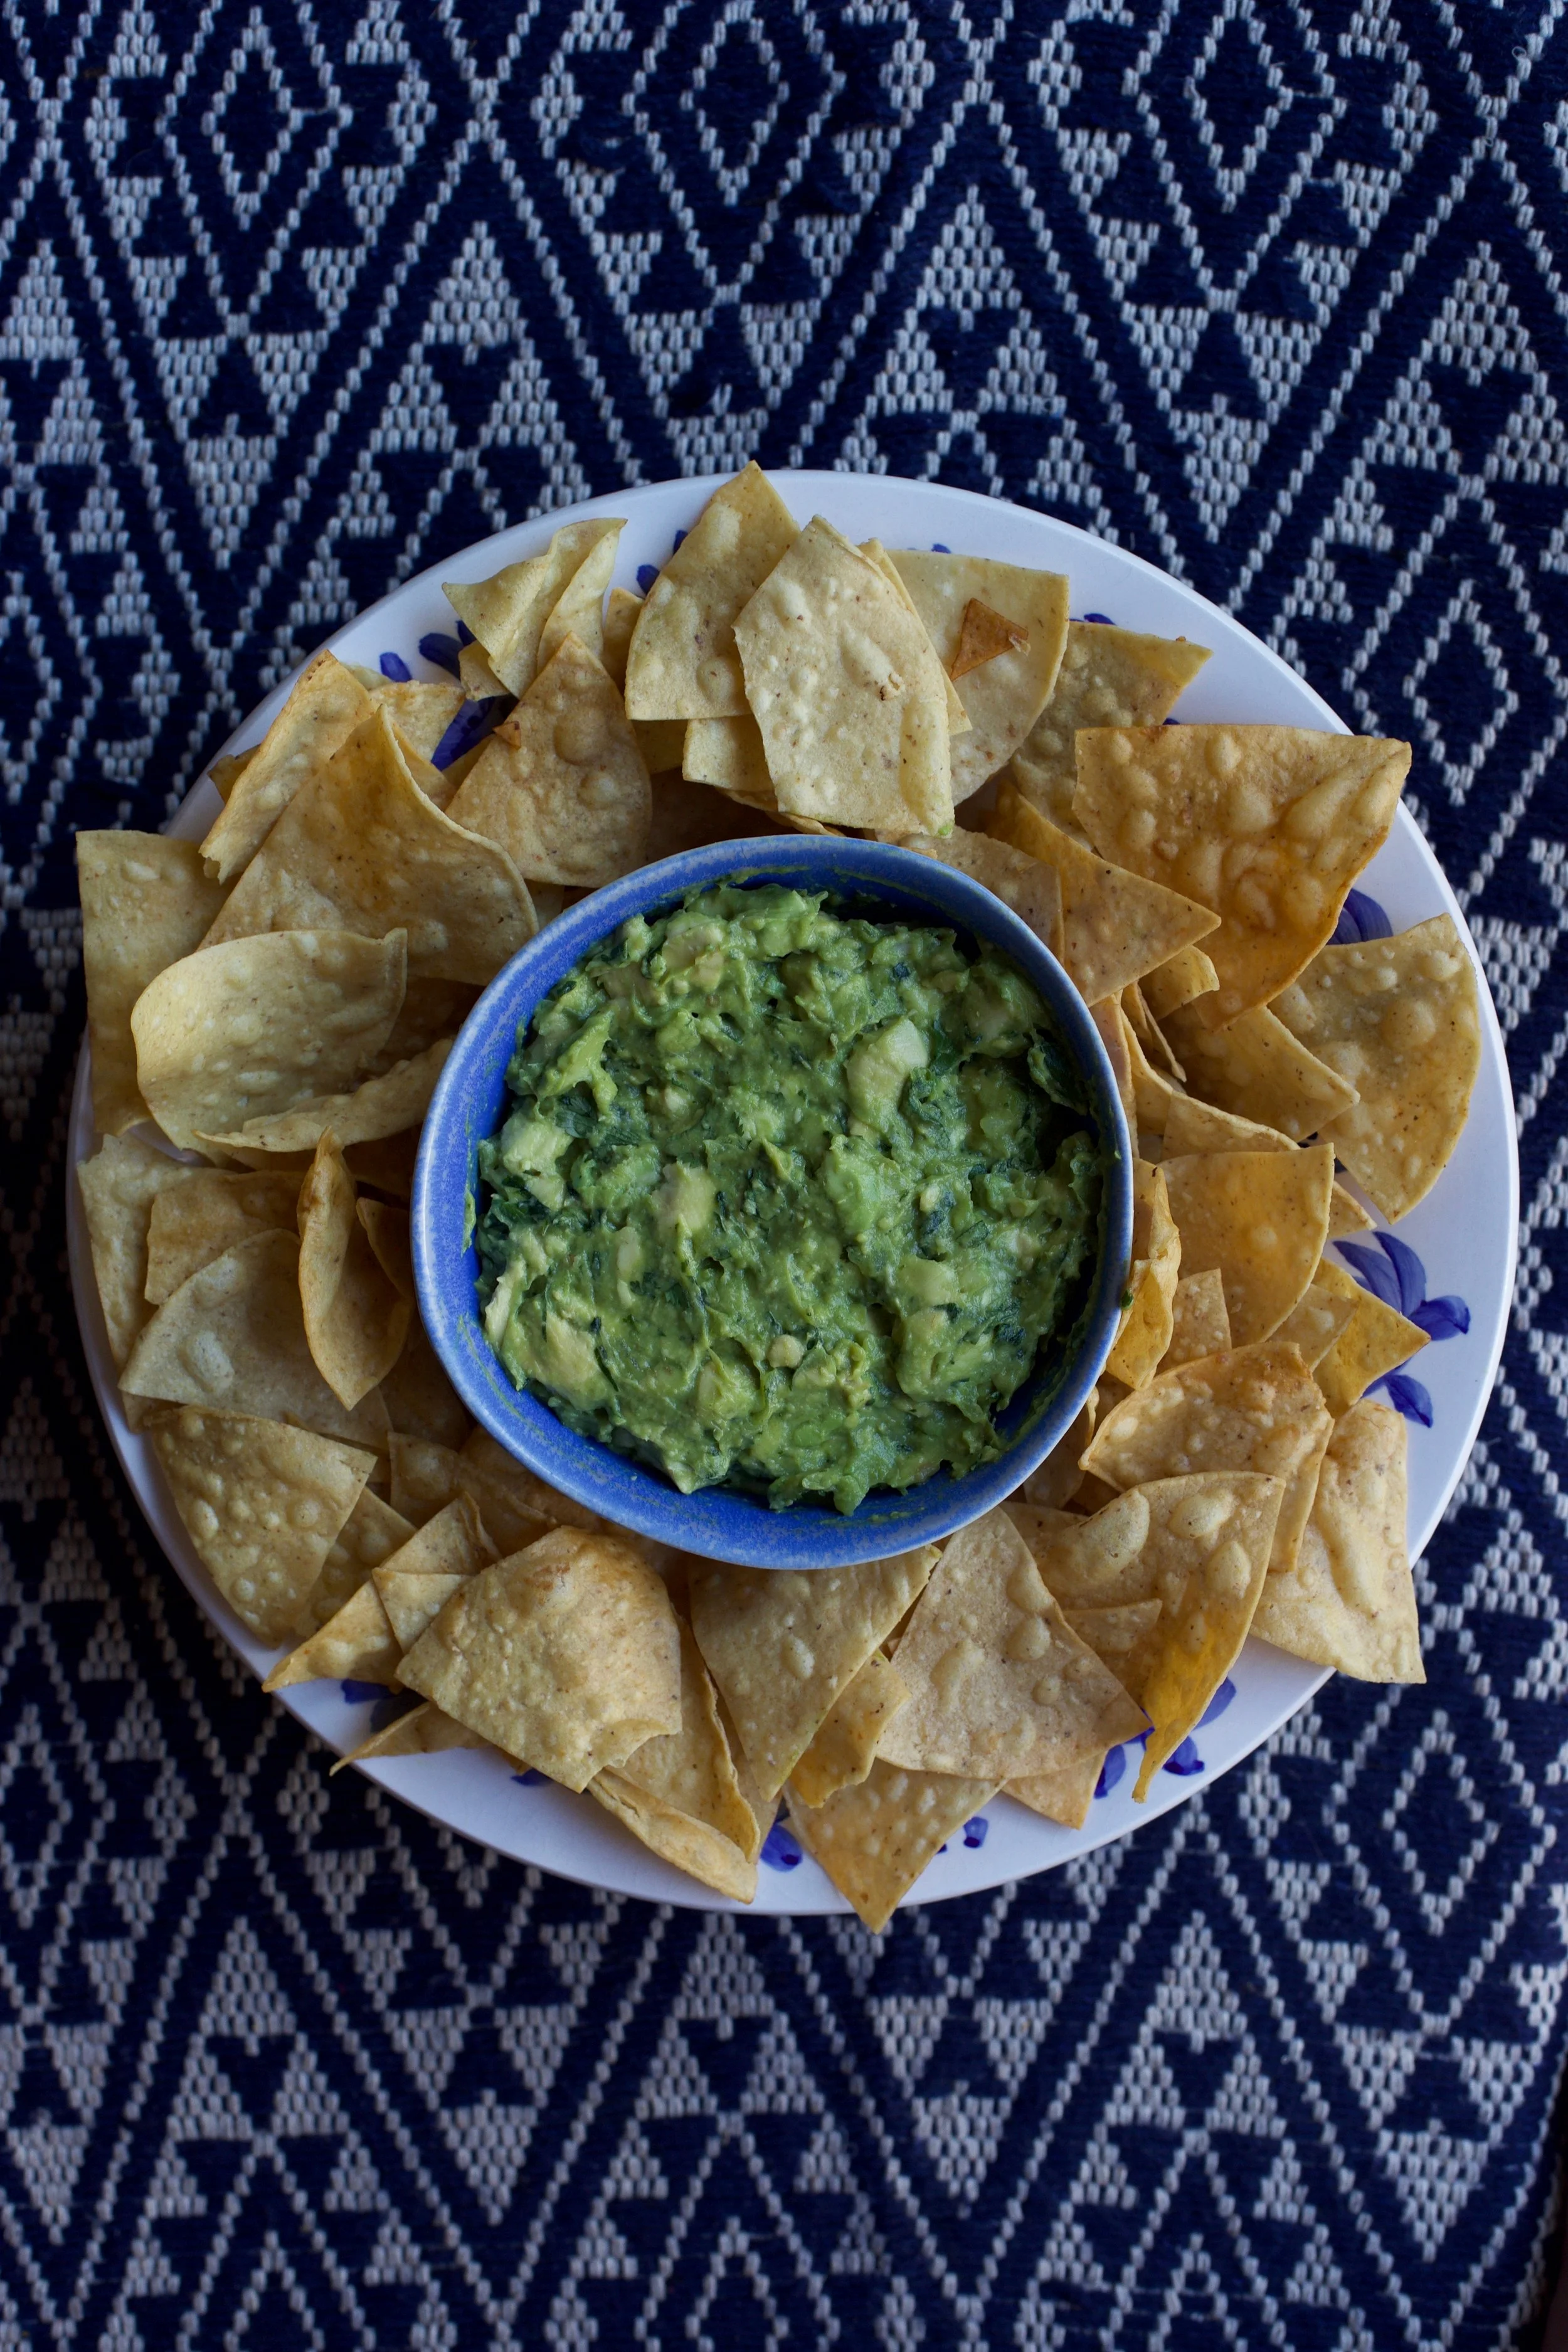
This recipe for guacamole from Roberto Santibañez is, in my opinion, perfect. It is very straight forward with only 6 ingredients, but recommends using a molcajete (a mortar and pestle). I got mine for a great price at either TJ Maxx or Marshalls (they're pretty much interchangeable to me and I love them both), and I still always see some for sale every time I visit. The molcajete is key to making the "paste" of cilantro, chile, onion, and salt that is added to the avocados, but if you don't want to add yet another tool to your kitchen, you can definitely create the paste with a knife or fork.

Alex and I have made this countless times and even though people are usually hesitant to try our version because they're used to a different guacamole - one with garlic, red onions, and/or tomatoes - 100% of the time we end up being asked for the recipe: it really is that good. Try it and let me know what you think!

Traditional Guacamole

Recipe from Roberto Santibañez

Makes about 3 cups (we always make this portion but it can easily be halved)

Ingredients

IMG_7842.jpg
  • 4 tbsp. finely chopped white onion

  • 2 tbsp. minced serrano or jalapeño pepper, seeds included (more or less depending on what you can handle; Alex and I prefer serrano peppers)

  • 1/2 tsp. kosher salt (this may seem like a little, but I'd rather everyone start with less and then season to their liking at the end)

  • 1/2 cup chopped cilantro, divided

  • 2 large or 4 small ripe avocados, halved and pitted

  • A squeeze of lime

Directions

  1. In your molcajete, mash together the onion, serrano or jalapeño pepper, salt, and half of the cilantro until it is a paste. If you don't have a molcajete, mash the ingredients together as well as you can on a cutting board with a knife or fork.

  2. With the skin still on, score the avocados in a crosshatch pattern with a knife, being careful not to cut through the skin, and scoop out into a bowl. Add the paste to the bowl and toss together well, and then add the rest of the chopped cilantro and mix with a fork.

  3. Add a good a squeeze of lime. Taste the guacamole and season to your liking - you may need more salt or more pepper. Enjoy!


UPSIDE-DOWN BLOOD ORANGE CAKE

For those who don't know, citrus season is during the winter months, with most citrus fruits being in season from about December to April. With that said and considering what month it is (hey April), I wanted to do a citrus recipe that not only highlighted their flavor but also showed off their beauty. Enter this upside-down blood orange cake.

I'm the kind of person who looks forward to citrus season almost more than any other season (watermelon season might be a tie though). I fully embrace the season by making anything from my favorite sangria (I'll post the recipe for that in the near future) to grapefruit loaf cakes to blood orange doughnuts. I also get so much use out of my older-than-me juicer that I inherited from my mom, and drink as much fresh cara cara juice as I can.

Today we are utilizing blood oranges and with that I must advise not wearing a white t-shirt for the sake of not looking like you were just part of a crime scene. But besides their dyeing affects, blood oranges are incredibly beautiful fruits mostly for the reason that you can have an array of color ranging from a deep red to a lighter orange. 

I feel like this cake is one that you whip out when you want to show off: the topping of sliced oranges is an absolute showstopper and even if it doesn't come out perfectly (i.e. some of the topping may stick to the pan), the color alone will impress whomever you baked it for, including yourself. It's also exciting and slightly nerve-racking to see what the top will look like after you flip it. If you've never flipped a cake before, don't be worried! I've done it by myself plenty of times and it's a lot easier than you think - just move quickly and swiftly and you'll be oohing and aahing at your creation before you know it.

Upside-Down Blood Orange Cake

Yields (1) 10 inch cake
Adapted Slightly from Bon Appétit

Ingredients

  • Nonstick cooking spray

  • 1/4 cup raw sugar

  • 2-3 blood oranges thinly sliced with seeds removed (make sure to have at least two other blood oranges for the zest and juice that will be added to the cake later)

  • 2 1/2 cups all-purpose flour

  • 3/4 cup plus 2 tbsp. sugar

  • 1 tsp. baking soda

  • 1 tsp. baking powder

  • 3/4 tsp. kosher salt

  • 2 large eggs

  • 1 large egg yolk

  • 1 1/2 cups buttermilk

  • 3/4 cups (6oz.) unsalted butter, melted

  • 2 tsp. blood orange zest

  • 2 tbsp. blood orange juice

  • 3/4 tsp. vanilla extract

Directions

  1. Preheat oven to 350°F. Generously spray a 9 or 10 in. cake pan with the nonstick cooking spray (rather be safe than sorry when flipping the cake upside down!). In an even layer, sprinkle the raw sugar on the bottom of the cake pan and then place the orange slices on top. You can place the slices whichever way you want, whether in a random fashion or layered to cover the entire pan like I did.

  2. In a medium bowl, whisk together the flour, sugar, baking soda, baking powder and salt.

  3. In a large bowl, whisk the eggs and egg yolk, buttermilk, melted butter (make sure it's not too hot), zest, juice and vanilla extract. Add the dry ingredients to the wet ingredients and whisk until incorporated.

  4. Pour the batter over the orange slices evenly and bake it in the oven for 35-40 minutes. The top will be golden brown and a toothpick inserted in the middle should come out fairly clean.

  5. Allow the cake to cool for about 5 minutes. In preparation of inverting the cake, run a butter knife around the edges to loosen the cake. Using your desired plate or cake stand, place it upside down on top of the cake and as quickly as possible, flip the cake over. Lift the cake pan up and if the cake is still not coming out, tap the cake pan with the butter knife. Enjoy!


THE ULTIMATE CHEWY + FUDGY BROWNIES

IMG_5138.jpeg

Today we are getting into one of my all-time favorite indulgent desserts: brownies. I have tried countless homemade brownie recipes over the years, and it's safe to say that this one is an absolute winner. 

Growing up, I pretty much subsisted on boxed desserts, with brownies at the forefront (I have a huge soft spot for the Ghirardelli version). My mom probably baked my sister and I boxed brownies a few times a month, and we probably could have eaten it more. When I started baking recipes from scratch after college, I still believed that boxed brownies were untouchable - they were just so easy and SO GOOD and the taste gave me a sense of nostalgia. But like all other desserts, the moment I baked a homemade batch, there was no going back to the box. (For the record, my mom, who has the BIGGEST sweet tooth and loves everything I bake, still makes boxed brownies and eats it for breakfast (and lunch... and dinner.) 

IMG_5118.jpeg

When it comes to brownies, everyone has their own opinion on what's "best" and that's totally fine! For me, the ultimate brownie has no nuts, a fudgy center, and a verrrrrrry chewy top (I am definitely a person who loves the edge pieces). As for finishing the brownies with a dusting of sugar, I'm 50/50 on it. I think it makes brownies look prettier, but I actually like treating my super sweet brownies like I treat my chocolate chip cookies: sprinkling them with flaky sea salt. Try it! 

IMG_5214.jpeg

With that said, read through my ingredients list and feel free to make changes to adapt to your own liking. For example, if you want to add nuts, I would suggest adding a cup of toasted chopped pecans or walnuts. Also more importantly, you'll notice that there are three different forms of chocolate in this recipe: 1) cocoa powder 2) chocolate chips and 3) a 4 oz. chocolate bar, like Ghirardelli or Lindt. All three are necessary to creating the ultimate brownie recipe! But I actually make it more complex by using a blend of cocoa powders (regular and dark) and a mix of chocolate chips (semi-sweet and dark). This is totally an option for you and not necessary - I'm sure you don't want to spend extra $$$ on two different kinds of cocoa powder and chocolate chips. If that's the case, don't do a cocoa blend and use one kind of chocolate chip (semi-sweet is what the original recipe calls for). I just so happen to love dark chocolate and I think the intensity from it just adds to the overall flavor of the brownie.

IMG_5281.jpeg

Chewy + Fudgy Brownies

Adapted from Sally's Baking Addiction

Ingredients

IMG_5323.jpeg
  • 3/4 cup unsalted butter

  • one 4 oz. semi-sweet chocolate bar, chopped and divided

  • 2 cups sugar

  • 3 large eggs, room temp.

  • 2 tsp. vanilla extract

  • 1 cup unsweetened cocoa powder, sifted if lumpy (I used a blend of 3/4 cup regular, 1/4 cup dark)

  • 1 cup all-purpose flour

  • 1/2 tsp. espresso powder (optional but recommended - it helps intensify the chocolate flavor!)

  • 1 tsp. salt

  • 1 1/4 cup chocolate chips (I used about 3/4 cup semi-sweet, and 1/2 cup dark)

  • powdered sugar or flaky sea salt to finish

Directions

  1. Preheat oven to 350°F. Butter a 9"x13" baking dish and line it with parchment paper so that there is an overhang, and then butter the parchment paper as well.

  2. In a microwave-safe bowl, melt the butter and 2 oz. of the semi-sweet chocolate bar together. Do this in 30 second intervals, stirring well after each time, being careful not to burn the mixture. Once melted, transfer the mixture into a large bowl.

  3. To the butter and melted chocolate mixture, whisk in the sugar until well incorporated. Whisk the eggs for a couple minutes in a separate bowl (this will give you a crinkly top to the brownies), then add them to the butter and sugar mixture, along with the vanilla extract. Mix until incorporated.

  4. Add the cocoa powder(s), flour, espresso powder, salt, the other 2 oz. of chopped chocolate, and chocolate chips to the bowl. Use a spatula to mix together. It will be very dry at first, but with some arm strength, it will form a very thick and fudgy batter.

  5. Spread the batter into the prepared baking dish and bake for 30-35 minutes, or until a toothpick inserted in the middle comes out with a few crumbs - you don't want to see any raw batter on the toothpick. Dust brownies with powdered sugar or flaky sea salt.

  6. Allow the brownies to cool for 1 hour at room temperature and then place them in the fridge for another hour. This will lead to a chewier texture and will also make it much easier to cut the brownies (I learned this tip from Claire Saffitz). If you can’t wait 2 hours, then dig in after they’ve cooled a bit.