UNION SQUARE CAFE'S BAR NUTS

IMG_4980.jpg

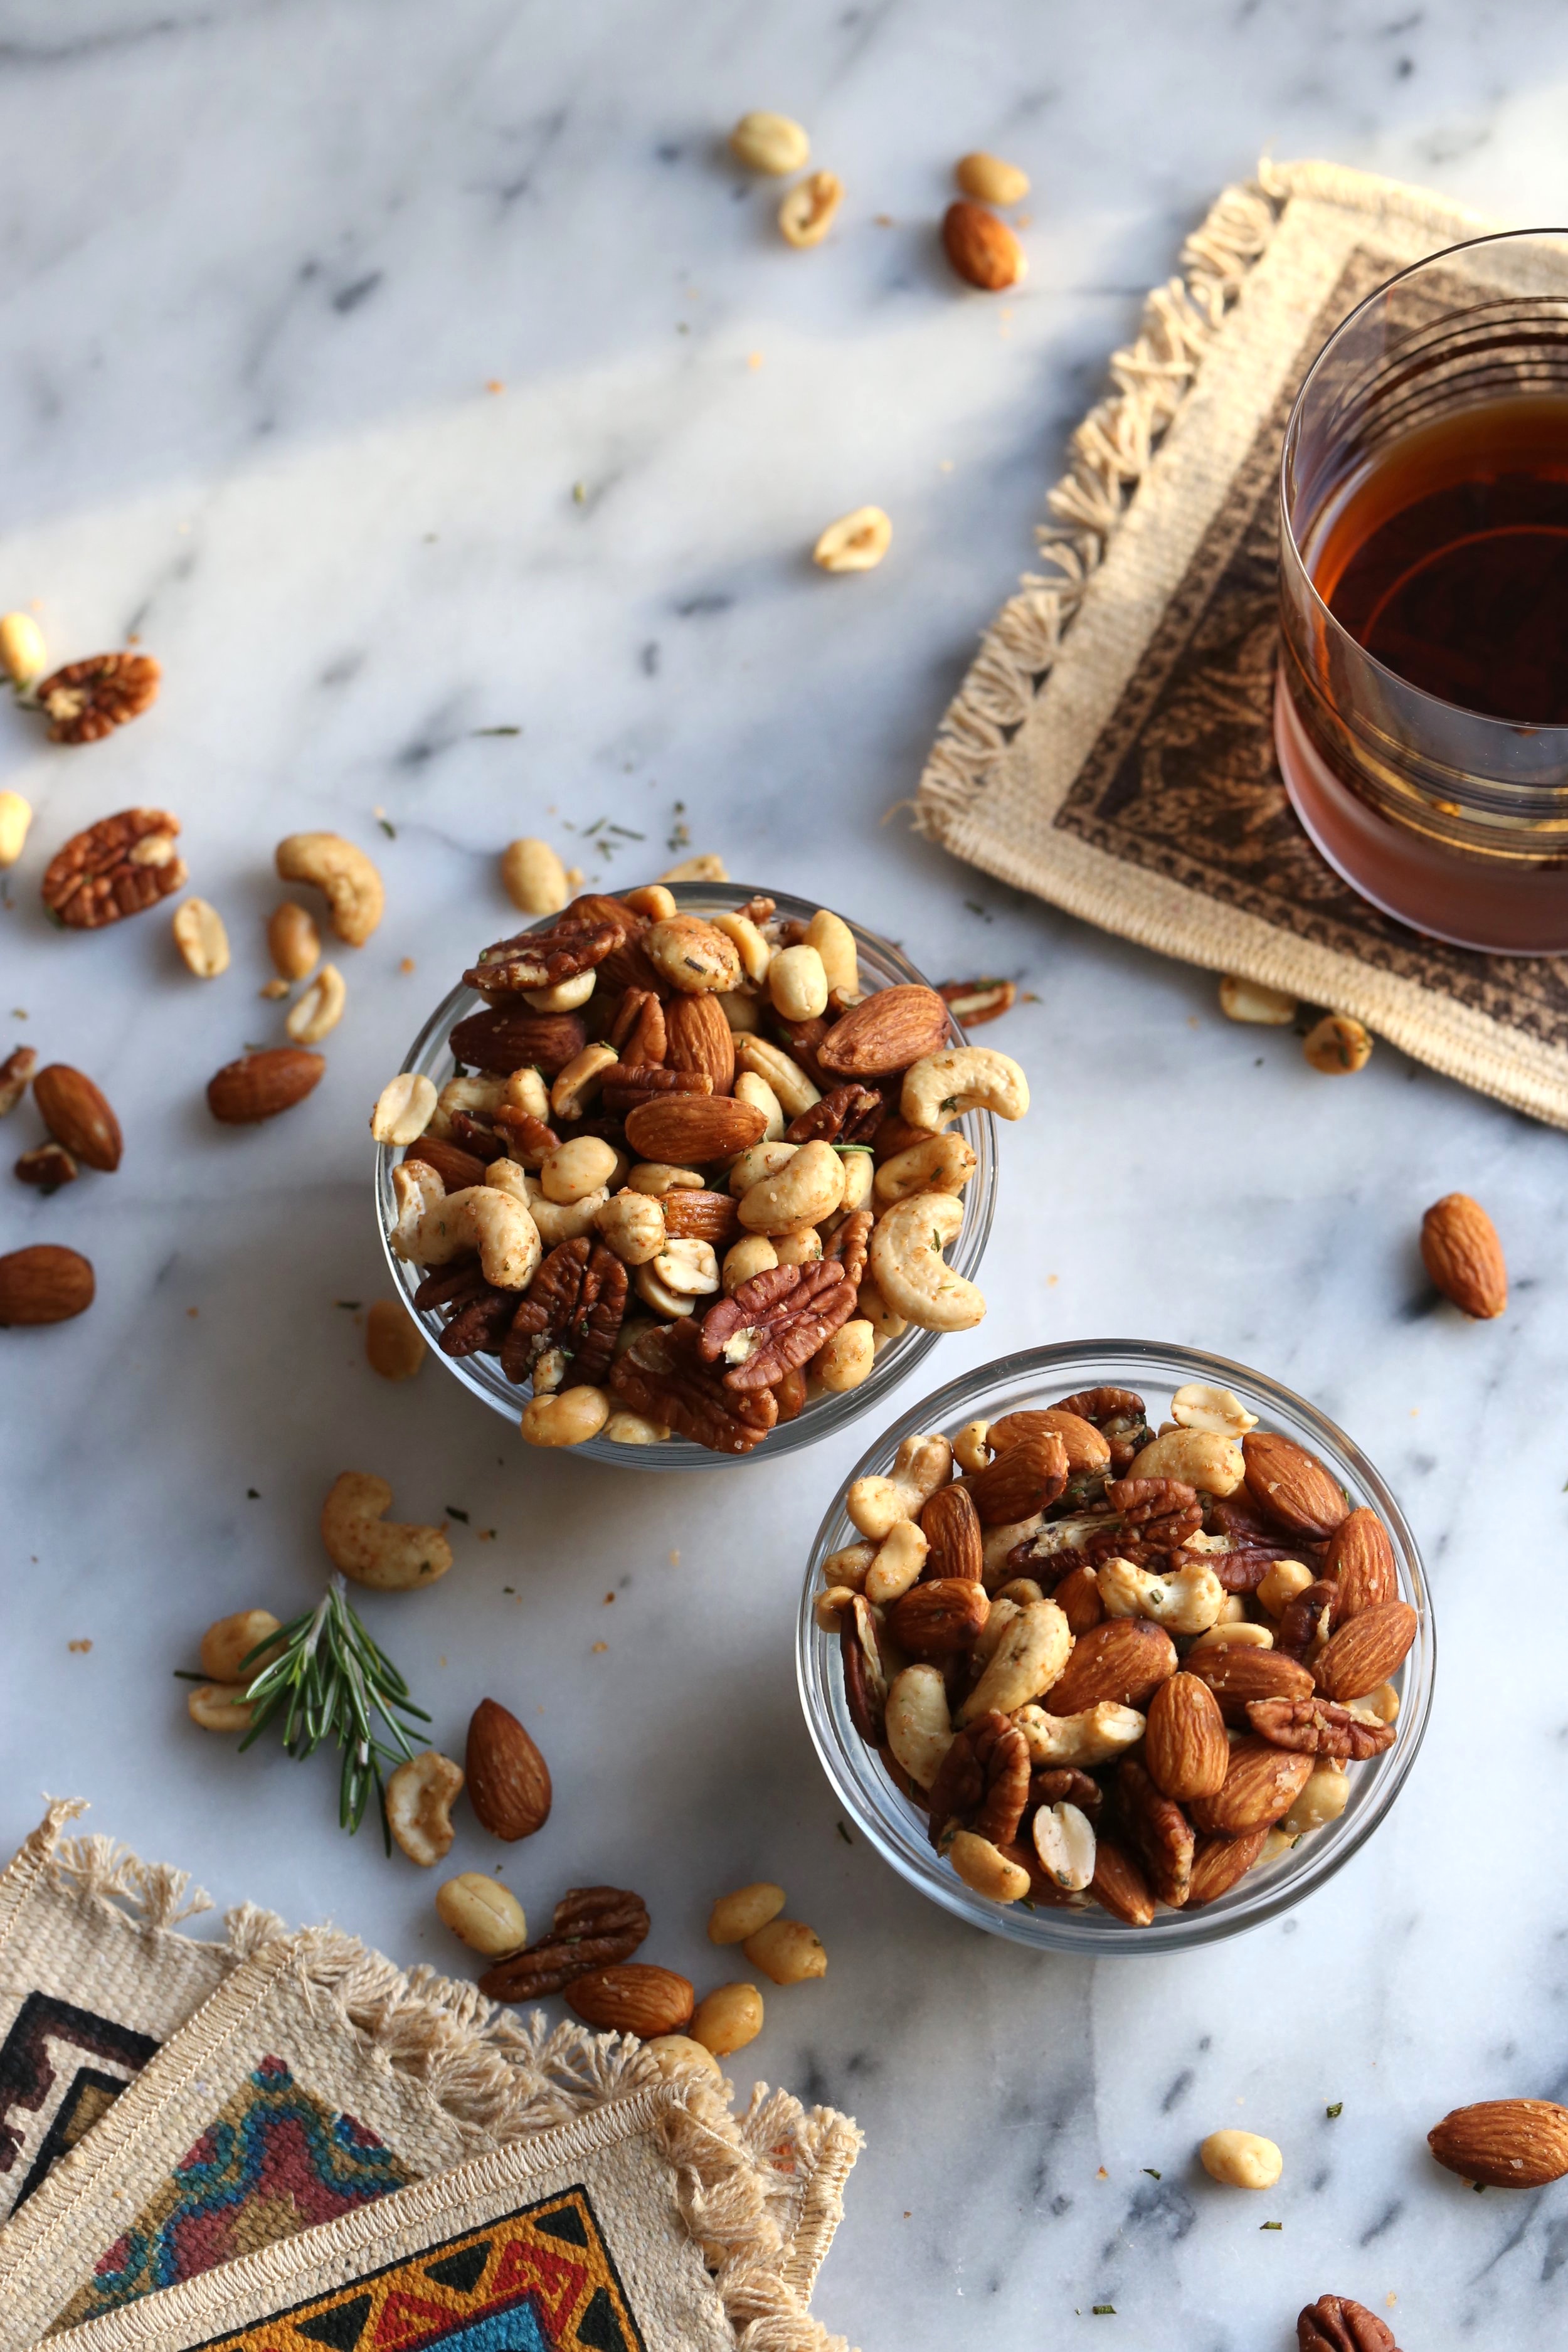
Today I am giving you quite possibly the easiest recipe that you can find on The Vivid Kitchen thus far. We’re taking a break from desserts and baked goods this week in lieu of making something that will work perfectly for your Super Bowl viewing party. I’m talking about bar nuts, and not just any bar nuts but Union Square Cafe’s version of the seriously addicting snack. For those who don’t know, Union Square Cafe is a famous restaurant in NYC and comes from the mastermind restaurateur, Danny Meyer. He later went on to open other highly accoladed spots like Gramercy Tavern and Eleven Madison Park, the latter being a Michelin-starred restaurant. Although Union Square Cafe is a high-end restaurant with a sophisticated menu, their bar nuts are almost as famous as the restaurant itself. A quick google search will show that I am far from the first person to share this recipe, but I’ve found that still, a good amount of people in my circle had never heard of or tried these I introduced them. So, I want to spread the bar nuts love a little further today!

I’ve made these bar nuts at least 15-20 times since I discovered the recipe in my coveted Genius Recipes cookbook from Food52, about 4 years ago. Every time I go to a Cinespia screening at the Hollywood Forever Cemetery where we picnic before viewing a film, it’s a no-brainer among my friends that I will be bringing a batch of the nuts. At my sister’s wedding, I made a HUGE batch of these, enough for 115 people, but with only almonds because we just so happened to find pounds of them in my mom’s freezer. Each table at the wedding had a cheese platter filled with crackers, fruit, and the seasoned almonds (my mom, aunt, and I made each platter mere hours before the ceremony) and it was the perfect appetizer.

IMG_4610.jpg

The only problem with these bar nuts is that once you start eating them, you honestly can’t stop. I have no problem stopping myself from eating an entire can of Pringles, and I know I can only eat one single Lay’s potato chip, but with Union Square Cafe’s nuts, there’s no stopping. In fact, I never make them just for Alex and I to have at home because we both will eat nothing else until they’re all gone. And on Thanksgiving, I’m not allowed to make them because putting them out before dinner would ruin everyone’s appetite. Have I given enough proof that these nuts are amazing and that you need to make them?

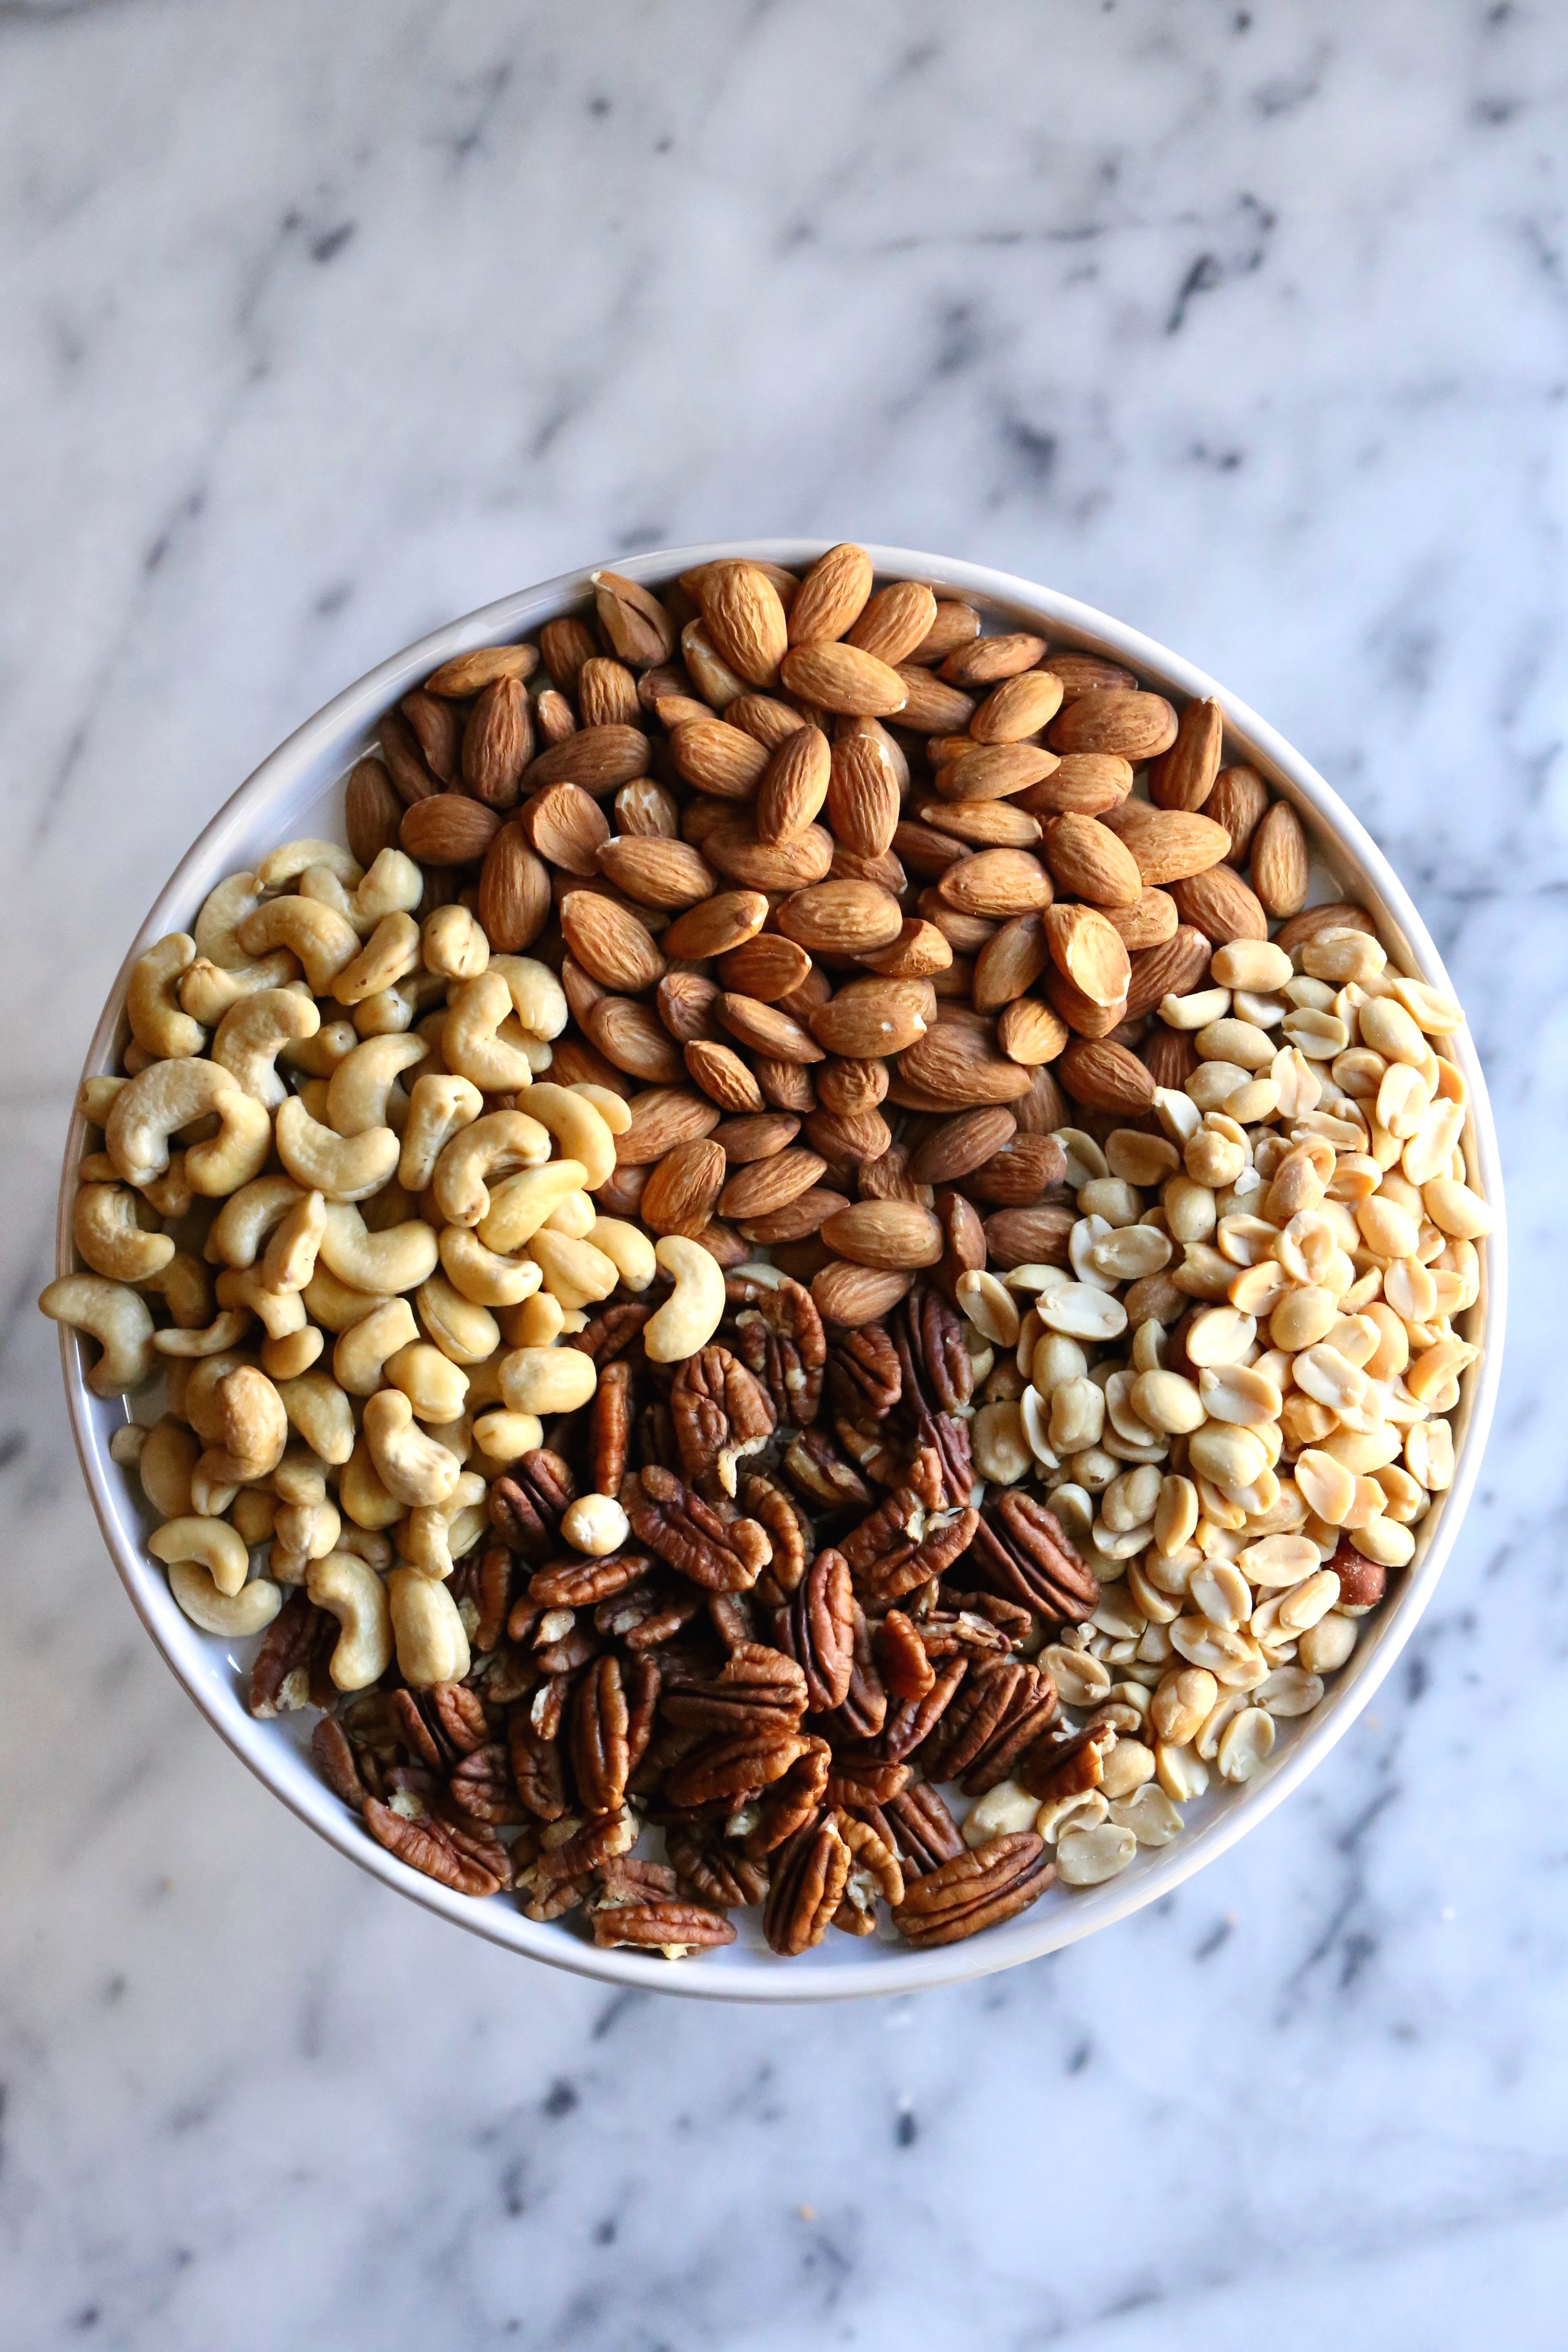
As for what nuts to use, the choice is yours. You may include pecans, walnuts, Brazil nuts, peanuts, almonds, cashews or hazelnuts. These are all the nuts that are found in Union Square Cafe’s blend. But could you add pistachios or macadamia nuts? Of course you can! You also get to decide how much of each nut you want in your batch: you can have more almonds and less cashews, you can use only pecans, or you can use every single nut I listed above. Just as long as you use 800 grams (1 3/4 lbs. or 28 oz.) worth of nuts, you’re good to go. I find that the easiest way to measure out the nuts is by using a kitchen scale, especially if you’re using an array of nuts.

IMG_4619.jpg

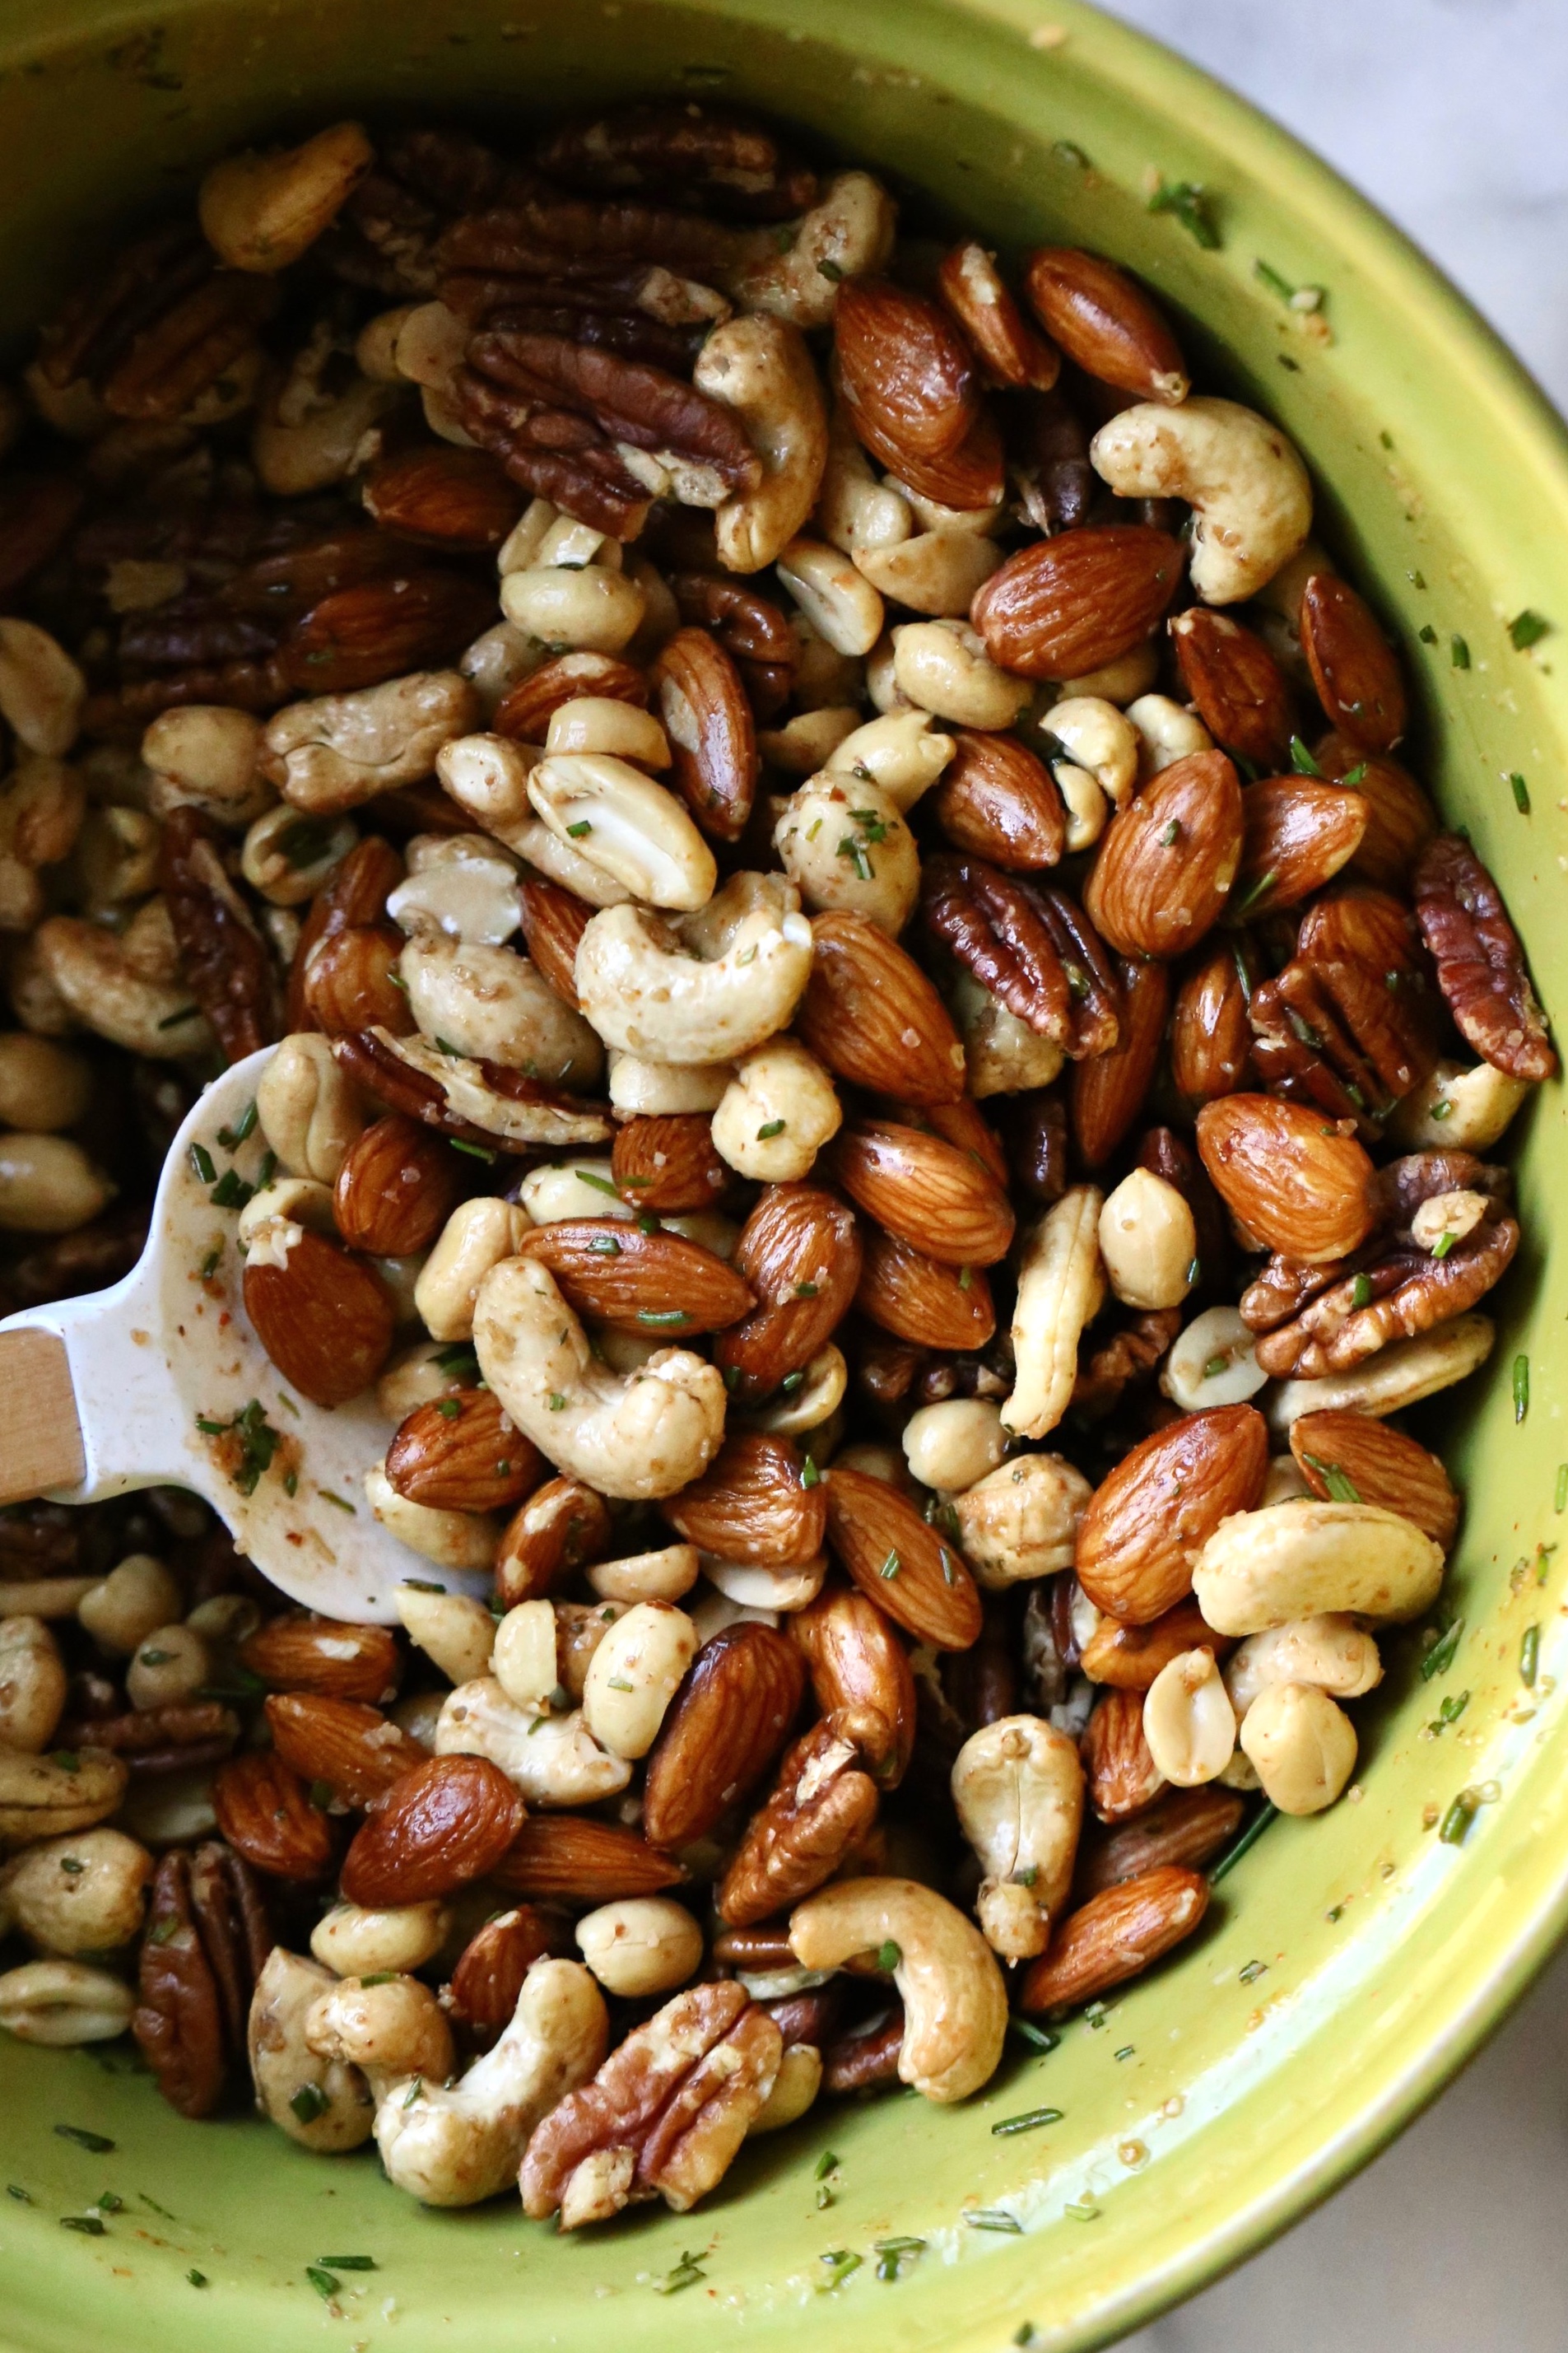
It’s important that I note that you need to buy raw and unsalted nuts! We need to toast them ourselves so that the seasoning “paste” we make - consisting of melted butter, brown sugar, chopped fresh rosemary, cayenne pepper, and salt - will adhere to the warm nuts. I made two tiny changes to the seasoning paste which is that I use a bit more butter than what is called for (about 2 tbsp. instead of 1) and I finely chop the fresh rosemary. Over the years, I’ve found that these two modifications make for not only a tastier batch, but allows for the nuts to receive a generous coating of seasoning deliciousness. So that’s why in the recipe below, I have written 1-2 tbsp. of melted butter. I suggest starting with 1 tbsp. and see if it works for you, and if not, remember to add an extra half tablespoon or so the next time you make them! Because there will definitely be a next time.

Make these for your Super Bowl party please! Or any party or get together for that matter. I promise that these nuts will get more compliments than your main dish that took hours to prepare.

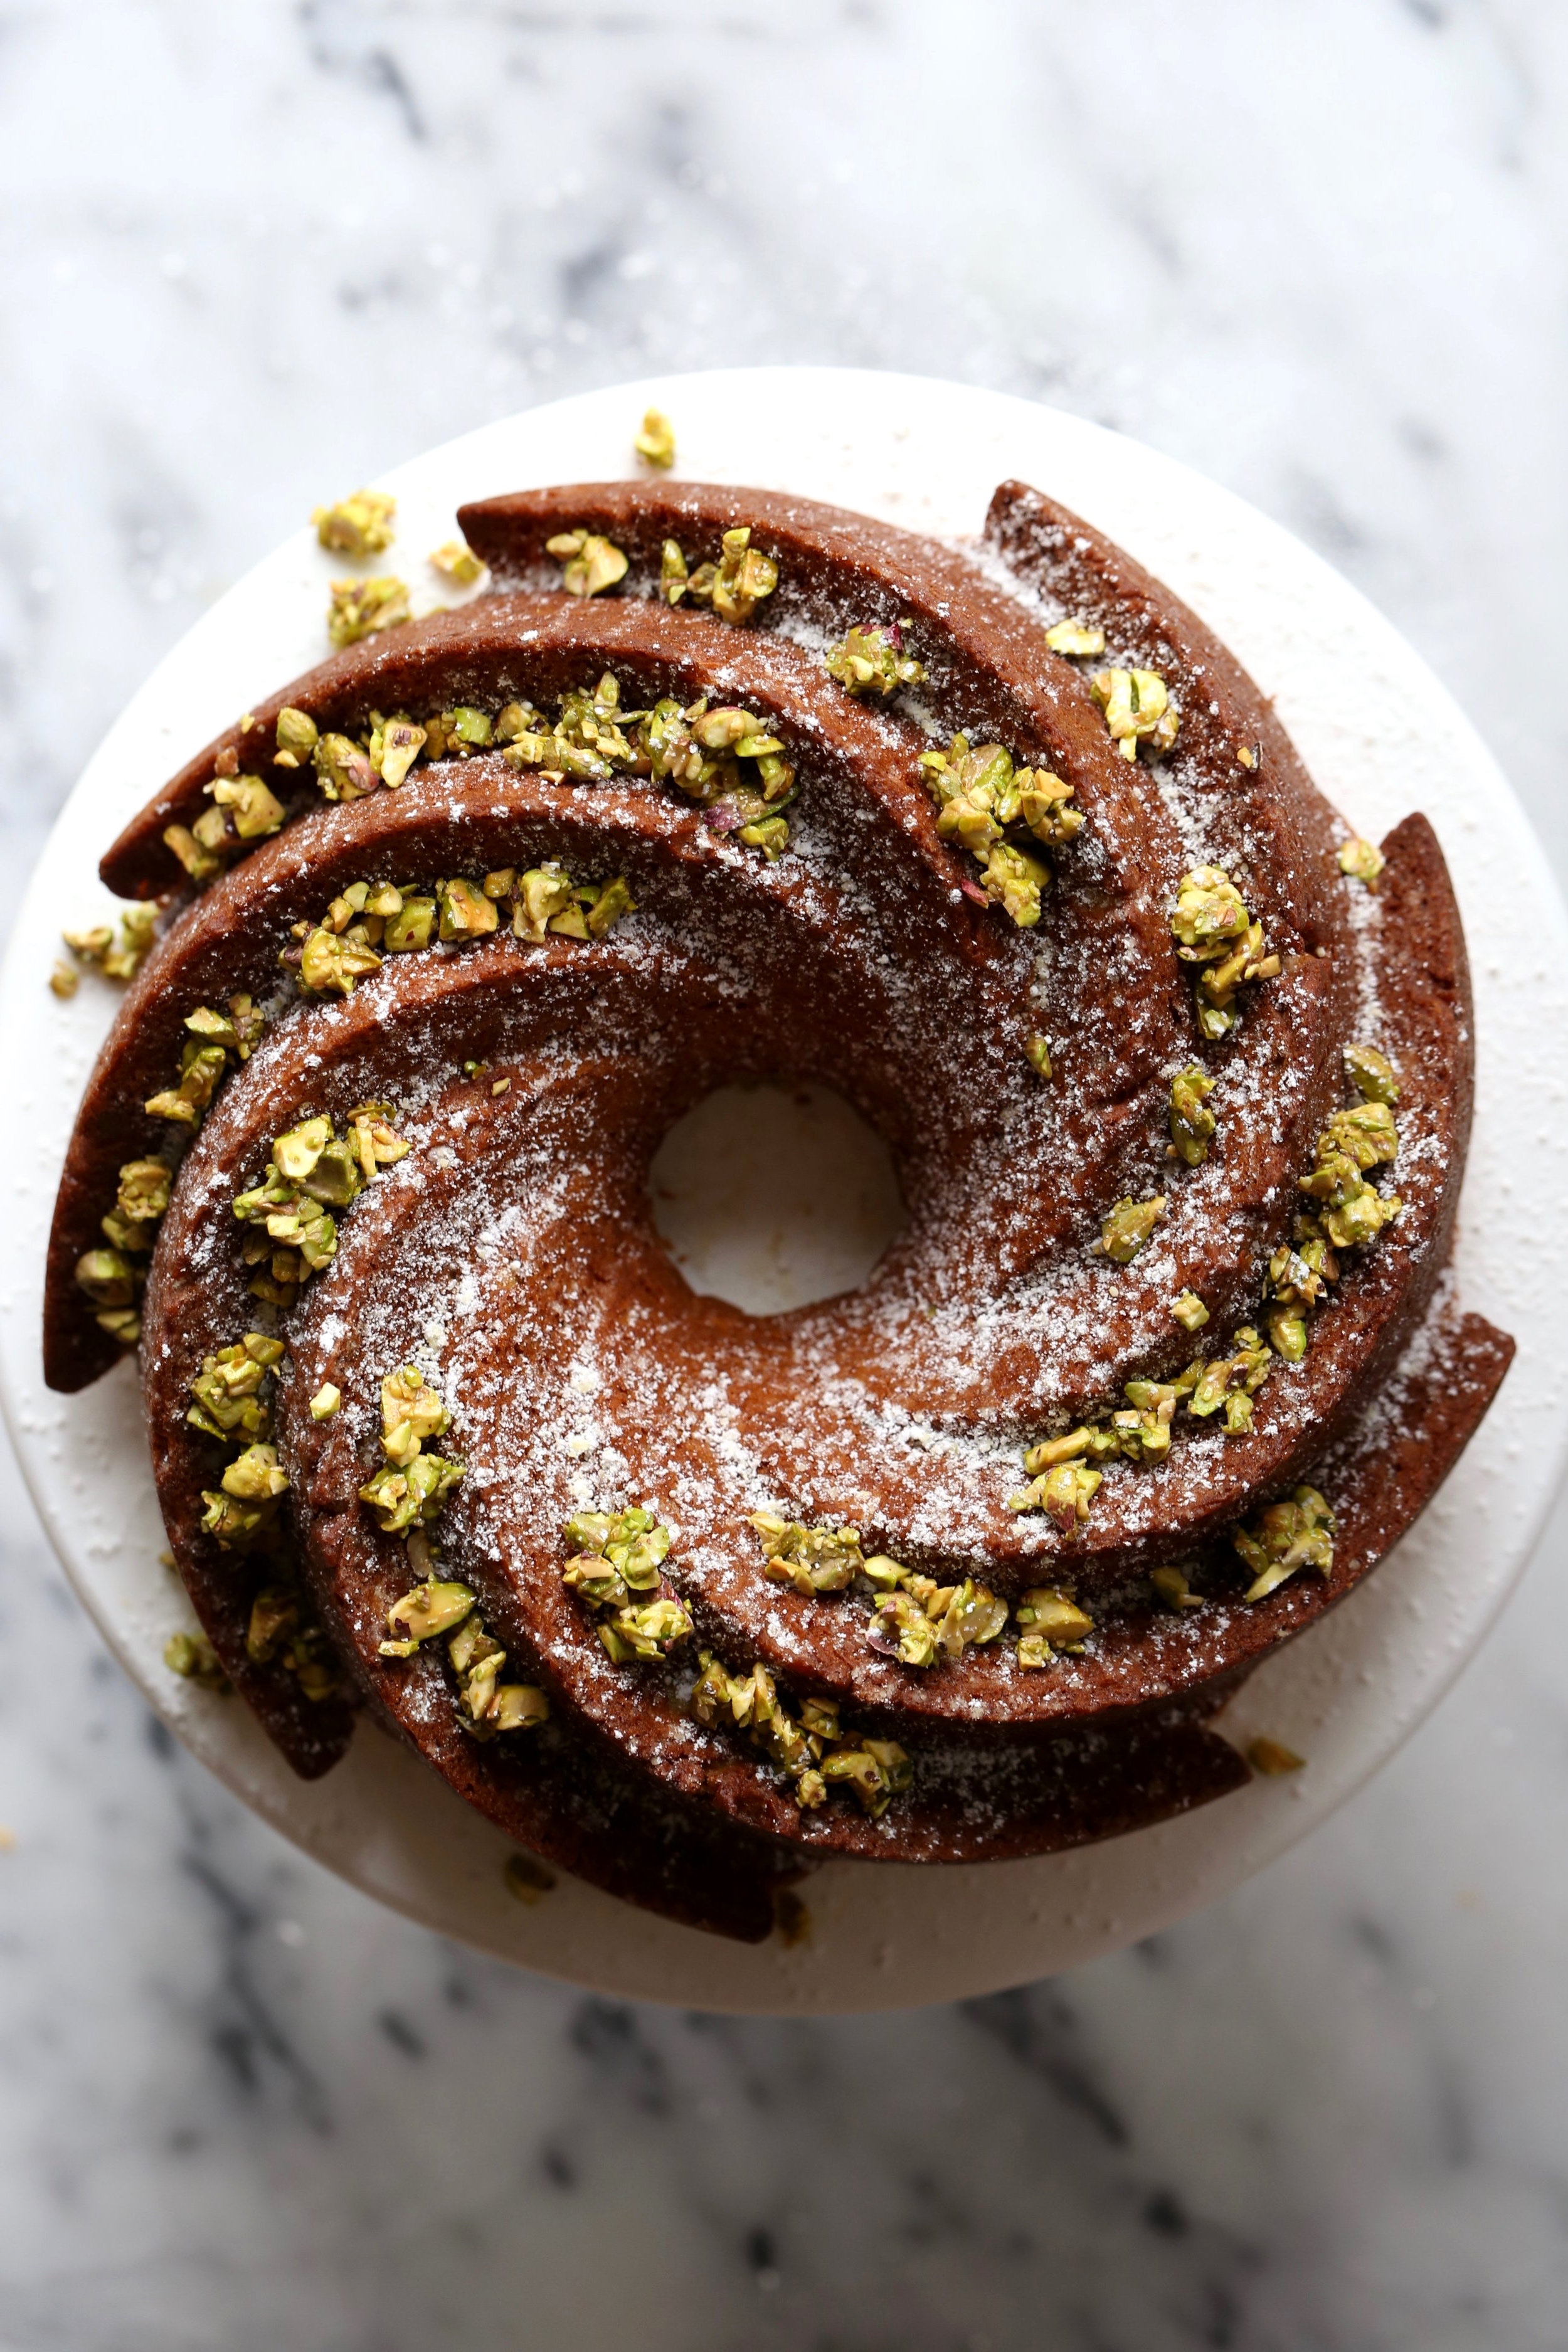
P.S. Have leftover fresh rosemary and not sure what to do with it? Make my lemon and rosemary madeleines!

IMG_4869.jpg

Union Square Cafe’s Bar Nuts

Makes about 5 cups

Recipe from Union Square Cafe via Genius Recipes

Ingredients

  • 1 3/4 lb. (800g, 28oz.) raw and unsalted assorted nuts (peanuts, cashews, Brazil nuts, pecans, walnuts, almonds, hazelnuts)

  • 1-2 tbsp. unsalted butter, melted (see note above)

  • 2 tbsp. finely chopped fresh rosemary

  • 2 tsp. dark brown sugar, packed

  • 1/2 tsp. cayenne pepper

  • 2 tsp. kosher salt

Directions

  1. Preheat the oven to 350°F. Evenly spread the nuts on a large baking sheet (if all nuts do not fit on one sheet, divide between two and toast at the same time). Toast the nuts for 10 minutes, or until lightly golden brown and fragrant.

  2. Meanwhile, prepare the seasoning. In a large bowl (large enough to fit the nuts), combine the melted butter, fresh rosemary, brown sugar, cayenne pepper and salt. When the nuts are finished, immediately transfer to the bowl with the seasoning and thoroughly mix to coat. Add more salt or cayenne if needed. Enjoy warm, but I think they’re best at room temperature when the coating has settled.

MAPLE BACON DOUGHNUTS

IMG_4404.jpg

What New Year’s resolution?

It’s mid-January, aka a rather depressing time of year where people are trying to be better by swearing off anything from alcohol to meat, signing up for gym memberships, and attempting to be a more well-rounded person. I personally do not set New Year’s resolutions and rather fall into the mindset of trying to stick to realistic goals for myself 365 days of the year.

For example, I do some form of a workout every day and I make sure to change it up so my body won’t get used to it nor will I get bored. I sometimes take an intense strength training class with weights, sometimes I take a more mellow yet challenging PiYo class (pilates and yoga combined), or I’ll take an hour walk in my neighborhood while listening to my favorite podcast. Just as long as I move for at least an hour each day, I’m happy and feel good about myself.

IMG_4265.jpg

As for what I eat, I really try not to deprive myself and yet focus on little tricks that will allow me to eat things that I love. Three things that I try to stick to every day are: 1) not eating past 8pm, 2) drinking a gallon of water throughout the day and 3) eating at least two servings of fruit and/or veggies. Following these three things are extremely doable for anybody and better yet, allows you to live a normal and social life. You’re not taking anything away from your diet, but rather adding to it which makes it a much more positive experience where you’re not punishing yourself. Furthermore, I save drinking alcohol for the weekends, which I know makes a huge difference when trying to live a healthier lifestyle.

It’s because of these tricks that I’m able to allow myself to eat cookies, or order a side of french fries, or not worry about going out to restaurants because the food doesn’t work with my diet. I am in no way a lifestyle coach or health expert, but I really think that extreme dieting, intermittent fasting, or beating yourself up over a piece of chocolate isn’t going to work in the long run, and it usually doesn’t! Making small changes really does make an impact and you’ll have a better chance of not giving up once February hits.

IMG_4322.jpg

So. My point in all of this is that life is short and we deserve a doughnut from time to time, ok? And not just any doughnut but an insanely delicious maple bacon doughnut made from a yeasted dough and fried to golden perfection. We do not have to eat this every day, nor should we, but like all sweets, they should be enjoyed in moderation. I’m in the school of thought where if you’re going to have a sweet for dessert like ice cream, I’d rather reach for the full-fat stuff from Häagen Dazs or Breyers, have a scoop or two, versus eating an entire pint of the fake/healthy ice cream that’s been trending recently.

I’d been wanting to make yeast doughnuts for the longest time since they’re my favorite type but was a bit hesitant because I figured that it would be too difficult and that I would mess up somewhere along the way. But I gotta say that making them was not only fairly easy, but actually a lot of fun and so worth it in the end! The doughnut recipe I’m giving you today is simply a standard yeast dough that yields a perfectly plain and barely sweetened doughnut that can be finished and glazed whichever way your heart desires. In the world of doughnuts, you’re either Team Cake Doughnut or Team Yeast Doughnut, and I definitely fall into the latter category. I like my doughnuts light and chewy, and these yeast doughnuts are exactly that.

IMG_4358.jpg

When it came to deciding what kind of doughnut flavor I wanted to make, I thought I’d be selfless this time around and make Alex’s #1 favorite, maple bacon. To put it simply, bacon is Alex’s love language (that’s right, there’s a sixth category that you can test into!), and so whenever we visit an “artisanal” doughnut shop like Sidecar, Blue Star or Holy Donut (in Maine!), Alex orders a maple bacon 100% of the time.

A tip that I have to make the bacon suuuuuuper crispy is to chop it up with a sharp knife before cooking it on the stovetop. I had never thought to do this before and was really happy with the results, and plan on doing this in the future when I make homemade wedge salads or potato skins. Crispy bacon is vital to these doughnuts and should not be skipped! As for the maple glaze, you will be using not only pure maple syrup (the good stuff, ok?!), but also a splash of imitation maple/maple extract, which can be found at your local grocery store. I normally wouldn’t use something like this, but it really does help give a lot of maple flavor and it makes the doughnuts smell so unbelievably good. A bottle of it will set you back about 3 bucks, so I say buy it the next time you’re out shopping.

Let me know if you plan on making the doughnuts anytime soon!

IMG_4493.jpg

Maple Bacon Doughnuts

Makes 6-8 doughnuts

Doughnut recipe from Williams Sonoma Test Kitchen via Amanda Frederickson

Ingredients

IMG_4348.jpg

For the doughnuts:

  • 1 cup warm (~ 110°F) milk, whole or 2%

  • 1 packet active dry yeast (2 1/4 tsp.)

  • 1/4 cup granulated sugar, divided

  • 3 cups all-purpose flour

  • 3 tbsp. vegetable oil

  • 1 large egg

  • 1 tsp. salt

  • Canola oil, for frying

For the maple glaze:

  • 2 cups confectioners’ sugar

  • 2-3 tbsp. milk, depending on desired consistency

  • 2 tbsp. pure maple syrup

  • 1/4 tsp. maple extract / imitation flavor

  • 6 bacon pieces, cooked and finely chopped

Directions

Make the doughnuts:

  1. In a small bowl, combine the warm milk, yeast and 1 tbsp. of the granulated sugar. Stir together, and let sit until proofed, about 5 minutes. The mixture will be foamy with bubbles.

  2. Transfer the proofed yeast to the bowl of a stand mixer fitted with a hook attachment. Add the flour, remaining sugar, vegetable oil. egg and salt, and mix on low speed for 4-6 minutes, or until the dough is shiny and has pulled away from the bowl. It will be fairly sticky.

  3. Remove the dough from the bowl and knead it by hand a couple of times on a lightly floured surface. Transfer the dough to a large bowl that has been coated with cooking spray, and tightly cover with plastic wrap. Allow the dough to rise at room temperature for at least one hour or until the dough has doubled in size.

  4. Once doubled, give the dough a small punch to remove some of the gas bubbles, then transfer it to a lightly floured surface. Roll the dough to 1/2” thick and, using a doughnut cutter (alternatively, you can use a 3 1/2” cutter with a 1” cutter for the holes), cut out as many doughnuts as you can. You will probably have to roll out the dough once more in order to use up all the dough.

  5. Move the doughnuts and doughnut holes to a lightly floured parchment lined sheet pan and allow to proof once again for about 1 hour, or until the doughnuts have doubled in size.

  6. Using a large pot or Dutch oven, heat about 3” worth of canola oil on medium heat until the oil reaches 325°F. Working in batches, fry 2 to 3 doughnuts at a time for about 4 minutes, flipping halfway through. The doughnuts will be a deep golden brown color. The doughnut holes will fry up in about 1-2 minutes. Transfer each finished doughnut and doughnut hole to a cooling rack (place paper towels underneath to catch any excess oil) and allow them to cool for about 10 minutes before glazing them.

Make the glaze:

  1. In a small bowl, whisk together the confectioners’ sugar, milk (start with 2 tbsp. and work from there to reach your desired consistency), maple syrup, and imitation maple. Dip each doughnut and doughnut hole into the glaze and immediately sprinkle with bacon bits. Enjoy! Doughnuts are best eaten ASAP, but can last a few days at room temperature. Just give them a quick reheat in the microwave to make them chewy again.

CITRUS RICOTTA BUNDT CAKE W/ PISTACHIOS

IMG_4156.jpg

And we’re back! After taking some time off from The Vivid Kitchen, I am more than excited to be here with my (tiny) community and start 2019 with fresh content. I kind of abruptly stopped posting new recipes about halfway through December because I had to focus on baking for real life events (I baked 4 different kinds of cookies to pass out as Christmas gifts - including these and these) and then after Christmas, Alex and I went out of town to Scottsdale, Arizona for 5 days to celebrate NYE. When we returned home on the 1st, I got sick for the first time in years and now that I’m finally feeling better, here we are!

P.S. I might do a photo diary/city guide of some sort for Scottsdale soon, even though all we do when we visit is hike and cook at the house we stay at.

IMG_4016.jpg

For Christmas, I was very lucky to be gifted a handful of kitchen/baking-related items that I’ve been obsessing over since opening them. Some things I received were: a Shun chef’s knife (Shun is my favorite knife brand), a Hamilton Beach waffle maker that I’ve already used a couple of times and yes, there will be waffle recipes in the future, a marble phone holder for my kitchen when I’m baking and my hands are full, and a few other things. I also got a new macro lens for my Canon camera (thank you, dad!) that is incredible and is the lens that I used to shoot this recipe.

Another gift I received was a new bundt pan from Nordic Ware, and I didn’t know it was possible to be in love with a baking pan, but I guess it is! The mold is so beautiful and makes every cake look like a piece of art, but it is also just as functional as it is pretty - I had no problems with the cake sticking to the pan. This is my first pan from Nordic Ware and it’s safe to say that I will continue to buy from them in the future.

IMG_4734.jpeg

Since we’re getting into citrus season, my favorite time of year, I wanted to make a bundt cake highlighting the season’s bright flavors. After about a month straight of eating cookies and chocolate, I didn’t want to make a very heavy or overly sweet cake, and this citrus ricotta cake is anything but those things. Olive oil and ricotta make the dish light yet super moist; the cake is sweetened with a blend of granulated sugar and honey; and the lemon/orange zests and juices brighten the cake and give it such a fresh flavor. This is actually one of the few cakes that you could eat for breakfast and not feel any guilt about it. Side note: I used my favorite orange variety, Cara Cara, for this recipe, which I highly recommend, but any orange variety will be perfect as well. You could even try using grapefruit, which I’ll probably do next time I make this cake.

If you remember, I did a post last year about making your own ricotta cheese for ricotta ice cream (still one of the best ice creams I’ve ever made) and today's recipe is pretty much the cake version of that. The flavors of citrus and pistachios work so well with the creamy ricotta cheese, so I knew that they both needed to be front and center in this cake. And of course, if you want to make your own ricotta cheese for this recipe, please do so, since it’s SO easy! But, if you don’t have the time or cheesecloth, then by all means, store-bought is A-OK with me. I recommend reaching for the whole-milk variety though.

IMG_4199.jpg

As for how to finish the cake, the choice is yours to make! (I did not plan that rhyme, I promise). There are a number of options: 1)a standard dusting of confectioners’ sugar, 2) a simple citrus glaze (2 cups of confectioners’ sugar whisked with 3-4 tbsp. of fresh lemon or orange juice), and/or 3) a mix of chopped pistachios with honey sprinkled all over the top. As you can see from the pictures, I chose a dusting of confectioners’ sugar as well as the pistachio/honey mixture and I thought it was perfect.

IMG_4735.jpeg

Citrus Ricotta Bundt Cake w/ Pistachios

Yields (1) standard bundt cake

Recipe adapted from Fraiche Nutrition

Ingredients

IMG_4736.jpeg
  • 2 cups all-purpose flour

  • 1/2 cup granulated sugar

  • 1 tsp. baking powder

  • 1 tsp. baking soda

  • 1/4 tsp. salt

  • 1 cup whole milk ricotta cheese, homemade or store-bought

  • 1/2 cup olive oil

  • 2 large eggs

  • 1 tsp. vanilla extract

  • 1/4 cup honey

  • 3 tbsp. lemon zest

  • 2 tbsp. orange zest (I love Cara Cara oranges)

  • 1/4 cup fresh lemon juice

  • 2 tbsp. fresh orange juice

  • 2/3 cup shelled and toasted pistachios, finely chopped (mixed w/ 1 tbsp. of flour)

  • Confectioners’ sugar, chopped pistachios mixed with honey, lemon glaze, to finish

Directions

  1. Preheat the oven to 350°F and spray the bundt pan with cooking oil spray (or you can butter and flour the pan).

  2. In a large bowl, whisk together the flour, sugar, baking powder, baking soda, and salt. Set aside.

  3. In a separate smaller bowl, combine the ricotta cheese, olive oil, eggs, vanilla extract, honey, zests, and juices. Whisk until the mixture is smooth and without lumps.

  4. Add the wet ingredients to the dry ingredients and gently fold together using a spatula. Before the batter is fully combined, mix in the pistachio/flour and finish mixing the batter.

  5. Pour the batter into the prepared bundt pan and smooth the top with a spatula. Place in the oven for 40-45 minutes, or until a toothpick inserted in the center of the cake comes out clean.

  6. Allow the cake to cool for about 5 minutes before inverting onto a plate or cooling rack. Finish the cake whichever way you’d like! The cake will last in an airtight container for about a week.