BROWN SUGAR + (EDIBLE) CHOCOLATE CHIP COOKIE DOUGH ICE CREAM

public.jpeg

After my sister’s baby shower in July - which if you forgot, I made enough ice cream to feed a small army - I decided to take a break from making my favorite frozen dessert. And even though it was much needed, and I was happily baking cookies, tarts and cheesecakes these past few months, I knew it wouldn’t be long before the ice cream maker was calling my name.

What also prompted me to pull my ice cream maker out of the pantry was in part from binge-watching Viceland’s TV show “The Ice Cream Show”. Although the show debuted in 2018, it just came onto my radar last week when Viceland aired a marathon of the series (there’s only 10 episodes total). The show is hosted by Isaac Lappert, a third generation ice cream maker who has been working for his family’s ice cream company, Lappert’s, since he was 6 years old. Throughout the series, Isaac travels around the country visiting and eating at America’s most beloved ice cream destinations; a very basic formula for food television, but one that resonated with me because I dream of opening up my own cream shop one day. To see various companies that started from all different backgrounds and hear their stories of blooming into huge successful companies or remain “mom and pop” shops that have a cult following, was seriously inspiring.

public.jpeg

In one of the episodes, Isaac visits the Mecca of the ice cream world: the Ben & Jerry’s factory in Vermont. When I was watching this episode (and if I’m being honest, every other episode as well) I was dying to get into the kitchen to make a quart of ice cream. When I was little, if you were to ask me what my favorite foods were, I 100% would have answered with “chicken fingers and fries and chocolate chip cookie dough ice cream”. And although I was obsessed with Thrifty’s version of the popular ice cream flavor, Ben & Jerry’s was the kind I always wanted but only got on special occasions because it was the “fancier” ice cream. Regardless, I am a chocolate chip cookie dough (CCCD from here on out!) ice cream fanatic and once I was able to make my version of it at home, adult version of me was not only elated but worried about not fitting into my clothes anymore. Because I will say this, the recipe I’m giving you below for my version of a CCCD ice cream is just as, if not better, than Ben & Jerry’s. And I think that’s a big deal!

I’ve made this ice cream for myself a handful of times over the years and I usually combined the cookie dough with a basic vanilla ice cream recipe. But for my blog, I wanted to give you another option but keep it simple enough so that the ice cream base wouldn’t overpower the cookie dough: enter brown sugar ice cream. I basically took my vanilla ice cream recipe and swapped in brown sugar where the granulated sugar went, took out one egg yolk and called it a day! I was worried that you wouldn’t be able to tell a difference between this and my basic vanilla recipe, but there’s definitely a distinction albeit a subtle one. Since brown sugar has molasses in it, the ice cream will have a slight caramel/toffee taste to it and the overall appearance (especially pre-churned) will be a darker/more tan color than plan vanilla. As for what kind of brown sugar to use… light, golden, dark… you’re good to use any of the three. I’ve made it with light brown sugar and then once with dark brown and I saw no difference in the color of the ice cream base nor did I taste anything different. So whatever you have in you’re pantry, use it up.

public.jpeg

Let’s get to the most important aspect of today’s ice cream: the cookie dough. I’d like to think of myself as a “normal” fan when it comes to cookie dough and how I eat it. For example, whenever I make a batch of cookies, I of course steal bits of dough here and there and love to lick clean the spatula and mixing bowl (yet, I’m nice and usually give it to Alex because we’re in a healthy, sharing relationship). But, I am pretty grossed out with the new fad of shops that solely sell scoops of cookie dough, instead of scoops of ice cream. I don’t know why but I feel like a bowl of cookie dough is too much and it should be a little treat that you either sneak when baking cookies or search for pockets of when eating a pint of ice cream. My point is… cookie dough is sacred and there’s a right time and place for it. Don’t exploit it!

Growing up, I know we all were warned by our parents that it was unsafe to consume raw cookie dough, and obviously, the moment my mom left the kitchen, I would take a HUGE spoonful out of the Pillsbury cookie dough tube (you know the one). I still stand by the fact that a little bit can’t hurt you, but if you’re going to make your own CCCD ice cream with the only intention of eating raw cookie dough, then definitely you need to take the proper steps to avoid getting sick. It was always thought that consuming raw eggs were the problematic part of cookie dough, but as we’ve come to find out, it’s also the flour as well! Raw flour is loaded with bacteria, so the cookie dough recipe below will not only be missing eggs but will have instructions for you to heat the flour to 160° F. This can be done in the microwave and only takes about 1 minute, but it’s an important step! Don’t skip it.

public.jpeg

So since we’re taking eggs out of the cookie dough, we’re going to have to add something that helps bind the dough together as well as provides fat for flavor. The best way to achieve that is by using heavy cream, but in a pinch, you can also use whole milk especially since you’ll have leftover if you’re making the ice cream base. As for the rest of the dough and the process of making it, it’s totally simple. You don’t need the rising agents (baking powder and baking soda) because you won’t be baking off the dough and overall, you can be pretty lackadaisical when making the dough. You don’t have to worry too much about having perfectly room temperature butter or whether or not you over mixed the dough… these are all things that need to be taken into account when baking off the cookies, not for consuming raw cookie dough. The only thing you have to worry about is if the dough tastes amazing. It will, I promise.

public.jpeg

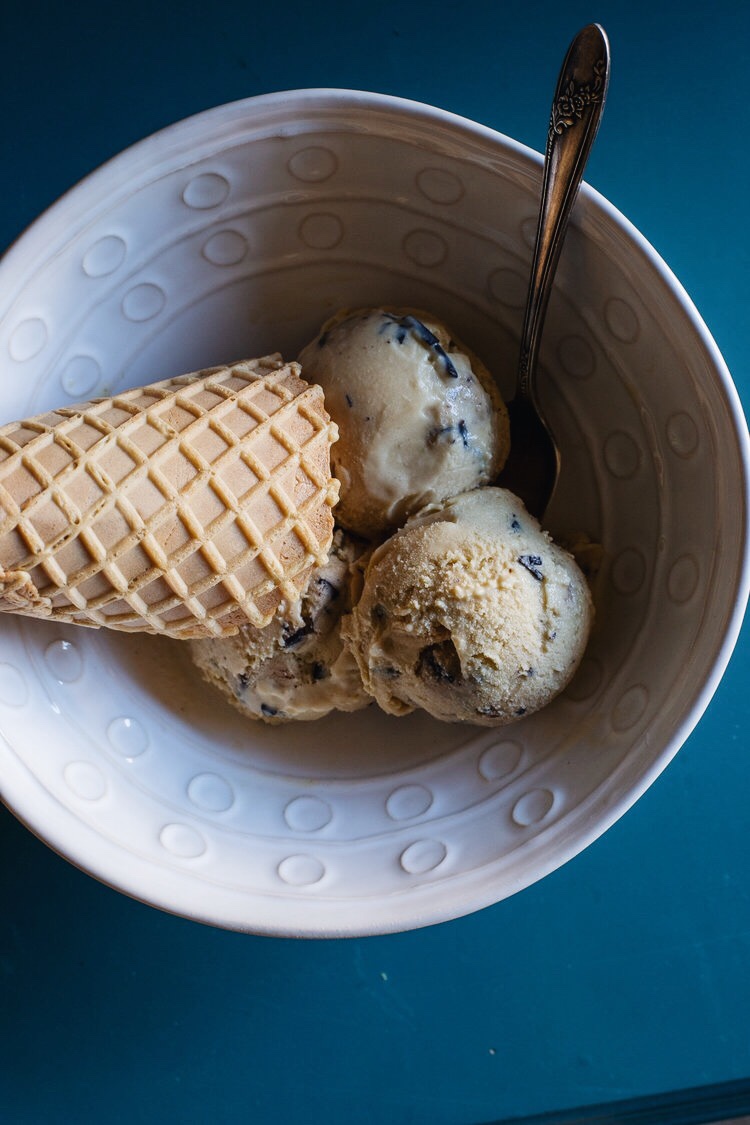
Brown Sugar and Chocolate Chip Cookie Dough Ice Cream

Yields about 1 quart

Ingredients

For the ice cream:

  • 1 cup whole milk

  • 2 cups heavy cream, divided

  • 1 cup brown sugar, lightly packed (light or dark works)

  • Pinch of salt

  • 5 large egg yolks

  • 2 tsp. vanilla extract

  • Chocolate chip cookie dough, to finish (recipe below)

For the edible cookie dough (recipe adapted from Brown Eyed Baker)

  • 3/4 cup all-purpose flour

  • 1/2 cup (1 stick) unsalted butter, room temperature

  • 1/4 cup granulated sugar

  • 1/2 cup light brown sugar, lightly packed

  • 2 tbsp. heavy cream (or whole milk)

  • 1/2 tsp. vanilla extract

  • 1/4 tsp. kosher salt

  • 1/2 cup mini chocolate chips or chopped chocolate

Directions

  1. In a large bowl, add 1 cup of the heavy cream and set a strainer over the top (use a bowl that will be able to fit over an ice bath for later).

  2. Warm the milk, 1 cup of heavy cream, brown sugar, and salt in a saucepan over medium-low heat. In a medium bowl, whisk the egg yolks together. Just as the milk mixture is beginning to simmer, gradually add some of it to the bowl of egg yolks, whisking constantly as to not scramble the eggs (this is called tempering). Once the egg yolk mixture temperature has raised, pour the mixture back into the saucepan. Stir constantly over medium-low heat until the mixture thickens and coats the back of your spatula or spoon.

  3. Pour the custard mixture over the strainer-lined bowl. Stir the custard in with the heavy cream that is already in the bowl and add in the vanilla extract. Let the ice cream base sit over an ice bath for about an hour before moving to the refrigerator. Chill for at least 4 hours, or overnight.

  4. Make the cookie dough: Place the flour in a small bowl and microwave on high for 1 minute and 15 seconds, stirring well every 15 seconds. You want to get the flour’s temperature up to 160°, but if you don’t have a thermometer, 1:15 should be more than enough time to kill any bacteria. Set the flour aside. In the bowl of stand mixer fitted with the paddle attachment (or in a large bowl if using a hand mixer) cream the butter and sugars together until light and fluffy, 2-3 minutes. Add in the heavy cream and vanilla extract and mix until incorporated. Add the flour and salt and mix on low for 10 seconds, then mix on medium until no flour bits remain. Stir in the chocolate chips. Cover the bowl with plastic wrap and refrigerate for about an hour (this will help in scooping out the cookie dough bites).

  5. Right before churning the ice cream, scoop out the cookie dough bites. You can use a teaspoon to help make more uniform bites, but honestly, I just used my hands and eyeballed it. The dough bites don’t have to be perfectly matched! Quickly roll each cookie dough bite into a ball and stick them onto a plate and place them in the freezer.

  6. Churn the ice cream in your maker according to the manufacturer's instructions. Transfer the finished ice cream to an airtight container and stir in the cookie dough bites. Freeze until solid. Enjoy!

APPLE RICOTTA TARTS W/ HOMEMADE CARAMEL

This Sunday is my boyfriend Alex’s 33rd birthday and I cannot wait to shower him with all the love that he deserves. We’ll be celebrating with family on Saturday with a boat ride in Newport Beach, as well as a trip to Big Bear next weekend with a group of friends, so on his actual day, he and I are going to take it easy. I plan on starting his day off with bagels and cold brew, then hitting up the beach or going on a hike, and finally ending with dinner at one of his favorite restaurants, Nick’s in Laguna Beach. He also requested that I make my cheesecake for dessert (it’s his favorite recipe on this blog) and of course I am happy to oblige.

IMG_5336-2.jpg

Like every year, Alex’s birthday also represents the beginning of autumn, which usually falls on his actual birthday, the 22nd, or the next day. Because of this, I believe it allows for the floodgates to open for apple recipes even though I’m fairly certain I could, and would, eat apple pie every day. So far on this blog, I’ve shared with you recipes for an apple brown butter buckle, apple muffins, apple cider doughnuts, and finally. a simple apple tart/galette. Today’s apple recipe may also be considered a ‘tart’ but differs in the fact that the base is not a pie dough, but actually puff pastry.

Puff pastry, also known as pâte feuilletée, is essentially a laminated dough, meaning the butter is incorporated into the dough by a series of folding and rolling, thus leading to multiple layers. When baked, the layers separate and puff up, leaving you with a very light and flaky texture. Making homemade puff pastry is a serious undertaking and something that I’m more than happy (at this point in time) to skip out on. What I’m trying to say is that today I am not giving you a recipe for puff pastry to go along with the tart - I am giving you instructions to go buy store bought puff pastry! I created this recipe for those who are 1) in a time crunch 2) don’t have the skills to make homemade puff pastry and/or 3) lazy! I don’t think anyone should feel bad for buying store bought components of a dish and I really believe that it’s the thought that counts.

IMG_5494.jpg

Store bought puff pastry. which you can get at any grocery store including Trader Joe’s, makes you look like you’re an amazing baker, yet the secret is that you didn’t do more than thawing it, topping it with some ingredients, and baking it in the oven. And if you want, you can totally lie and tell your guests or whomever you’re serving this to that YES, the puff pastry IS made from scratch! Just make sure that you’ve gotten rid of any evidence of the Pepperidge Farm puff pastry packaging - burn it if you have to.

IMG_5534.jpg

If you’re unfamiliar with buying puff pastry, you should know that it’ll be found in the freezer section of your grocery store and comes with 2 sheets of puff pastry (therefore you can easily double the recipe!), which will need to be thawed out for about 40 minutes before working with it. For my recipe, I ask of you to only use 1 sheet of pastry which you’ll cut into 6 equal rectangles. You could totally make it into one giant tart, but I really enjoy the look of baking them off as individuals and it also makes it much easier for serving purposes. Each puff pastry tart will get a spread of a ricotta cheese mixture that has cinnamon, nutmeg, and vanilla bean paste in it. If ricotta isn’t your thing, mascarpone or cream cheese could work as well; and if your grocery store doesn’t carry vanilla bean paste, vanilla extract is fine. I went with vanilla bean paste because Trader Joe’s just started carrying it and I thought this recipe would be perfect for it since it showcases the vanilla bean specks so well.

And once again, if you’re feeling guilty for using store bought puff pastry, all will be forgotten when you make your own caramel to top it off with. Homemade caramel is SO simple and requires only 4 ingredients and 10 minutes of your time, so you can make it while the apple tarts bake in the oven. Apples and caramel are a perfect pairing, and since the apple tarts themselves are barely sweetened, you can load up on as much caramel as you want.

Apple Ricotta Puff Pastry Tarts

Yields 6 individual tarts

Ingredients

  • 1 puff pastry sheet, thawed and cut into 6 rectangles (I prefer Pepperidge Farm

  • 1/2 cup ricotta cheese, homemade or store-bought

  • 1 tsp. vanilla bean paste (or vanilla extract)

  • 1/8 tsp. ground cinnamon

  • 1/8 tsp. ground or fresh nutmeg

  • 1 apple, cored and sliced thin (I used Granny Smith and Pink Lady, but Honeycrisp and Braeburn work as well)

  • Brown sugar (light or dark)

  • Caramel sauce, to finish (recipe provided below)

Directions

  1. Preheat the oven to 400°F and place the 6 puff pastry rectangles onto a parchment-lined baking sheet. Using a fork, poke holes in about 4-5 different places on each rectangle.

  2. In a small bowl, mix the ricotta cheese, vanilla bean paste (or extract), cinnamon and nutmeg together. Add about 1 heaping tablespoon of this spread onto the center of each pastry. Try not to spread it out too much.

  3. Place 2-4 slices of apple onto each pastry, right on top of the ricotta cheese mixture. Finish with a heavy sprinkling of brown sugar on top of the fruit.

  4. Bake in the oven for 18-20 minutes, or until the pastry has puffed up and is a golden brown color.

  5. Transfer to a baking sheet to cool for about 5 minutes before finishing them with a drizzle of caramel sauce.

Simple Homemade Caramel Sauce

Yields 1 cup

Recipe adapted from Sally’s Baking Addiction

Ingredients

  • 1 cup granulated sugar

  • 6 tbsp. unsalted butter, room temperature, cut into 6 pieces

  • 1/2 cup chilled heavy cream

  • 1/2 tsp. kosher salt

Directions

  1. Place the sugar in a medium saucepan and heat over medium heat. Using a wooden spoon, constantly stir the sugar until it completely melts and turns into a deep amber color. Before it melts, it will be very clumpy… this is good, just keep mixing!

  2. Add the butter and mix it in with the melted sugar using a whisk. The mixture will begin to bubble vigorously.

  3. Once the butter has melted, slowly pour in the heavy cream. Careful with this step because the cold heavy cream may cause the mixture to splatter. Allow the caramel to boil for about one minute, then take it off the heat and stir in the salt.

  4. Carefully (it will be VERY hot) pour the caramel into your desired container (mason jar, tupperware, etc.) and store it in the fridge for up to 1 month - if it can last that long.

PUMPKIN + BROWN BUTTER BREAKFAST PUFFS

Well, summer is officially over. And I’m saying this because when I walked into Trader Joe’s the other day, I immediately noticed that the large containers that usually held big, beautiful watermelons were sadly replaced with pumpkins of all shapes and sizes. Although I welcome fall and everything it has to offer from cooler weather to Halloween and whatnot, I’m going to miss my precious watermelon! Ask Alex if you don’t believe me, but I ate watermelon every single day this summer. I guess I don’t care about saying goodbye to long beach days or sunsets at 8pm or wearing dresses… I only care about watermelon. See you next year, buddy!

Now that pumpkin and pumpkin spice-flavored everything has quite literally taken over Trader Joe’s (there’s pumpkin bagels, pumpkin cream cheese spread, pumpkin crackers, etc.), I figured I’d follow suit and offer a recipe utilizing the most popular of the gourd family. While I’m not a fan of pumpkin spice lattes, pumpkin-based dishes are something that I’ve come to really love. My pumpkin cheesecake, that I make every Thanksgiving, is something I look forward to baking (and eating) every year, and I am also a huge fan of pumpkin pancakes and pumpkin bread… and pumpkin ice cream. I don’t discriminate; I (mostly) love it all.

So when I was thinking about doing another pumpkin recipe for the blog, I remembered a recipe that I’d made a couple of times before - breakfast puffs, also known as French breakfast puffs. They’re essentially sugared doughnuts in muffin form and, although they’re a bit too sweet for breakfast/brunch purposes, I won’t judge you if you have one (or two) of them with your morning coffee. Typical breakfast puffs do not have canned pumpkin in them, but I was able to figure out what ingredient to remove from the original recipe to replace with the pumpkin: the milk. I actually read online that you can replace the eggs or the oil/butter with pumpkin in certain recipes, but since this recipe only calls for one egg, and the fact that the butter is vital to this recipe (more on that later), getting rid of the milk was my best bet. And it worked out!

Like the title of this post suggests, these pumpkin breakfast puffs also have brown butter in them, an ingredient that I save mostly for fall and winter desserts due to its decadent qualities. Adding brown butter to any recipe gives it a much more nutty and richer flavor, which I think works perfectly with the pumpkin and blend of spices. The last time I shared a recipe featuring brown butter was with my brown butter apple buckle, another perfect example of how well brown butter works with popular fall produce. Speaking of spices, I decided to make it simple and have you use “pumpkin pie” spice for this recipe - something that you can actually buy at the grocery store (I buy mine from Trader Joe’s). The pumpkin pie spice blend that I buy consists of cinnamon, nutmeg, ginger, cloves and cardamom, which are ingredients that most people already have in their pantry. So, if you don’t have pumpkin pie spice, simply make the blend yourself! Here’s a recipe I found, but I would suggest adding a 1/4 teaspoon of cardamom as well.

Pumpkin and Brown Butter Breakfast Puffs

Yields 12 puffs

Recipe adapted from FIVEANDSPICE via Food52

Ingredients

For the puffs:

  • 1/3 cup (76g) unsalted butter

  • 1/4 cup light brown sugar, lightly packed

  • 1/4 cup granulated sugar

  • 1 large egg

  • 1 1/2 cups all-purpose flour

  • 1 1/2 tsp. pumpkin pie spice

  • 1 1/2 tsp. baking powder

  • 1/2 tsp. kosher salt

  • 1/2 cup canned pumpkin, I prefer Libby’s brand

For the sugar coating:

  • 6 tbsp. unsalted butter, melted

  • 1/2 cup granulated sugar

  • 1 tsp. pumpkin pie spice

Directions

  1. Make the brown butter: In a medium saucepan, melt 1/3 cup butter over medium-low heat. Once melted, the butter will begin to foam and turn to a golden color. Stir frequently and soon there will be a nutty smell and the butter will brown. Immediately take off the heat once browned and transfer to the bowl of a stand mixer fitted with the paddle attachment (or a large bowl if using a hand mixer). Allow it to cool for about 10-15 minutes.

  2. Preheat the oven to 350°F. Grease a 12-cavity muffin/cupcake tin with butter or cooking spray and lightly coat with flour.

  3. To the slightly cooled brown butter, add both sugars and the egg and mix on medium speed for about 5 minutes.

  4. In a separate medium-sized bowl, add the flour, pumpkin pie spice, baking powder and salt, and whisk together.

  5. Add the pumpkin puree to the brown butter/sugar mixture and mix until incorporated. With the mixer on low, slowly add in the dry ingredients and mix until just incorporated - don’t over mix!

  6. Using a spoon or a ice cream scoop, evenly distribute the batter between the 12 cavities in the pan - it may seem like not a lot of batter, but they will rise in the oven - and bake for 18-20 minutes or until golden brown and a toothpick inserted comes out clean.

  7. Allow the puffs to cool for a few minutes before using a knife to take them out of the pan and place them on a cooling rack.

  8. Coat the breakfast puffs: put the melted butter in one shallow bowl and combine the sugar and pumpkin pie spice together in a separate shallow bowl. One at a time, gently roll each puff through the melted butter, getting every section, and then roll it through the spice-y sugar. The puffs are best eaten straight from the oven but can be enjoyed for a couple more days when stored in an airtight container.